Vanilla Crescent Cookies (Vanillekipferl)
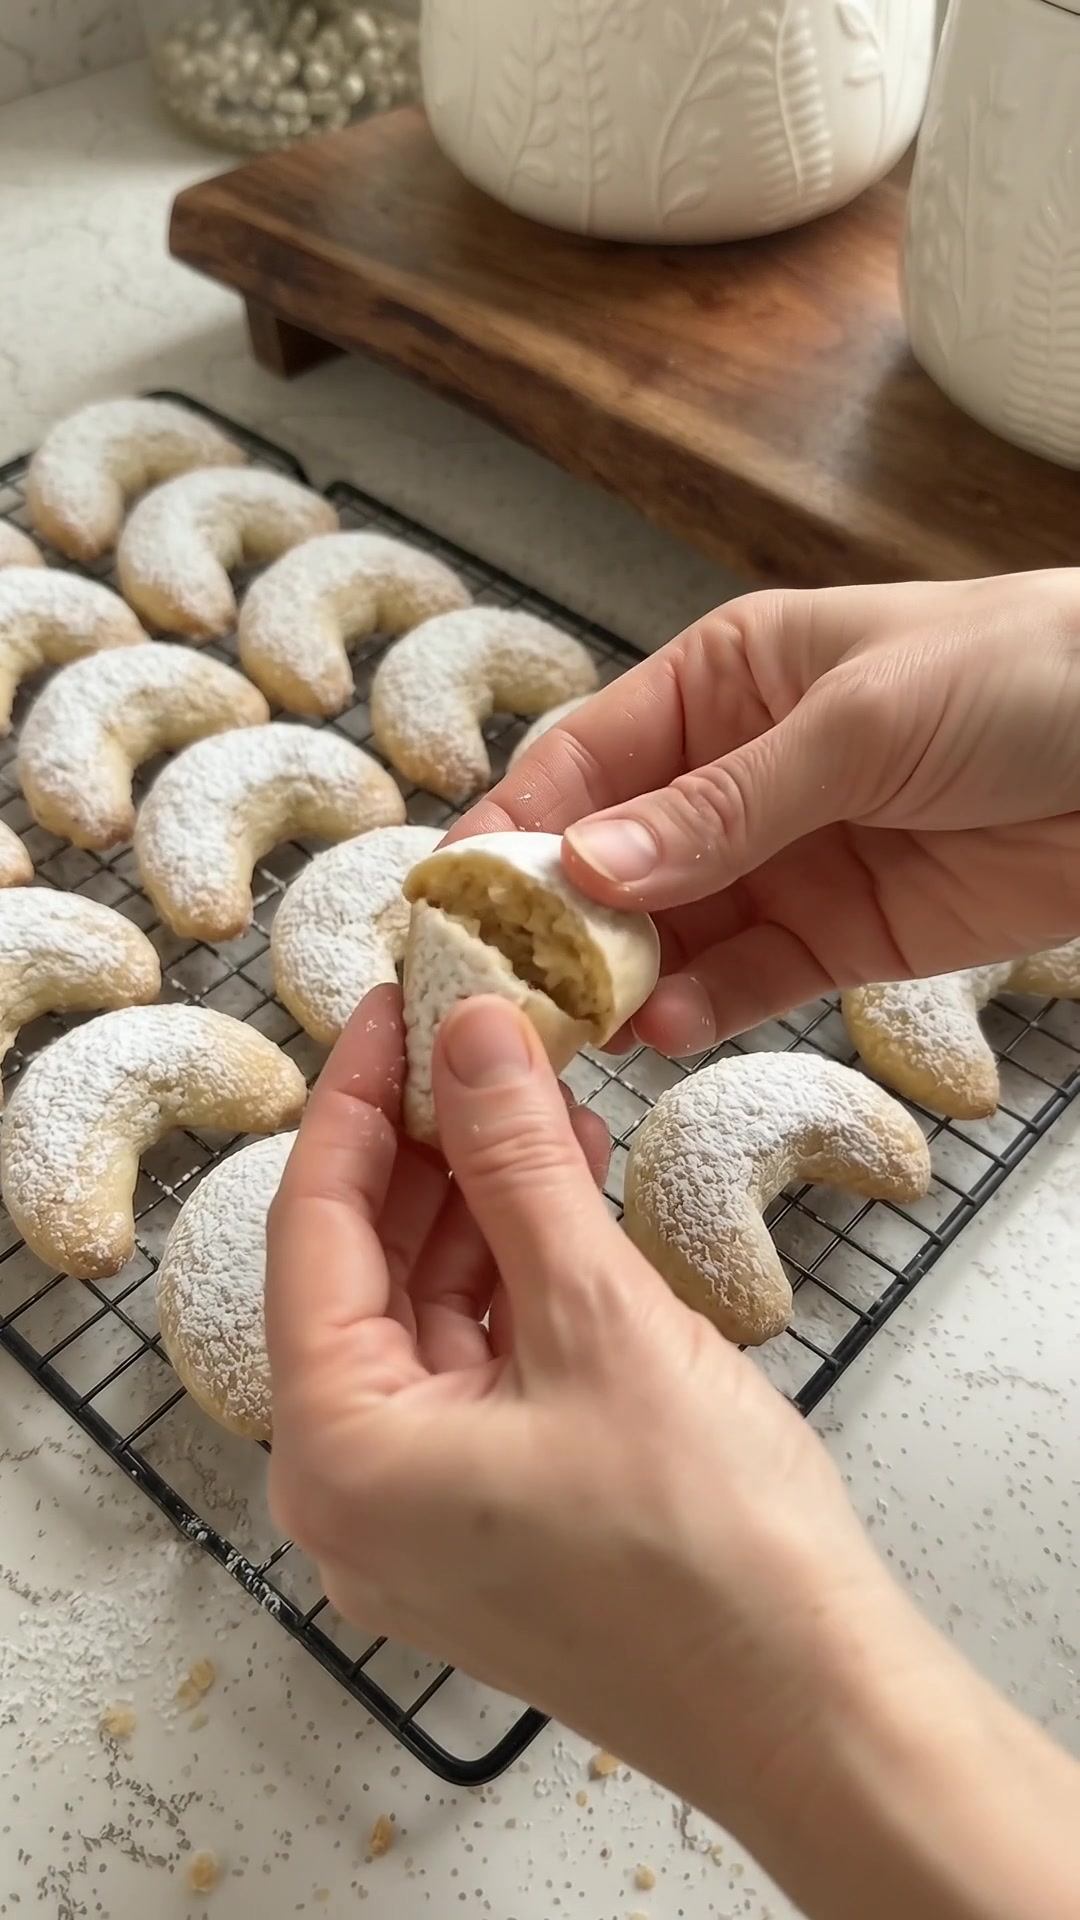
Vanilla crescent cookies, or Vanillekipferl, are buttery almond cookies shaped by hand and finished with a soft blanket of vanilla-scented sugar. Their appeal is in the delicate texture: the edges are lightly crisp, while the centers crumble gently with each bite.
This version uses finely ground almonds and vanilla extract, so you can make it with ingredients available in most US grocery stores. An egg-free dough keeps the cookies tender, and a short chill makes shaping easier. The crescents are fragile straight from the oven, so let them settle before lifting them or adding their final snowy coating.
Recipe at a glance
Makes about 36 cookies. Prep and shaping: 35 minutes. Chill: 1 hour, plus 15 minutes after shaping. Bake: 12–15 minutes per batch. Cooling: about 30 minutes. You will need two baking sheets, parchment paper, a mixing bowl, an electric mixer or sturdy spoon, and a small sieve for dusting.
Ingredients
For the dough
- 1 cup unsalted butter, softened but still cool
- ½ cup powdered sugar, sifted
- 2 teaspoons vanilla extract
- 2 cups all-purpose flour, spooned into the cup and leveled
- 1 cup finely ground blanched almonds or almond flour
- ¼ teaspoon fine salt
For the coating
- ¾ cup powdered sugar, sifted
- 1 tablespoon vanilla sugar, store-bought or homemade, optional
For homemade vanilla sugar, bury a split vanilla bean in 1 cup granulated sugar in a covered jar for at least 1 week. Use 1 tablespoon of that sugar in the coating and save the rest. If you do not have vanilla sugar, plain powdered sugar works well because the dough already contains vanilla extract. Do not pour extract into the dry coating; it creates damp clumps.
Mix a tender almond dough
Beat the butter and ½ cup powdered sugar together for 1–2 minutes, until smooth and creamy. Mix in the vanilla extract. In a separate bowl, whisk the flour, ground almonds, and salt, breaking up any lumps. Add the dry ingredients to the butter mixture in two additions and mix on low speed until moist crumbs form.
Press a handful together. If it holds, the dough is ready even if it still looks crumbly in the bowl. Gather it gently into a ball with your hands. Avoid prolonged beating or kneading after the flour is added, which can make the cookies less delicate. The warmth of your hands helps the buttery crumbs bind together.
Divide the dough in half, flatten into two disks, and wrap tightly. Refrigerate for 1 hour. If the dough has been chilled longer and feels very hard, leave it at room temperature for 10–15 minutes before shaping. It should be pliable enough to roll without becoming greasy.
Shape the crescents
Line two baking sheets with parchment paper. Work with one dough portion at a time, keeping the rest refrigerated. Scoop level tablespoon portions and roll each into a short log about 2½ inches long. Taper the ends slightly, then bend the log into a crescent. Keep the tips rounded rather than needle-thin so they do not burn.
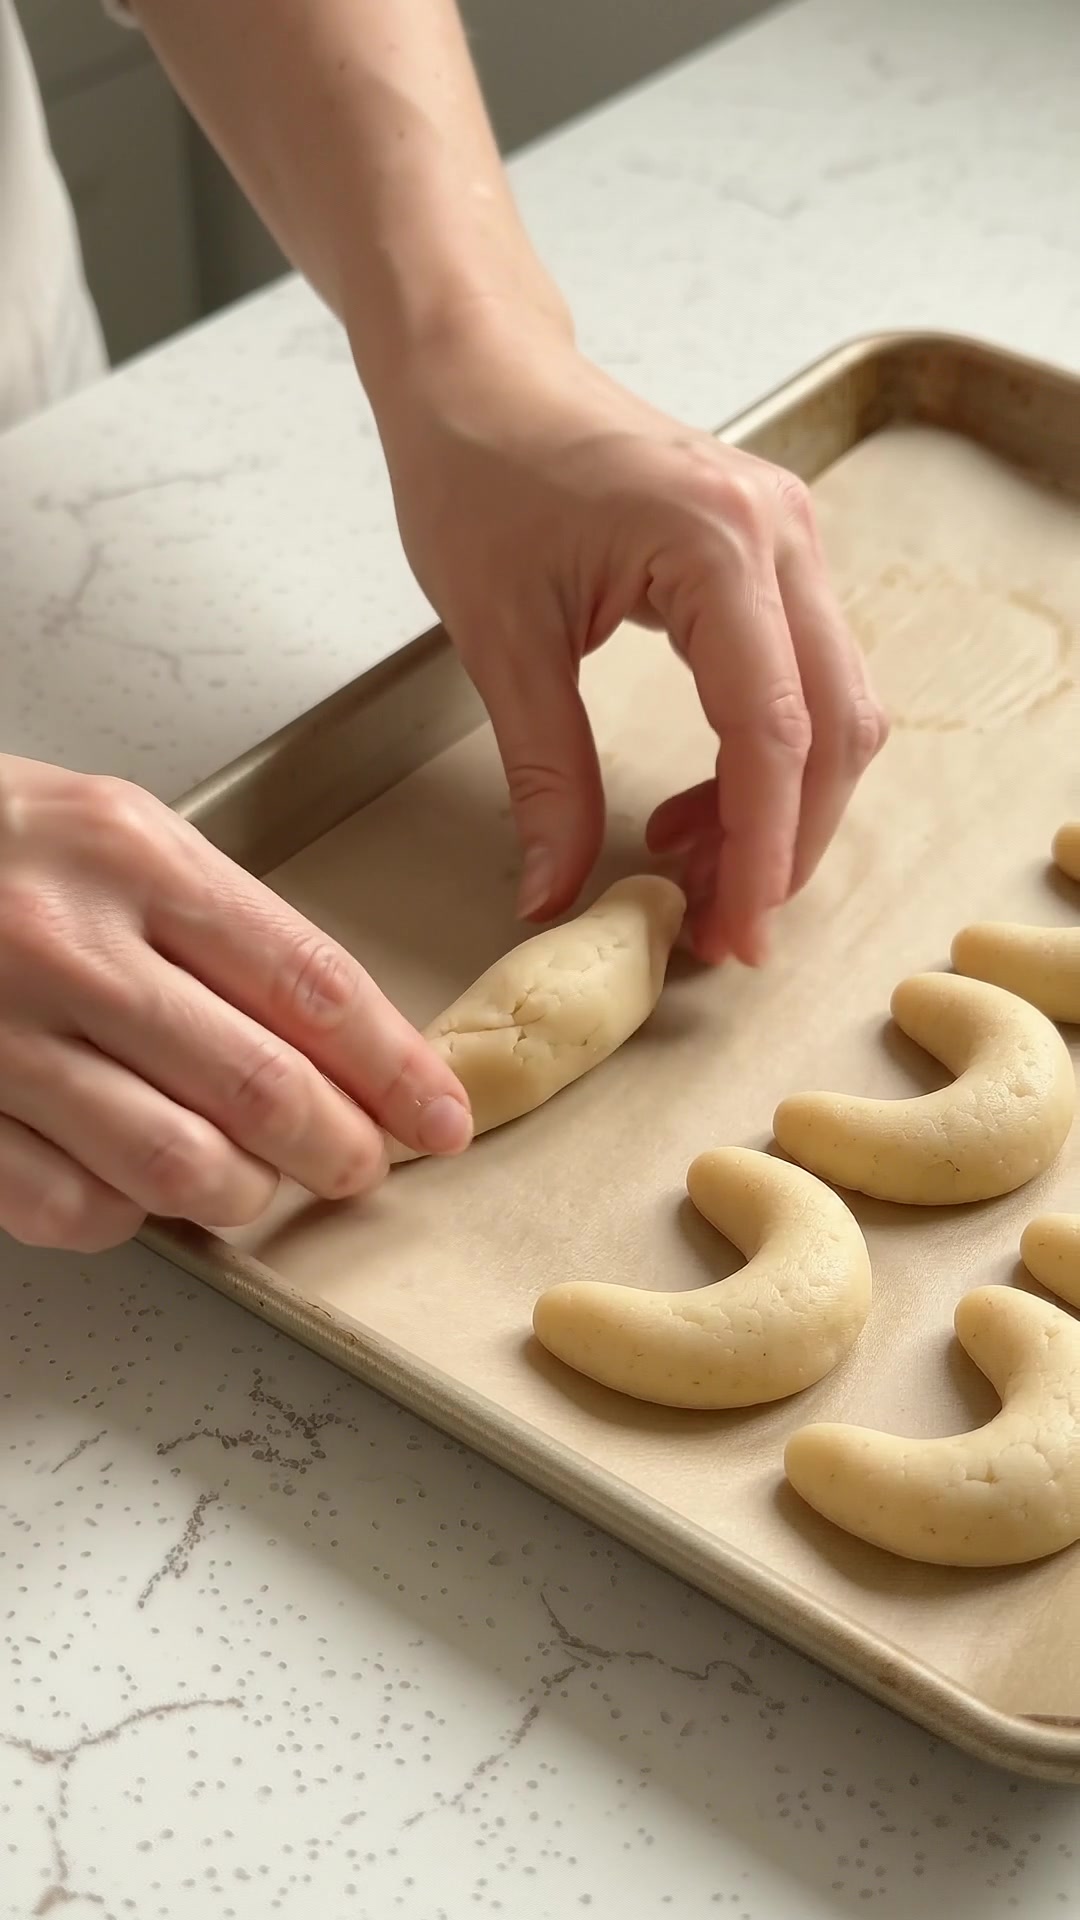
Arrange the crescents about 1 inch apart on the prepared sheets. Aim for similar thickness throughout each cookie, with only a gentle taper at the ends. If a log cracks while bending, press the crack closed and roll it briefly again. Dough that repeatedly breaks may need a few minutes to soften; sticky dough needs a short return to the refrigerator.
Chill the shaped cookies for 15 minutes. Meanwhile, heat the oven to 350°F. This short rest firms the butter and helps the crescents keep their curved shape.
Bake gently
Bake one sheet at a time on the center rack for 12–15 minutes. Begin checking at 12 minutes. The tops should remain pale, while the tips and bottoms become lightly golden. Dark browning means a drier cookie and a less delicate vanilla flavor. Rotate the sheet near the end if your oven has a noticeable hot spot.
Remove the pan and leave the cookies undisturbed for 5–8 minutes. They will be very fragile at first but become easier to handle as they cool. Move them carefully with a thin spatula to a wire rack set over a clean tray or sheet of parchment. Use completely cooled pans for later batches.
Give them a snowy finish
Mix the coating ingredients in a bowl. While the cookies are still slightly warm, sift a light layer over the tops. Warmth helps the first coating adhere, but piping-hot cookies can absorb too much sugar and look wet. Allow the crescents to cool completely, then dust again for an even white finish.
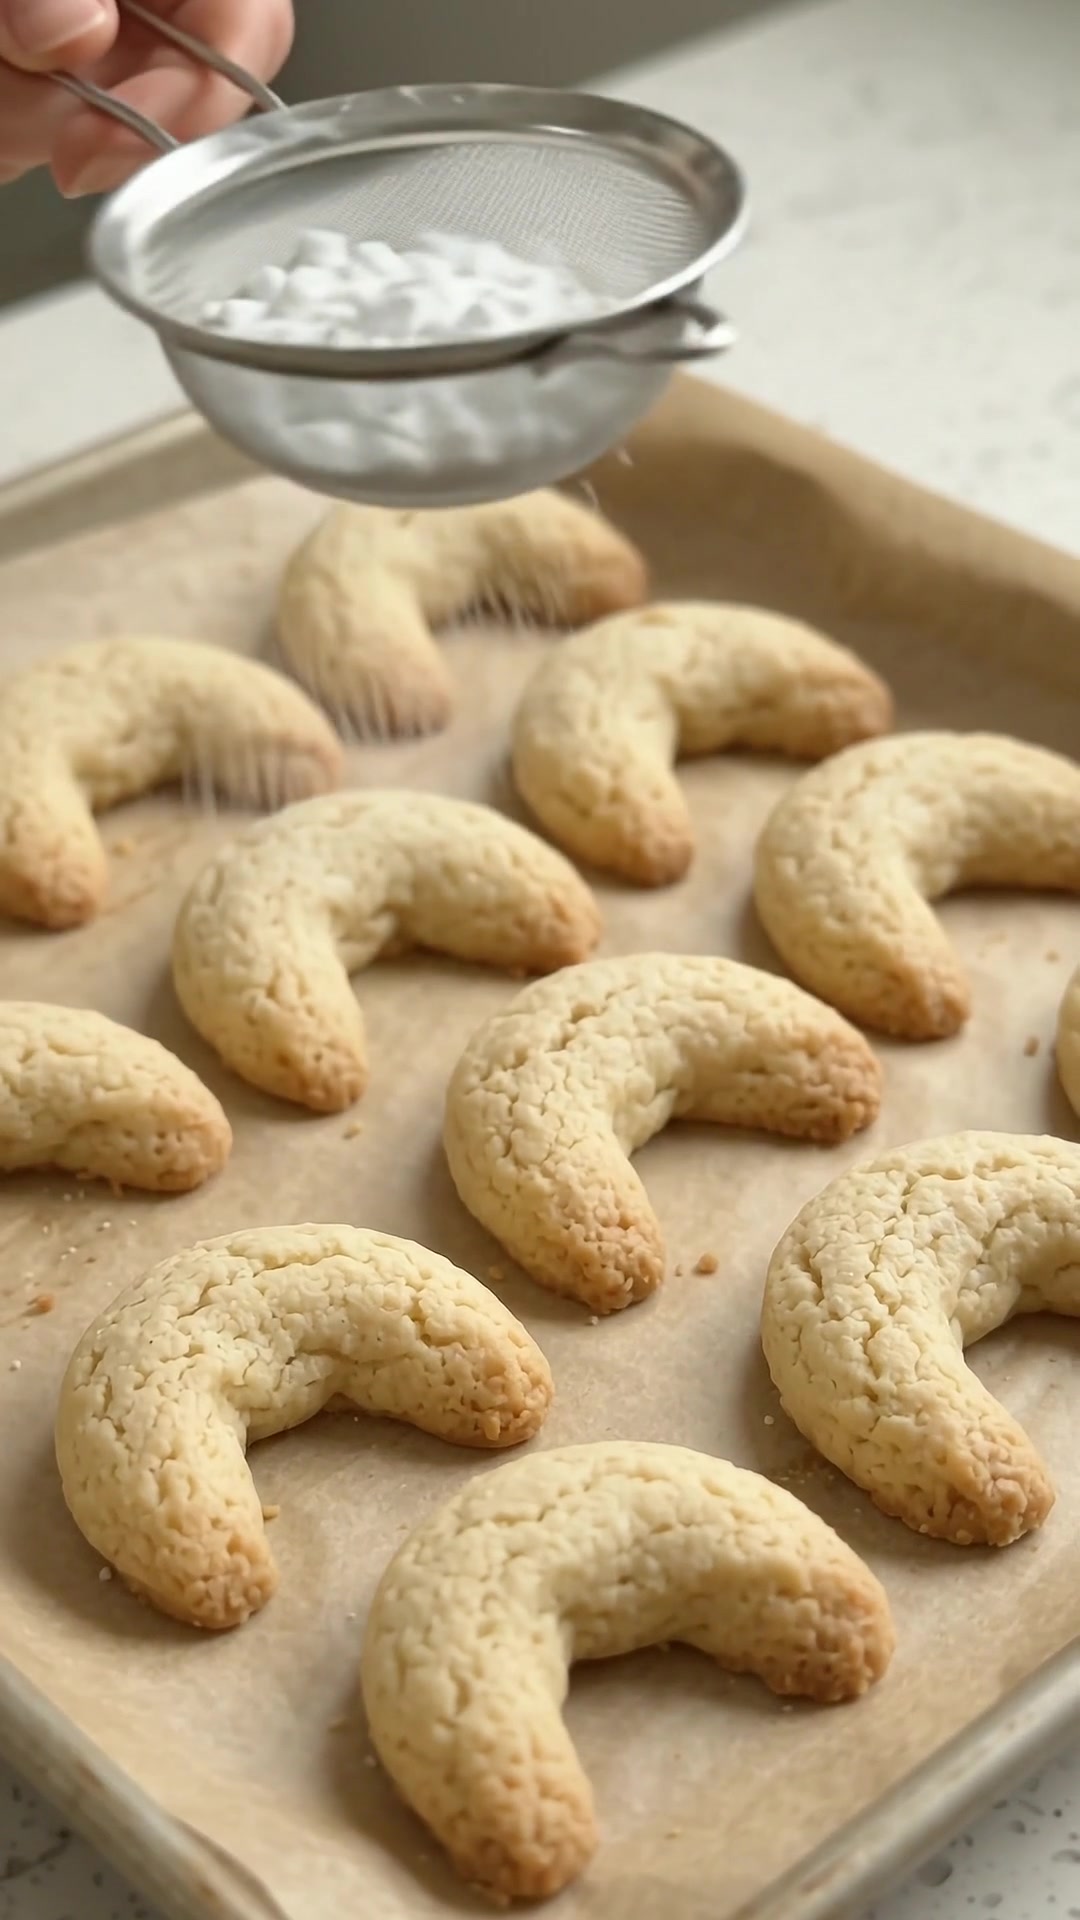
Dusting is gentler than tossing these delicate cookies in a bowl. Let the sugar settle before arranging them on a serving plate.
Helpful tips and storage
Use fine almond flour rather than coarse chopped nuts, which can create weak spots in the dough. Walnuts or hazelnuts can provide a different flavor when finely ground, but avoid grinding so long that they become nut butter. Do not replace the wheat flour with additional almond flour, since the dough needs the structure of both.
Store fully cooled cookies in an airtight container at cool room temperature for up to 1 week. Separate layers with parchment and handle gently. Freeze baked cookies for up to 2 months in a rigid container. Thaw covered at room temperature, then refresh the powdered sugar if needed. Wrapped dough disks can also be frozen for 2 months; thaw overnight in the refrigerator before shaping.
Short FAQ
Why did the crescents spread?
The butter or dough may have been too warm. Chill the shaped cookies and start with a cool baking sheet.
Why do they break when I lift them?
They need a few more minutes on the pan. Lift with a thin spatula supporting the entire cookie.
Can I skip the nuts?
This dough relies on ground almonds for its texture. For a nut-free cookie, choose a butter cookie recipe designed without nuts instead of simply omitting them.