Authentic Grandma’s Danish Aebleskiver (Buttermilk Pancake Balls)
Authentic Grandma’s Danish Aebleskiver (Buttermilk Pancake Balls)
A Treasured Taste of Danish Heritage
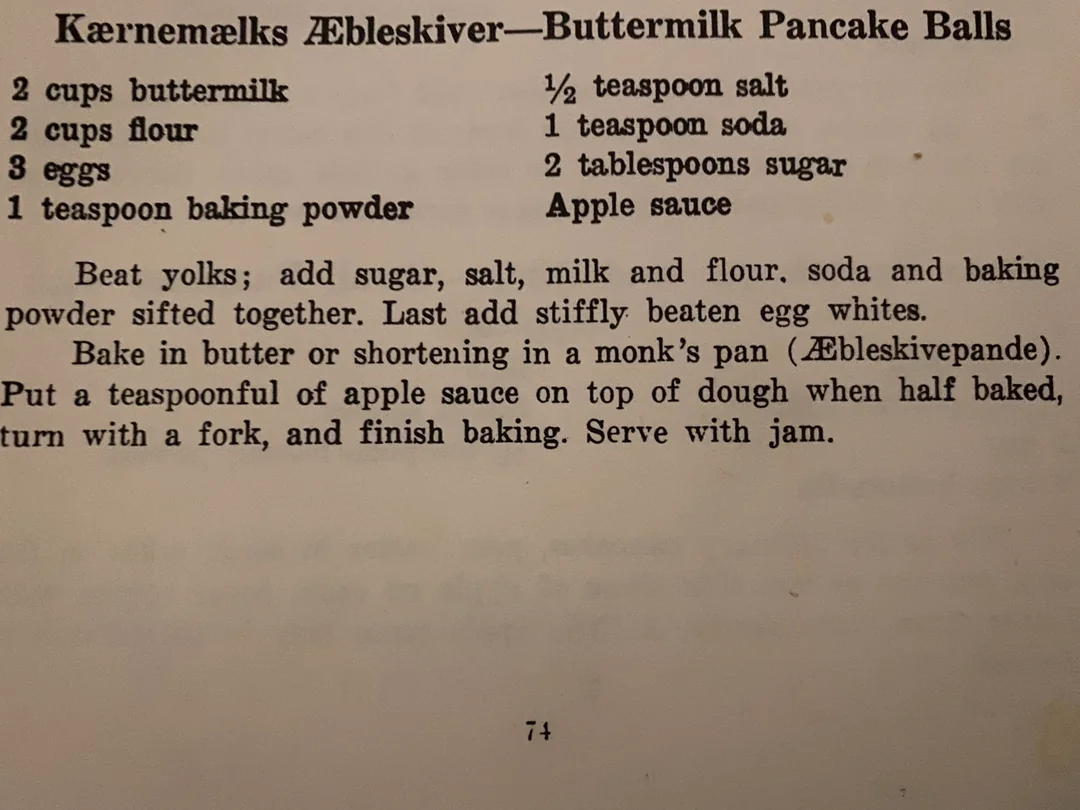
There is something profoundly special about cooking from a time-tested family cookbook. This authentic Danish Aebleskiver recipe comes straight from the pages of a vintage family heirloom, From Danish Kitchens, and it represents the absolute pinnacle of Scandinavian comfort food. Known as Kærnemælks Æbleskiver in Denmark, these are not your average morning flapjacks. They are delightfully puffy, spherical buttermilk pancake balls that boast a crisp, golden exterior and a tender, cloud-like center.
What sets this specific heirloom recipe apart is the traditional, sweet surprise hidden inside. While many modern recipes leave the center plain, this authentic version calls for dropping a small spoonful of applesauce directly into the batter just before flipping. As the pancake ball cooks and seals, the applesauce warms into a sweet, jammy core that makes every single bite completely irresistible.
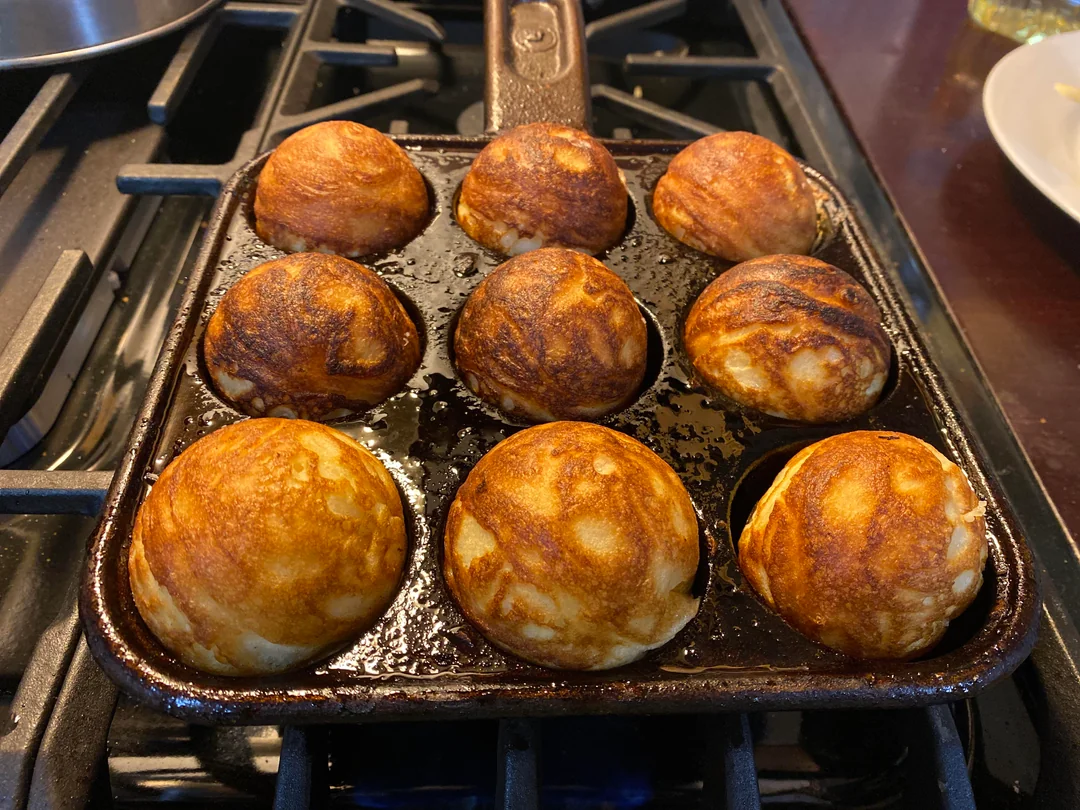
Cooking these in a classic cast-iron monk’s pan (or Æbleskivepande) is an interactive and highly rewarding weekend kitchen project. The heavy iron ensures a beautiful, even sear on the batter, while the whipped egg whites provide a spectacular rise. Whether you are honoring your own Danish heritage or simply looking to upgrade your Sunday breakfast routine, these stuffed buttermilk pancake balls will instantly win over your entire family.
Why You’ll Love This Recipe
-
A Hidden Center: The warm, sweet applesauce sealed inside the center of each aebleskiver is a delightful, traditional surprise that elevates the entire dish.
-
Incredibly Fluffy: By beating the egg whites to stiff peaks and gently folding them in at the end, the batter rises into incredibly light, airy spheres.
-
Simple Ingredients: Despite their fancy appearance, the batter is made entirely of basic, inexpensive pantry staples like flour, sugar, and buttermilk.
-
Cast Iron Crisp: Baking them in a butter-greased cast-iron pan creates a beautifully caramelized, slightly crunchy shell that contrasts perfectly with the soft interior.
-
A Slice of History: You get to experience a genuinely authentic, vintage recipe that has been passed down through generations of Danish kitchens.
Ingredients
-
Buttermilk: 2 cups of rich buttermilk. The acidity is crucial for reacting with the baking soda and tenderizing the flour.
-
All-Purpose Flour: 2 cups, sifted to remove any lumps and keep the batter light.
-
Eggs: 3 large eggs. You must separate the yolks from the whites!
-
Baking Powder & Baking Soda: 1 teaspoon of baking powder and 1 teaspoon of baking soda to give the pancakes their maximum puff.
-
Salt: 1/2 teaspoon to balance the sweetness of the filling.
-
Granulated Sugar: 2 tablespoons to help the exterior caramelize to a deep golden brown.
-
Applesauce: Used for the classic filling. Use a smooth, thick applesauce rather than a watery one.
-
Butter or Shortening: For generously greasing the cast-iron pan.
-
Jam: For serving alongside the finished pancake balls.
Step-by-Step Instructions
Step 1: Prep the Dry Ingredients
In a medium mixing bowl, combine the all-purpose flour, baking powder, and baking soda. Sift these dry ingredients together thoroughly to ensure the leavening agents are evenly distributed and the flour is perfectly aerated.
Step 2: Beat the Yolks
Separate your 3 eggs, placing the whites into a spotlessly clean glass or metal bowl, and the yolks into your main large mixing bowl. Beat the egg yolks lightly, then whisk in the 2 tablespoons of sugar and the 1/2 teaspoon of salt.
Step 3: Combine Wet and Dry
Add the 2 cups of buttermilk to the egg yolk mixture. Gradually fold in your sifted dry ingredients, stirring just until everything is combined and moistened. Do not overmix, or the pancake balls will become tough and dense.
Step 4: Whip the Egg Whites
Using an electric hand mixer (or a whisk and a lot of elbow grease), beat the reserved egg whites until stiff peaks form. When you pull the beaters straight up, the peaks of the egg whites should stand tall without folding over.
Step 5: Fold the Batter
Gently scoop the stiffly beaten egg whites into the main batter. Use a rubber spatula to carefully fold them in, using a sweeping motion from the bottom of the bowl to the top. Keep folding until no large white streaks remain, being careful not to deflate the air bubbles you just whipped in.
Step 6: Heat and Grease the Pan
Place your cast-iron monk’s pan (Æbleskivepande) on the stovetop over medium heat. Once it is hot, add a generous dab of butter or shortening into each spherical cup, letting it melt and coat the sides.
Step 7: Fill and Stuff
Pour or spoon the fluffy batter into each cup until they are roughly half full. Immediately drop one teaspoonful of applesauce directly into the center of the wet batter in each cup.
Step 8: The Classic Turn
Watch the edges of the batter carefully. Once they look half-baked and slightly set, use a fork (or a wooden skewer) to quickly turn the aebleskiver over. The raw batter from the top will slide down into the bottom of the cup, completely sealing the applesauce inside to form a perfect sphere.
Step 9: Finish Baking
Continue turning the aebleskiver occasionally until they are uniformly golden brown all the way around and cooked through the center. Remove them from the pan and serve immediately!
Expert Cooking Tips
-
Spotless Bowl for Whites: When beating egg whites, even the tiniest speck of leftover fat or egg yolk in the bowl will prevent them from reaching stiff peaks. Use a clean glass or metal bowl, never plastic.
-
Managing Skillet Heat: Cast iron retains heat incredibly well. If your first batch browns too quickly on the outside while the inside remains runny, turn your stove dial down to medium-low for the subsequent batches.
-
The Fork Flip: While modern cooks often use bamboo skewers to flip aebleskiver to protect the pan’s seasoning, a standard fork is the traditional method noted in vintage recipes. Just be gentle so you don’t aggressively scrape your cast iron!
-
Don’t Overstuff: Keep the applesauce portion to exactly one teaspoon. If you add too much, the filling will burst out of the side when you try to flip it, causing a sticky mess in the pan.
Variations to Try
-
Fruit Preserves: If you don’t love applesauce, you can stuff the centers with a teaspoon of thick raspberry jam, lingonberry preserves, or even a small dollop of lemon curd.
-
Chocolate Center: Drop a few semi-sweet chocolate chips or a tiny spoonful of Nutella into the center of the batter before flipping for a decadent dessert variation.
-
Spiced Apple: Mix a heavy pinch of cinnamon and a dash of nutmeg into your applesauce before stuffing the pancake balls to give them a cozy, autumnal flavor.
What to Serve With Authentic Aebleskiver
Because these are already stuffed with applesauce, they have a wonderful built-in sweetness and moisture. Traditionally, they are served piping hot right out of the pan alongside a small dish of high-quality jam (like strawberry or raspberry) for dipping.
A heavy dusting of powdered sugar over the top of the plate is practically mandatory! For a robust breakfast, serve these fluffy pancake balls alongside savory, salty sides like thick-cut bacon or savory breakfast sausages to balance the sweet flavors. Pair with a strong cup of black coffee or Scandinavian gløgg.
Storage & Reheating
Refrigerator
Allow any leftover aebleskiver to cool completely on a wire rack so the bottoms don’t get soggy. Store them in an airtight container in the refrigerator for up to 3 days.
Freezer
Aebleskiver freeze wonderfully! Flash freeze the cooled pancake balls on a baking sheet in a single layer for 1 hour. Once solid, transfer them to a freezer-safe zip-top bag and store for up to 3 months.
Reheating
To keep the cast-iron crust slightly crisp, reheat the aebleskiver on a baking sheet in a 350°F (175°C) oven for 5 to 8 minutes. If they are frozen, bake them for 10 to 12 minutes. Microwaving them will make them soft and steamy.
Frequently Asked Questions
What does “Aebleskiver” mean?
The literal translation of Æbleskiver from Danish to English is “apple slices.” Historically, they were made by dipping actual slices of apple into pancake batter and frying them. Over time, the recipe evolved into these puffy, spherical pancakes that are often stuffed with apple sauce or cooked with a piece of apple inside, retaining the historic name.
Where can I find an Aebleskivepande?
You can often find vintage cast-iron aebleskiver pans (sometimes labeled as monk’s pans) at antique stores or flea markets. Modern cast-iron and non-stick versions are widely available online and in specialty kitchen stores.
Why did my aebleskiver turn out flat?
Flat aebleskiver are usually the result of deflated egg whites. If you overmix the batter during the folding stage, you crush all the delicate air bubbles that provide the lift. Fold the egg whites in gently with a spatula, stopping as soon as the batter is combined.
Is the buttermilk absolutely necessary?
Yes, especially for this vintage recipe! The acidic buttermilk reacts strongly with the baking soda (soda) to create carbon dioxide bubbles, which are essential for making the dough rise rapidly in the pan. Regular milk will not provide the same chemical reaction or the signature tangy flavor.
Final Thoughts
Baking from a historic family cookbook is a beautiful way to keep culinary traditions alive, and this authentic Kærnemælks Æbleskiver recipe is an absolute treasure. From the cloud-like buttermilk batter to the sweet applesauce center, every bite is a testament to the comforting power of Scandinavian baking. Heat up your cast iron, whip those egg whites, and enjoy a truly authentic Danish breakfast!
Authentic Grandma's Danish Aebleskiver
A vintage, authentic Danish recipe for fluffy buttermilk pancake balls with a sweet, hidden applesauce center, cooked to perfection in cast iron.
Ingredients
Equipment
Method
- In a bowl, sift together the flour, baking powder, and baking soda.
- In a large mixing bowl, beat the egg yolks. Add the sugar, salt, and buttermilk, mixing well.
- Gradually stir the sifted dry ingredients into the yolk mixture until just combined.
- In a separate, clean bowl, beat the egg whites until stiff peaks form.
- Gently fold the stiffly beaten egg whites into the main batter using a spatula. Do not overmix.
- Heat the aebleskiver pan over medium heat. Add a generous amount of butter or shortening to grease each cup.
- Fill each cup about halfway with batter.
- Immediately place 1 teaspoon of applesauce directly into the center of the dough in each cup.
- When the bottom is half-baked and golden, use a fork to turn the batter over, sealing the applesauce inside.
- Finish baking, turning occasionally, until the spheres are golden brown all around and cooked through. Serve hot with jam.
Notes
Folding the Whites: Be extremely gentle when folding in the egg whites to preserve the air for maximum fluffiness.