Christmas Cranberry Walnut Cheese Balls (Easy Holiday Appetizer)
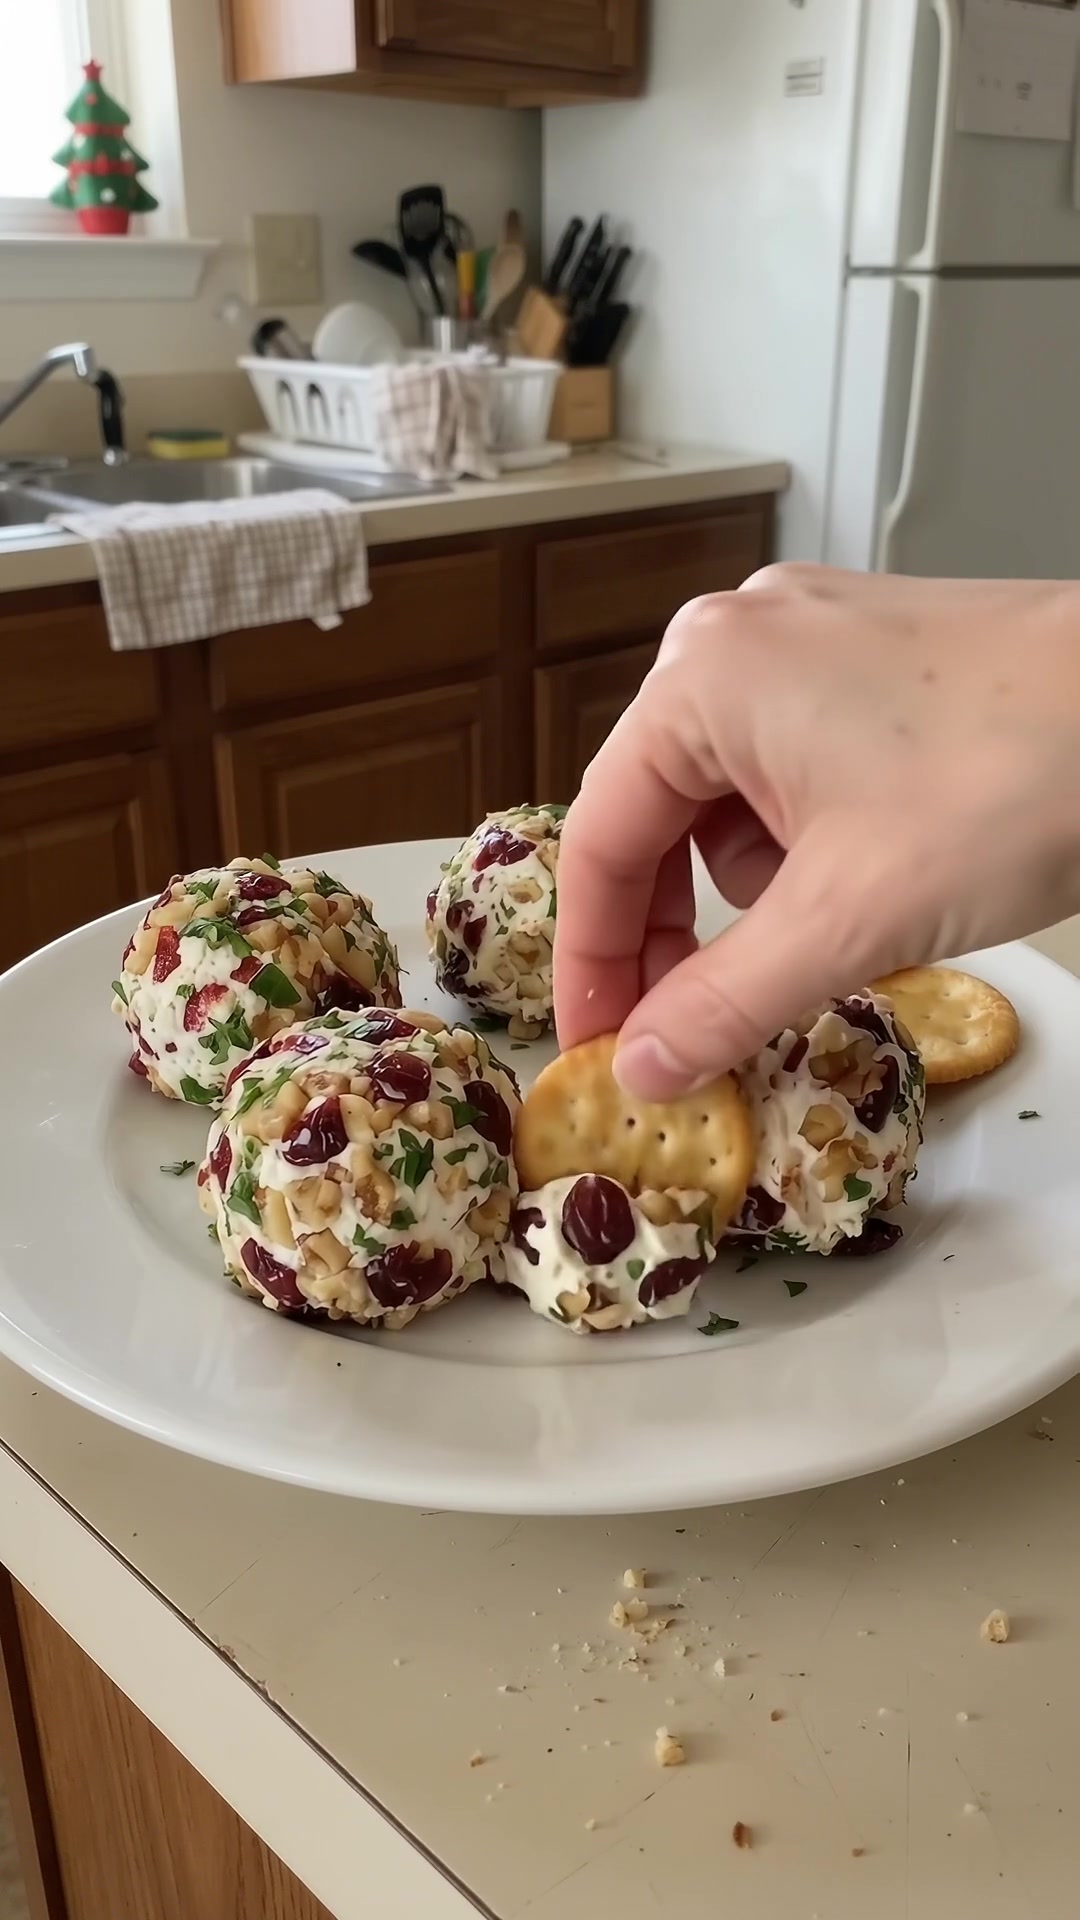
Christmas Cranberry Walnut Cheese Balls bring creamy cheese, sweet dried cranberries, crunchy walnuts, and fresh parsley together in one festive appetizer. Their red and green coating looks lovely on a holiday platter, and the small portions are easy to serve with buttery crackers.
There is no baking involved. Mix the cheese filling, shape it into mini balls, roll them in the colorful coating, and refrigerate until firm. You can also prepare the cheese centers ahead, leaving the coating for closer to serving time. It is a practical way to make room for other holiday preparations.
Recipe Details
- Prep time: 15 minutes
- Chill time: At least 30 minutes
- Total time: Approximately 45 minutes, plus any extra chilling needed for shaping
- Yield: 12 mini cheese balls
- Course: Appetizer
- Cuisine: American
Ingredients for Christmas Cranberry Walnut Cheese Balls
For the Cheese Mixture
- 8 oz cream cheese, softened
- 1 cup shredded sharp cheddar cheese
- ½ teaspoon garlic powder
- ¼ teaspoon onion powder
- ¼ teaspoon black pepper
- 1 tablespoon finely chopped fresh parsley
For the Coating
- ¾ cup dried cranberries, roughly chopped
- ¾ cup walnuts, finely chopped
- 2 tablespoons fresh parsley, finely chopped
For Serving
- Ritz crackers or your favorite buttery crackers
Keep the parsley amounts separate: 1 tablespoon goes into the cheese mixture, while 2 tablespoons go into the coating. Softened cream cheese is easier to blend with the cheddar and seasonings. Full-fat cream cheese gives the filling a rich flavor and a firm texture after chilling.
Use dried cranberries for this recipe. Fresh cranberries are too tart and moist for the intended coating. Chop the walnuts finely so they cling easily to the cheese, and roughly chop the dried cranberries so each bite has a balanced mix.
How to Make Christmas Cranberry Walnut Cheese Balls
1. Mix the Cheese Filling
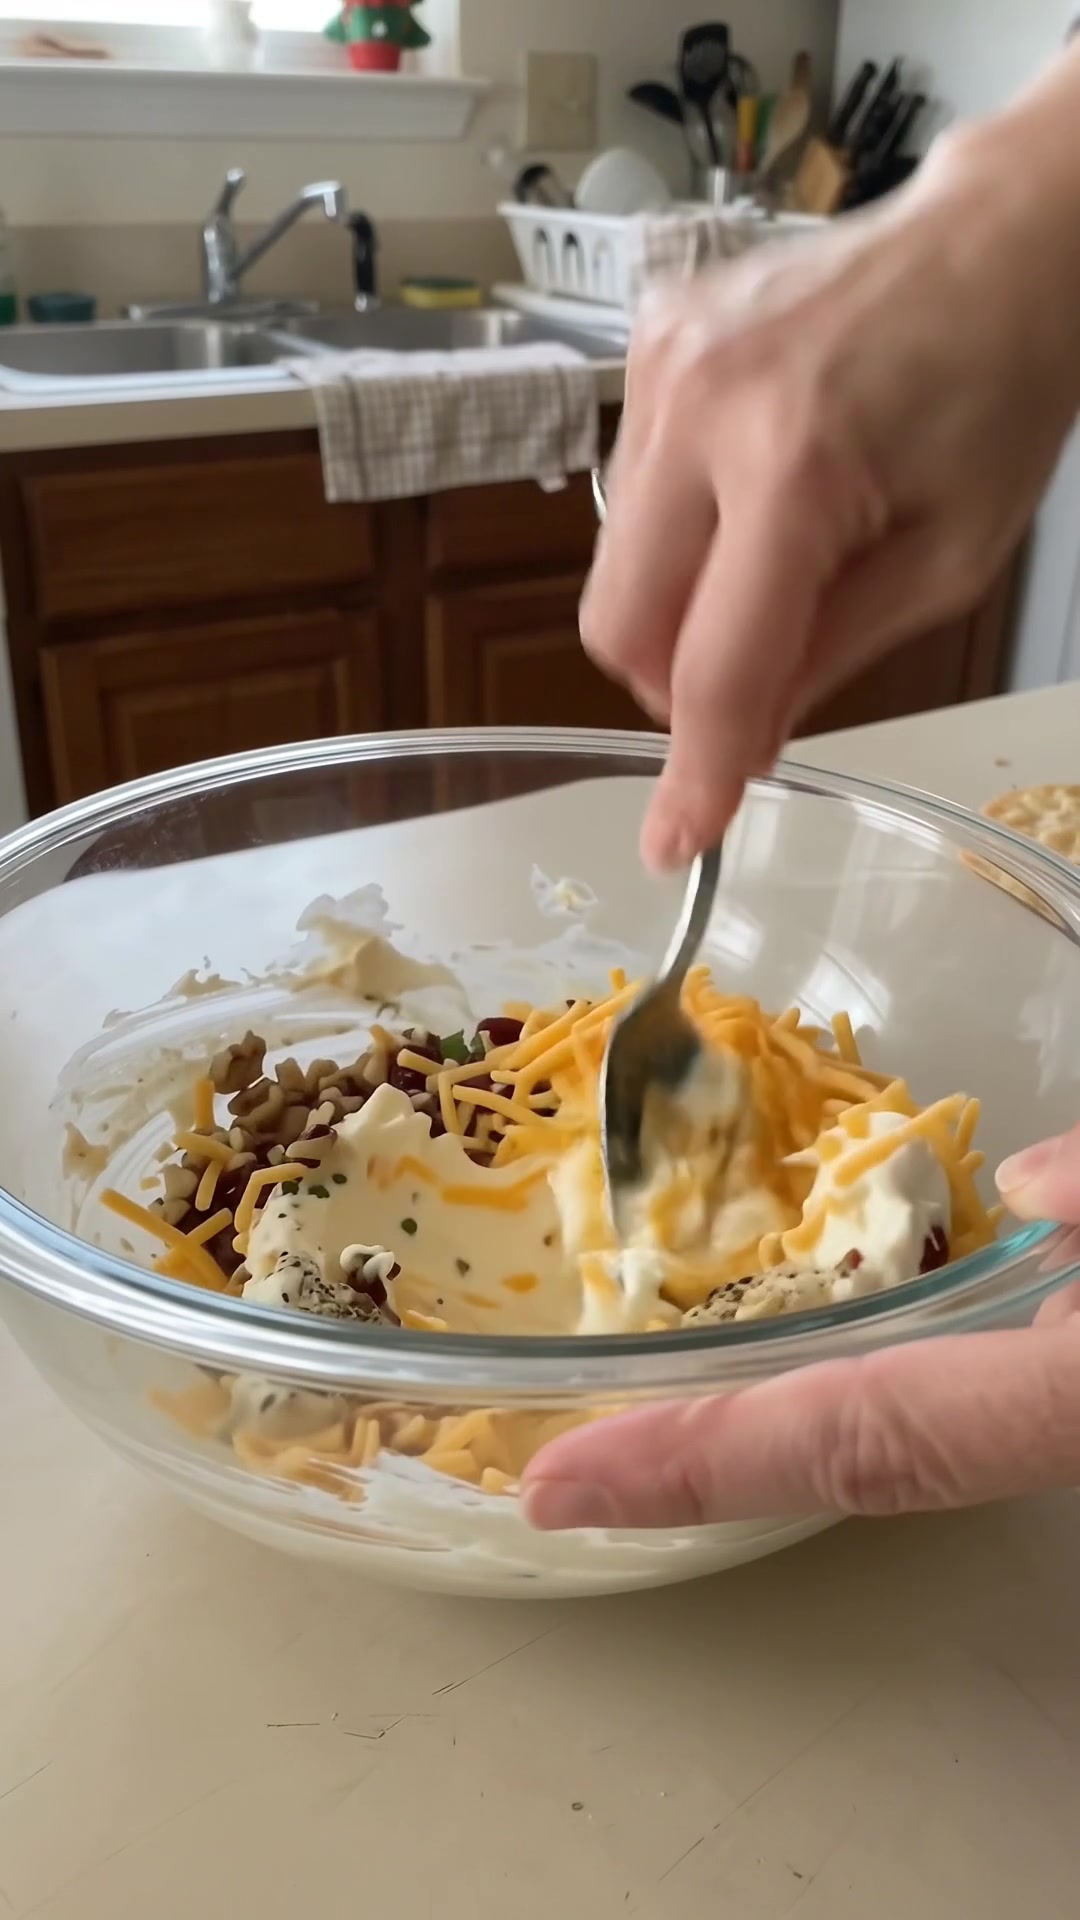
Place the softened cream cheese, shredded sharp cheddar, garlic powder, onion powder, black pepper, and 1 tablespoon chopped parsley in a medium bowl.
Mix with a spoon until smooth and evenly combined. Scrape around the sides and bottom of the bowl so the seasonings are distributed throughout the cheese. There should be no large pockets of plain cream cheese left.
2. Shape into Mini Balls
Use a small cookie scoop or spoon to divide the mixture into approximately 12 portions. Roll each portion gently between your hands to form a small ball.
If the mixture is too soft to hold its shape, refrigerate for 15–20 minutes before rolling. Keep the portions similar in size so they look tidy on the serving plate and are easy to enjoy with crackers.
3. Prepare the Holiday Coating
Combine the chopped dried cranberries, finely chopped walnuts, and remaining 2 tablespoons parsley on a shallow plate. Mix until the red, green, and golden pieces are evenly distributed.
A shallow plate gives you room to roll the cheese balls without pushing the coating over the edge. Stir the mixture occasionally as you work so the parsley and nuts do not collect in one spot.
4. Coat Each Cheese Ball
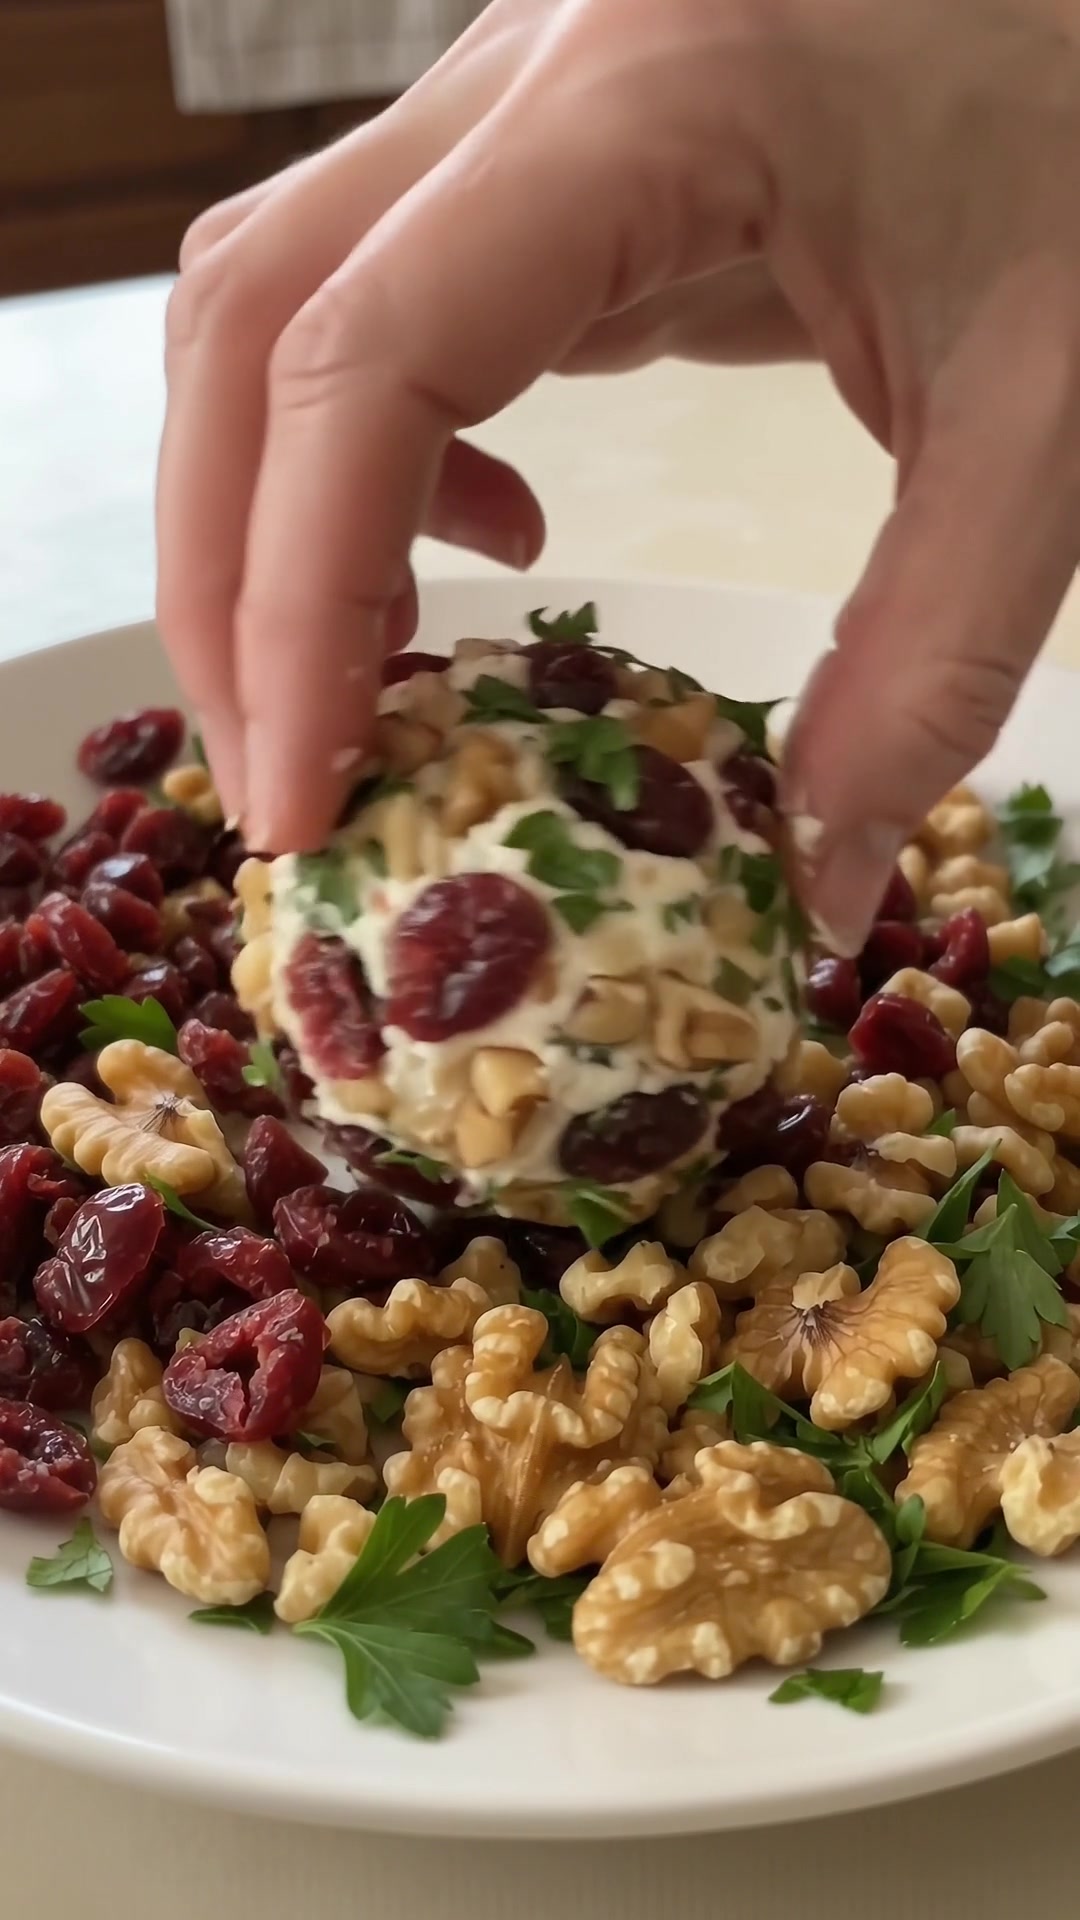
Roll each ball gently through the cranberry walnut mixture. Press lightly to help the coating stick, turning the ball until it is generously covered.
Handle the cheese centers gently so they stay rounded. If you notice an uncovered patch, press a little extra coating onto that spot rather than repeatedly rolling the entire ball.
5. Chill Until Firm
Arrange the coated cheese balls on a serving plate. Cover and refrigerate for at least 30 minutes to help them firm up and hold their shape.
If preparing ahead, refrigerate the shaped centers separately and add the coating closer to serving for the best texture. Allow time for the finished balls to chill before they go onto the holiday table.
6. Serve with Crackers
Remove from the refrigerator shortly before serving. Arrange with buttery crackers, keeping the crackers separate until serving time so they retain their crisp texture.
These cheese balls are served chilled or slightly softened, with no heating required. Their creamy centers and crunchy coating make a satisfying contrast to a crisp cracker.
Helpful Tips and Variations
Soften the cream cheese enough to mix easily, chop the walnuts finely, and keep the portions small. Chilling is especially useful if the filling becomes sticky while you work.
For a variation, replace the walnuts with chopped toasted pecans. Add a pinch of cayenne or finely chopped jalapeños for heat, or try fresh chives or dill in the filling. A teaspoon of honey mixed into the cream cheese creates a slightly sweeter version. These additions are optional; the base recipe is flavorful on its own.
Make-Ahead and Storage
Prepare the cheese centers up to 24 hours ahead and refrigerate covered. For the best coating texture, roll them in the cranberry walnut mixture closer to serving.
Store leftovers in an airtight container in the refrigerator for up to 3–4 days. Freezing is not recommended because the cream cheese can become grainy after thawing. Keep refrigerated until shortly before serving, and do not leave the cheese balls at room temperature for more than 2 hours.
Frequently Asked Questions
Can I make Christmas cheese balls the night before?
Yes. Mix and shape the cheese centers, refrigerate overnight, and add the cranberry walnut coating before serving.
Can I use pecans instead of walnuts?
Yes. Chopped toasted pecans are a delicious substitute. Chop them finely so they stick well to the cheese.
What crackers go best with these cheese balls?
Ritz crackers, water crackers, wheat crackers, and buttery round crackers all work well.
Can I use low-fat cream cheese?
Yes, although full-fat cream cheese gives a richer flavor and firmer texture. Chill the mixture as needed before shaping.