Cast Iron Cat Head Biscuits Recipe (Crispy & Fluffy)
The Best Southern Cast Iron Cat Head Biscuits
How to Make Authentic Cast Iron Cat Head Biscuits
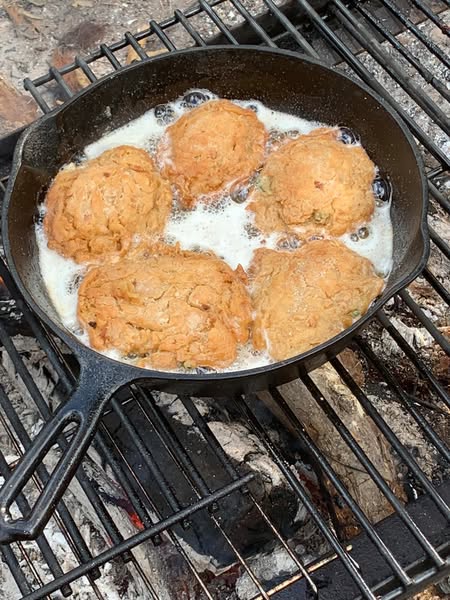
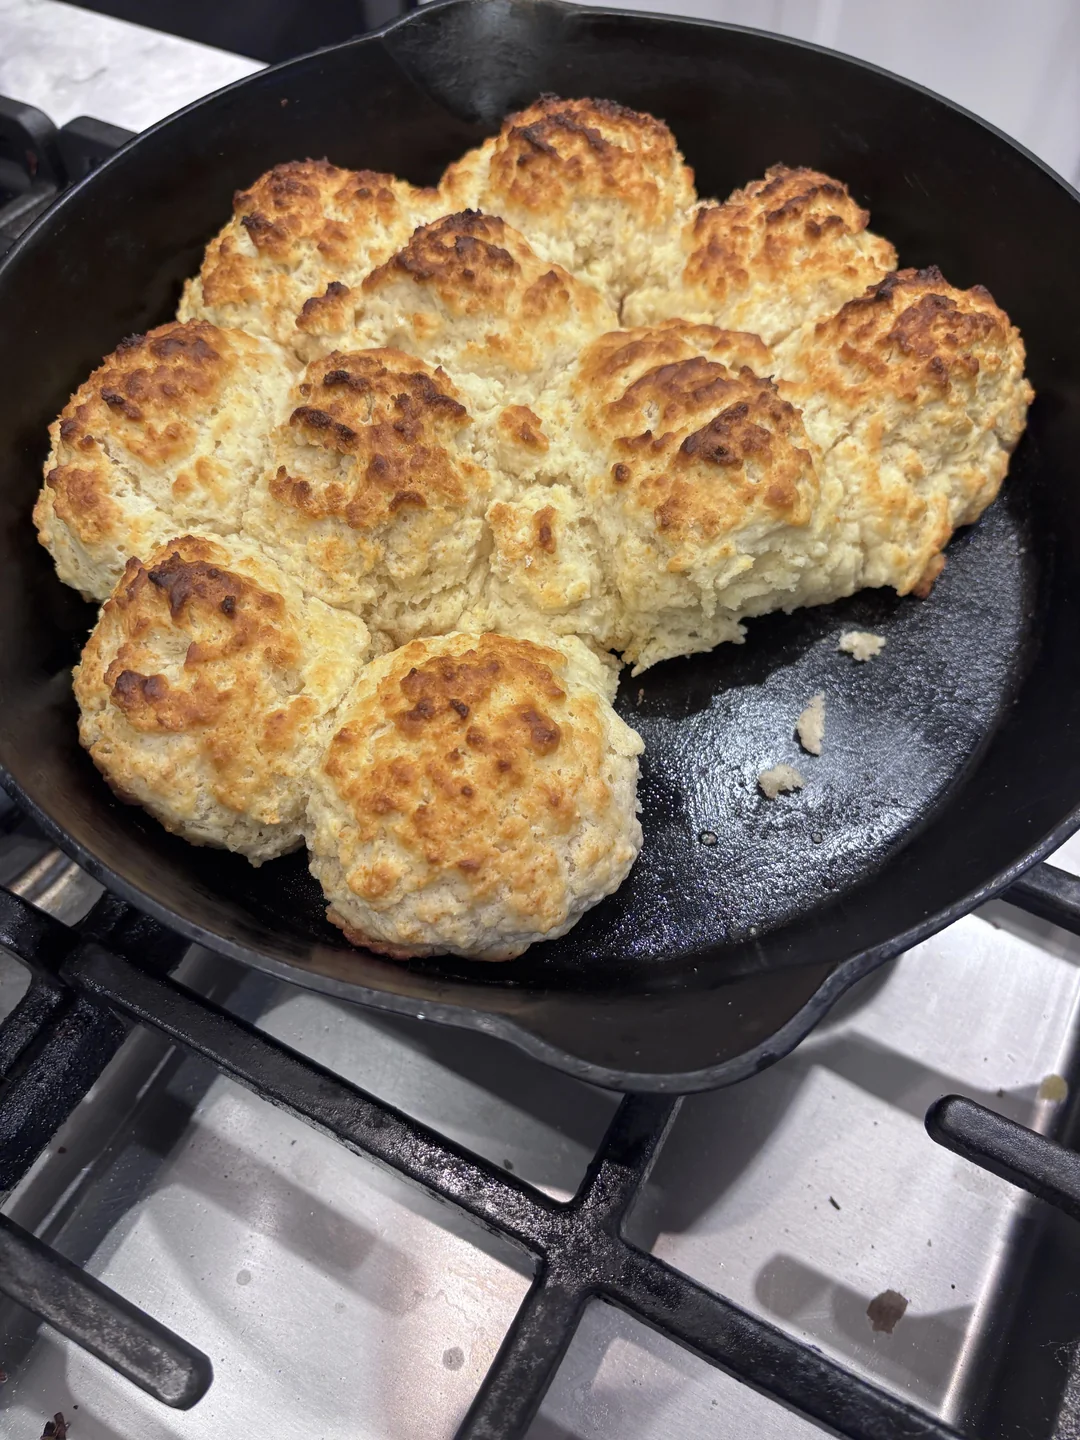
Southern baking is legendary for its deeply comforting recipes, and nothing embodies that culinary spirit quite like a piping hot batch of cast iron cat head biscuits. If you have never experienced these massive, rustic, drop-style biscuits, you are in for an incredible treat. They earn their highly memorable name simply because each portion of dough is scooped to be roughly the size of a cat’s head.
This vintage baking method completely skips the fussy rolling pins, flour-covered countertops, and biscuit cutters. Instead, it relies on a screaming hot cast iron skillet and a heavily hydrated dough to do all the heavy lifting. The result is a biscuit with a gorgeously crispy, buttery crust on the bottom and sides, giving way to a wildly tender, fluffy, and steamy interior.
Creating the perfect biscuit often feels intimidating to home bakers, but this foolproof technique guarantees success. By utilizing frozen grated butter and cold buttermilk, you create distinct pockets of fat that puff up beautifully in the oven without the need for complex lamination or folding. Whether you are smothering them in rich sausage gravy for breakfast, serving them alongside a hearty stew, or just slathering them with sweet butter and jam, these oversized, comforting biscuits will instantly become a household staple.
Why You’ll Love This Recipe
-
No Rolling or Cutting: This is a drop-biscuit style recipe, meaning you completely bypass the mess of rolling out dough and cutting perfect circles.
-
Crispy Cast Iron Crust: Preheating the cast iron skillet ensures the bottom of the biscuits instantly fries in butter, creating a crunch you cannot get on a standard baking sheet.
-
Impressive Size: These are not your average dinner rolls. Their massive, shareable size makes for a stunning presentation.
-
Foolproof Butter Distribution: Grating frozen butter directly into the dry ingredients ensures perfect, flaky layers without the risk of overworking the dough with your hands.
-
Freezer-Friendly: You can easily portion out the raw dough and freeze it, allowing you to bake off fresh biscuits one at a time whenever a craving strikes.
Ingredients
-
All-Purpose Flour: 2 1/2 cups (approximately 300g). Standard all-purpose flour provides the perfect balance of structure and tenderness.
-
Baking Powder: 1 tablespoon to give the biscuits their massive lift.
-
Baking Soda: 1/2 teaspoon to react with the acidic buttermilk, ensuring a fluffy interior and aiding in browning.
-
Salt: 1 teaspoon of fine sea salt or kosher salt to enhance the overall flavor.
-
Unsalted Butter: 1/2 cup (113g or 1 stick). It must be frozen solid so it can be easily grated. (Plus 1 extra tablespoon for the skillet).
-
Buttermilk: 1 1/2 to 1 2/3 cups (360–400g total), kept as cold as possible.
Optional Substitute: If you do not have buttermilk, you can easily make soured milk. Simply stir 1 tablespoon of fresh lemon juice or white vinegar into 1 cup of whole milk and let it sit at room temperature for 5 to 10 minutes until it slightly curdles.
Step-by-Step Instructions
Step 1: Preheat the Oven and Skillet
Place a bare cast iron skillet directly onto the center rack of your oven. Preheat the oven to 450°F. Allowing the heavy skillet to preheat alongside the oven is the ultimate secret to achieving that signature crispy, fried bottom crust.
Step 2: Combine the Dry Ingredients
While the oven is heating, grab a large mixing bowl. Add the all-purpose flour, baking powder, baking soda, and salt. Use a wire whisk to blend the dry ingredients together thoroughly, ensuring the leavening agents are evenly distributed throughout the flour.
Step 3: Grate the Frozen Butter
Take your frozen stick of unsalted butter and a standard box grater. Using the large holes, grate the butter directly into the bowl of dry ingredients. Once all the butter is grated, use your fingers to lightly toss the mixture, coating the butter shreds in flour so they do not clump together.
Step 4: Mix the Dough
Pour 1 1/2 cups of cold buttermilk into the bowl. Using a wooden spoon or a silicone spatula, gently fold the liquid into the dry ingredients until the dough just begins to come together. If the dough feels overly dry or crumbly, gradually add the remaining buttermilk (up to 1 2/3 cups total). The finished dough should be soft, slightly sticky, tacky, and cohesive. Do not overmix!
Step 5: Prep the Hot Skillet
Using heavy-duty oven mitts, carefully remove the screaming hot cast iron skillet from the oven and place it on a heat-safe surface. Immediately drop 1 tablespoon of butter into the hot pan. Swirl it around carefully as it rapidly melts and foams, coating the entire bottom of the skillet.
Step 6: Portion and Bake
Working quickly, scoop the sticky dough into large portions (about 115g each for a classic size) and drop them directly into the hot, buttered skillet. Do not attempt to smooth or flatten the tops; the craggy edges will turn beautifully crispy in the oven. Return the skillet to the oven and bake for 8 to 12 minutes, or until the tops are deeply golden brown. The biscuits are perfectly done when an instant-read thermometer inserted into the center reaches 200°F.
Expert Cooking Tips
-
Weigh Your Ingredients: For the most consistent results, rely on a digital kitchen scale. Measuring 300g of flour and 115g dough portions takes the guesswork out of baking.
-
Keep Everything Cold: The secret to fluffy biscuits is preventing the butter from melting before it hits the oven. Keep your butter frozen and your buttermilk chilled until the exact moment you need them.
-
Embrace the Sticky Dough: Cat head biscuit dough is significantly wetter than traditional cut-out biscuit dough. Resist the urge to add extra flour, as the high hydration level creates the steam needed for maximum puff.
-
Do Not Flatten: When you drop the dough portions into the skillet, leave them tall and rustic. Pressing them down will result in dense, heavy biscuits.
-
Mind the Skillet Size: A 10-inch cast iron skillet is ideal for a standard batch. The biscuits should touch each other slightly when dropped in, which forces them to rise up rather than spread out.
Variations to Try
-
Cheddar and Chive: Fold 1 cup of freshly shredded sharp cheddar cheese and 3 tablespoons of finely chopped fresh chives into the dry ingredients before adding the buttermilk.
-
Spicy Jalapeño Bacon: Add 1/4 cup of cooked, crumbled bacon and 2 tablespoons of finely minced jalapeños for a savory, fiery breakfast side.
-
Sweet Honey Butter: Brush the craggy tops of the biscuits with a mixture of melted butter and warm honey immediately after pulling them out of the oven.
What to Serve With Cat Head Biscuits
Because of their impressive size, these biscuits are sturdy enough to anchor a heavy meal. They are the ultimate vessel for a generous ladle of peppery Southern sausage gravy or creamed chipped beef. Serve them split open alongside crispy fried chicken, utilizing the fluffy interior to mop up any leftover hot honey or pan drippings. For a simpler approach, enjoy them piping hot with a thick smear of salted butter, homemade strawberry preserves, or a drizzle of dark molasses.
Storage & Reheating
Refrigerator
Allow any leftover biscuits to cool completely to room temperature. Transfer them to an airtight container or a heavy-duty zip-top bag. They will stay fresh in the refrigerator for up to 4 days.
Freezer
These biscuits freeze incredibly well. Once completely cooled, wrap each individual biscuit tightly in plastic wrap, then place them all into a large freezer bag. They will maintain their quality in the freezer for up to 3 months.
Reheating
To restore that fresh-from-the-oven crunch, skip the microwave. Preheat your oven or toaster oven to 350°F. Place the biscuits on a baking sheet and heat for 5 to 7 minutes until warmed through. If reheating from frozen, allow 15 to 20 minutes of baking time.
Frequently Asked Questions
Why are they called cat head biscuits?
The name is purely descriptive! In traditional Southern cooking, bakers would simply scoop a generous handful of wet dough and drop it into a skillet. The resulting oversized, craggy biscuits were roughly the size and shape of a large cat’s head.
Can I use regular milk instead of buttermilk?
Standard milk lacks the acidity required to react with the baking soda in this recipe, which will affect the rise and flavor. If you do not have buttermilk, always use the soured milk trick (adding lemon juice or vinegar to whole milk) to replicate that necessary acidic environment.
Why do I need to grate the butter?
Grating frozen butter creates tiny, uniform shards of fat that distribute perfectly throughout the flour without requiring you to cut it in with your warm hands. As the biscuits bake, the water in those cold shards of butter evaporates, creating steam pockets that result in a light, tender crumb.
Is the cast iron skillet absolutely necessary?
While you can technically bake drop biscuits on a standard aluminum baking sheet, you will lose the defining characteristic of this recipe. The preheated, heavy cast iron pan sears the bottom of the wet dough, creating a thick, buttery, fried crust that a regular sheet pan cannot replicate.
How do I portion the dough correctly?
If you have a kitchen scale, a classic cat head biscuit should weigh approximately 115g before baking. If you want a massive, shareable “Bobcat” size, aim for 150g. For a standard 10-inch skillet, divide the dough into 6 equal portions.
Final Thoughts
Mastering the art of the Southern cat head biscuit is a deeply rewarding culinary endeavor. By leaning on simple techniques like grating frozen butter and preheating your cast iron skillet, you can achieve bakery-level results with minimal effort. Whether you are feeding a hungry crowd on a Sunday morning or just craving a warm, comforting side for your evening stew, these giant, crispy-edged biscuits are guaranteed to steal the show.
Cast Iron Cat Head Biscuits
Ingredients
Equipment
Method
- Place a bare cast iron skillet in the oven and preheat to 450°F.
- In a large mixing bowl, thoroughly whisk together the flour, baking powder, baking soda, and salt.
- Using the large holes of a box grater, grate the frozen 1/2 cup of butter directly into the flour mixture. Toss lightly with your fingers to coat the butter shreds in flour.
- Pour in 1 1/2 cups of the cold buttermilk. Gently mix with a spatula until the dough just comes together. If the dough is dry, add the remaining buttermilk. The dough should be soft, tacky, and cohesive.
- Carefully remove the hot cast iron skillet from the oven. Immediately drop in the 1 tablespoon of butter and swirl to melt and coat the bottom.
- Scoop the dough into 6 equal portions (approx 115g each) and drop them directly into the hot skillet. Do not flatten the tops.
- Bake for 8 to 12 minutes, or until the biscuits are deep golden brown and reach an internal temperature of 200°F.
- Remove from the oven, let cool in the pan for 2 minutes, then transfer to a wire rack. Serve hot.
Notes