Authentic Kiowa Indian Frybread Recipe (Easy & Traditional)
Authentic Kiowa Indian Frybread
A Cherished Family Recipe for Traditional Frybread
There is a profound comfort in recipes that have been passed down through generations. After being asked for my Indian frybread recipe more times than I can count, I am finally writing it down. As a Native American with roots stretching from Alaska to Oklahoma, and now making my home in Louisiana, this specific recipe is a deep piece of my heritage. It is my Mama’s authentic Kiowa Indian recipe, and it carries the memories of countless family gatherings.
Like so many incredible cooks from long ago, my Mama never wrote this recipe down. She was taught to “eyeball” the ingredients, feeling the dough to know when it was just right. Translating an intuitive, touch-based recipe into exact measurements is always a challenge, but I have closely approximated the amounts so you can recreate this magic in your own kitchen.
This frybread is perfectly crispy on the outside, incredibly fluffy on the inside, and features a signature golden crust. The dough is meant to be slightly sticky, requiring a gentle hand and a well-floured surface to shape. Whether you eat it plain, dip it into a warm pot of beans, or use it as the base for Indian tacos, this frybread is a deeply comforting, traditional staple that belongs on your table.
Why You’ll Love This Recipe
-
Authentic Heritage: This is a genuine, passed-down Kiowa recipe made with traditional methods.
-
Incredible Texture: The generous amount of baking powder ensures the bread puffs up beautifully in the hot oil.
-
Simple Ingredients: You only need basic pantry staples like flour, milk, sugar, and baking powder.
-
Highly Versatile: It acts as a blank canvas. Serve it savory alongside soups and stews, or make it sweet with a drizzle of honey.
-
No Yeast Required: Because it uses baking powder as the leavening agent, there is no waiting around for the dough to rise.
Ingredients
-
All-Purpose Flour: 4 cups, plus extra for heavily flouring your work surface and hands.
-
Baking Powder: 3 tablespoons. This is not a typo! The baking powder is essential for getting that signature puffy, airy texture.
-
Salt: 2 teaspoons to balance the flavors.
-
Sugar or Honey: ⅓ cup. You can use granulated sugar or liquid honey depending on what you have on hand.
-
Whole Milk: Around 4 cups. You will add this gradually until the dough reaches the perfect sticky consistency.
-
Frying Oil: Enough neutral oil (like canola or vegetable oil) to fill a large, deep pan for deep frying.
Step-by-Step Instructions
Step 1: Heat the Oil
Before you get your hands into the dough, prepare your frying station. Pour your cooking oil into a large, deep heavy-bottomed pan or cast-iron skillet. You need enough oil to allow the dough to float. Place the pan over medium-high heat so it can gradually reach the proper frying temperature while you mix the ingredients.
Step 2: Whisk the Dry Ingredients
In a very large mixing bowl, combine the 4 cups of flour, 3 tablespoons of baking powder, 2 teaspoons of salt, and the sugar (if using honey, wait to add it with the milk). Whisk everything together thoroughly so the baking powder and salt are evenly distributed throughout the flour.
Step 3: Add the Milk
Gradually pour the milk (and honey, if using) into the dry ingredients. Stir the mixture together. The dough must be sticky. If it feels too dry or crumbly, continue adding a little more milk until it reaches the right wet consistency. It should not look like a smooth, firm bread dough.
Step 4: Coat in Flour
Sprinkle a generous amount of flour onto your clean work surface. Carefully turn the sticky dough out onto the floured counter. Gently roll the dough around in the flour just until the outside is completely covered and it is manageable to handle without sticking entirely to your fingers. Do not knead the dough!
Step 5: Shape the Frybread
Pinch off a piece of dough roughly the size of a large biscuit. Place it onto your floured surface and lightly press it down with your fingers to gently flatten it into a disc. Use your index finger to poke a distinct hole right through the center of the dough. This hole ensures the bread fries evenly and prevents the center from puffing up into a giant balloon.
Step 6: Fry to Golden Brown
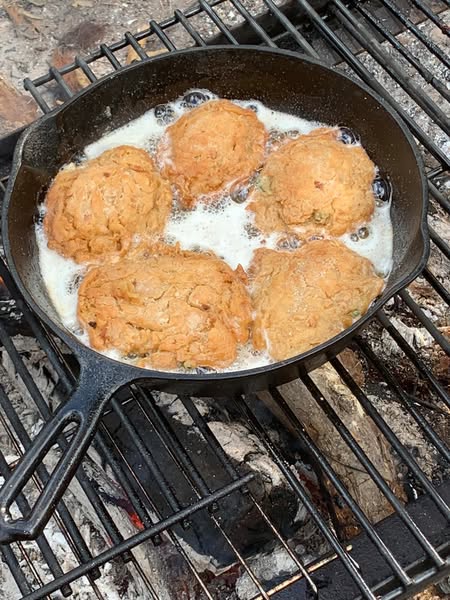
Carefully lower 2 or 3 shaped dough pieces into the hot oil. Fry them until you see the edges turn a beautiful golden color. Carefully flip the frybread using tongs or a slotted spoon, and fry the second side until it matches the top.
Step 7: Drain and Serve
Once golden brown and cooked through, remove the frybread from the hot oil. Transfer them to a baking sheet or wire rack lined with paper towels to drain any excess oil. Serve them immediately while they are hot and crisp!
Expert Cooking Tips
-
Embrace the Stickiness: The biggest mistake beginners make is adding too much flour to the dough to make it smooth. A sticky, highly hydrated dough is exactly what makes the inside of the frybread so light and fluffy.
-
Do Not Knead: Treat this dough more like a delicate biscuit dough than a traditional bread dough. Overworking or kneading it will develop the gluten and result in tough, chewy frybread.
-
Keep Hands Floured: Because the dough is naturally sticky, keep a small bowl of flour nearby to continuously dust your fingers while pinching and shaping the discs.
-
Test the Oil: To check if your oil is ready, drop a tiny pinch of dough into the pan. If it immediately sizzles and floats to the top, the oil is hot enough. If it sinks, let the oil heat up a bit longer.
-
The Center Hole is Crucial: Never skip poking a hole in the middle. Hot oil needs to circulate through the center of the dough to cook it evenly, otherwise, you will end up with raw dough in the middle.
Variations to Try
-
Classic Indian Tacos: Top the freshly fried bread with warm chili or seasoned ground beef, shredded lettuce, diced tomatoes, sharp cheddar cheese, and a dollop of sour cream.
-
Sweet Dessert Bread: Immediately after removing the bread from the hot oil, toss it in a mixture of cinnamon and sugar, or drizzle it generously with warm honey and powdered sugar.
-
Garlic and Herb: Add a teaspoon of garlic powder and a handful of finely chopped fresh herbs to the dry ingredients before adding the milk for a savory side dish.
What to Serve With Kiowa Frybread
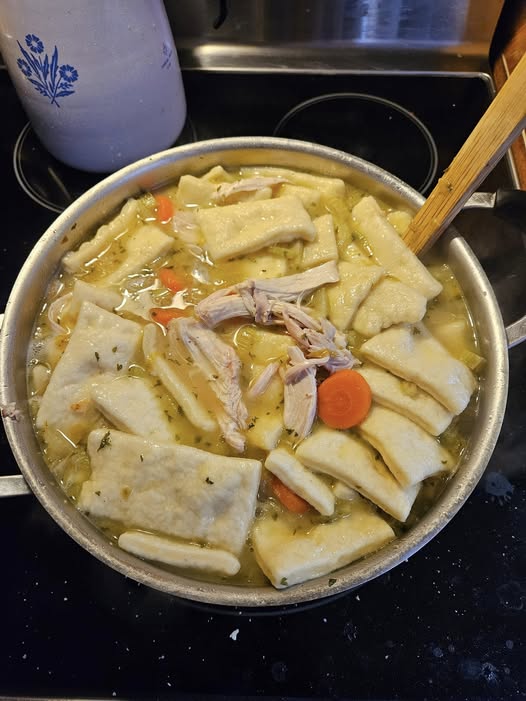
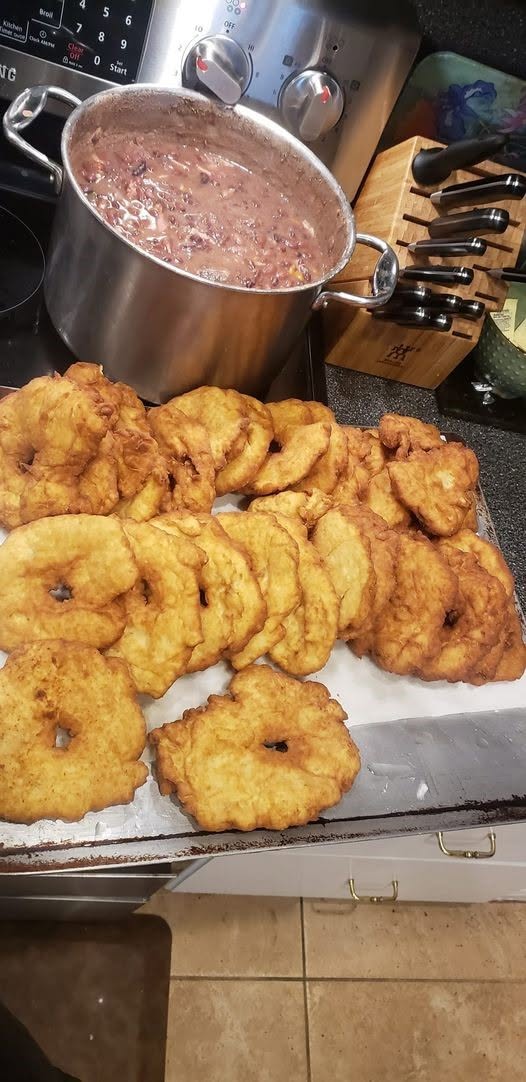
Frybread is deeply comforting and acts as the perfect vessel for soaking up rich flavors. As pictured, serving a massive platter of warm frybread alongside a large, simmering pot of hearty red beans or chili is a household favorite. It is also incredible when served alongside a thick beef stew, roasted meats, or simply enjoyed with a pat of butter and a drizzle of real maple syrup for breakfast.
Storage & Reheating
Refrigerator
Allow any leftover frybread to cool completely to room temperature. Place the pieces in an airtight container or a large ziplock bag lined with a paper towel to absorb moisture. Store in the refrigerator for up to 3 days.
Freezer
Frybread freezes beautifully! Wrap completely cooled pieces individually in plastic wrap, then place them all into a heavy-duty freezer bag. Squeeze out as much air as possible. Freeze for up to 2 months. Thaw on the counter at room temperature before reheating.
Reheating
To bring back that fresh, crispy exterior, the oven is your best option. Preheat your oven to 350°F. Place the frybread on a wire rack over a baking sheet and bake for 5 to 7 minutes until warmed through and crispy. Avoid the microwave, as it will make the bread soggy and tough.
Frequently Asked Questions
Why is my frybread tough and chewy?
Tough frybread is usually the result of overmixing or kneading the dough. You want to handle the dough as little as possible. Only roll it in the flour enough to make it manageable to shape.
What kind of oil is best for frying?
You need an oil with a high smoke point for deep frying. Canola oil, vegetable oil, peanut oil, or corn oil are all excellent, neutral-tasting choices that can handle the heat without burning.
Can I use water instead of milk?
While some traditional recipes do use water, milk adds richness, flavor, and a slightly softer crumb to the bread. If you are out of milk, water will work in a pinch, but milk is highly recommended for the best texture.
Why did my frybread absorb so much oil?
Greasy frybread means your frying oil was not hot enough. If the oil is too cool, the dough will sit and absorb the grease rather than rapidly cooking and forming a crisp outer crust. Ensure your oil is hot before dropping the dough in.
Do I have to make the pieces biscuit-sized?
You can absolutely make them larger if you prefer! A biscuit-sized pinch is perfect for a side dish or snack, but if you are making Indian Tacos, you may want to pinch off larger, handful-sized pieces to create a bigger base.
Final Thoughts
Making authentic frybread is a labor of love, but once you master the feel of the sticky dough and the rhythm of the hot oil, it becomes second nature. This recipe carries so much history and warmth, and sharing it with family around a big pot of beans or chili is an experience everyone should enjoy. Do not be afraid to get a little flour on your hands—the results are entirely worth it!
Authentic Kiowa Indian Frybread
Ingredients
Equipment
Method
- Pour enough oil into a large, deep pan for deep frying. Heat over medium-high heat.
- In a large bowl, whisk together the 4 cups of flour, baking powder, salt, and sugar. (If using honey, add it in the next step).
- Gradually add the milk to the dry ingredients, mixing as you pour. The dough must be sticky. Add enough milk to reach a wet, sticky consistency.
- Heavily flour your clean work surface. Turn the sticky dough out onto the flour.
- Gently roll the dough around until it is completely covered in flour and easy to handle. Do not knead.
- Pinch off a biscuit-sized piece of dough. Lightly press it with your fingers on the floured surface to flatten it.
- Use your index finger to poke a hole directly through the center of the dough.
- Carefully drop 2 or 3 pieces into the hot oil. Fry until the edges turn golden, then flip and fry until the other side is equally golden brown.
- Remove from the oil and drain on a plate lined with paper towels. Serve warm!
Notes