Old Fashioned Anise Pizzelle Cookies (Thin & Crispy)
Old-Fashioned Anise Pizzelle Cookies (Thin and Crispy Italian Christmas Recipe)
There’s something special about an old pizzelle iron and a handwritten family recipe. For many Italian-American families, making pizzelle cookies is a Christmas tradition that brings back memories of Grandma’s kitchen, the smell of anise, and stacks of delicate cookies cooling on the counter.
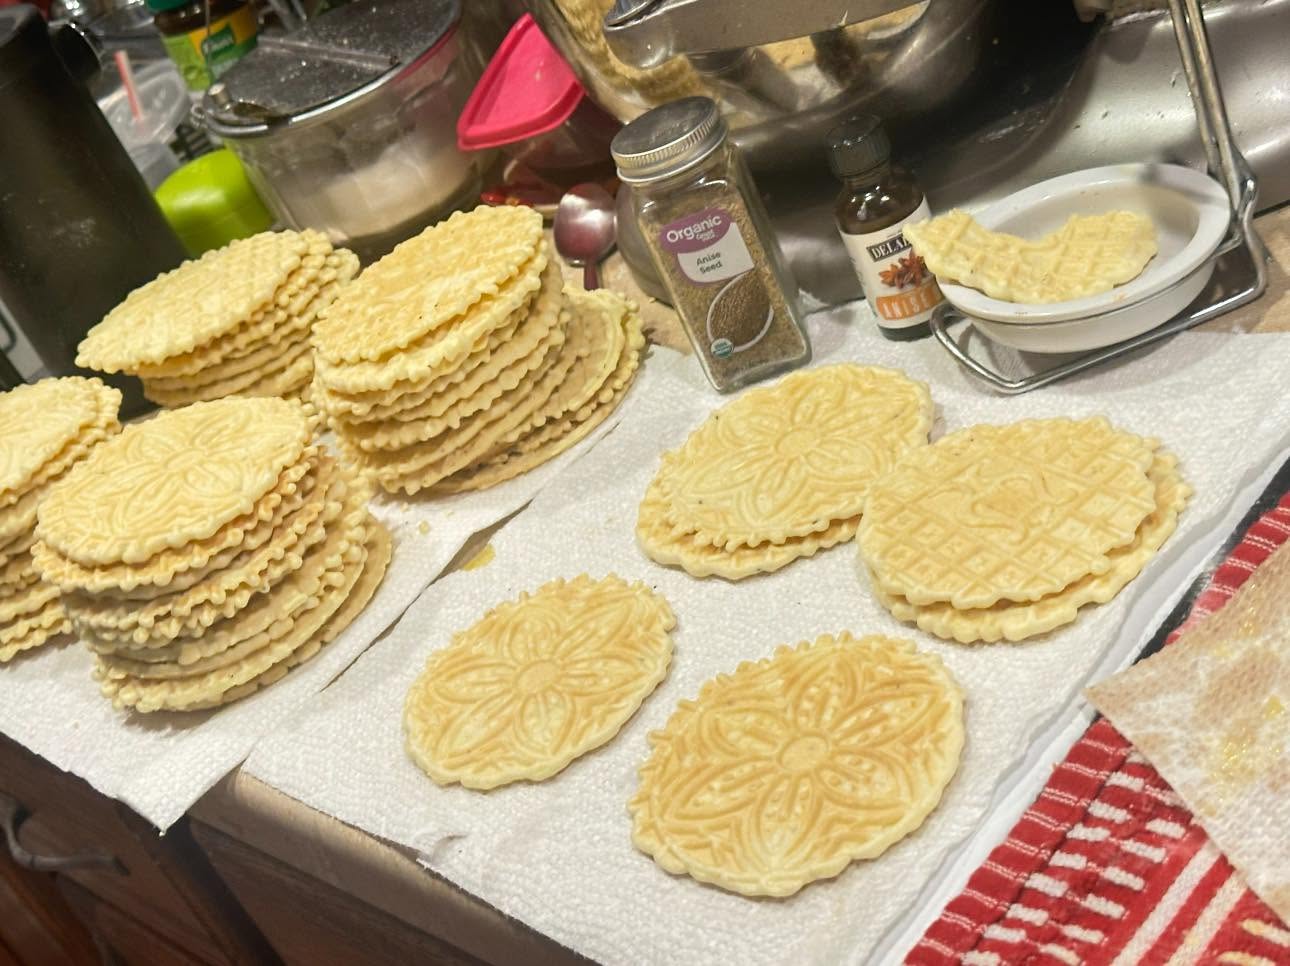
These Old-Fashioned Anise Pizzelle Cookies are thin, lightly golden, and wonderfully crisp, with beautiful patterns pressed into every cookie.
Pizzelles look fancy, but they’re surprisingly simple to make. You only need a few basic ingredients and a pizzelle iron.
The secret is getting the cookies thin enough, cooking them properly, and allowing them to cool completely before storing.
If you grew up eating homemade pizzelles at Christmas, this recipe is a lovely way to bring back that tradition.
What Are Pizzelle Cookies?
Pizzelles are traditional Italian waffle cookies made in a special iron that presses decorative patterns into the dough.
They’re especially popular during Christmas in Italian-American households, although many families make them for weddings, Easter, and other celebrations.
Traditional flavors include anise, vanilla, and lemon.
Anise pizzelles have a distinctive sweet, licorice-like aroma that many people associate with old-fashioned Italian baking.
Why You’ll Love This Recipe
- Thin and crispy: Perfect for anyone who prefers crunchy pizzelles.
- Small batch: Makes approximately 18–24 cookies.
- Traditional anise flavor: A familiar Italian-American holiday favorite.
- Simple ingredients: Flour, eggs, sugar, butter, and flavoring.
- Beautiful designs: The pizzelle iron creates decorative patterns.
- Great for gifting: Stack them in Christmas cookie tins.
Ingredients You’ll Need
Eggs: Two large eggs give the cookies structure.
Granulated Sugar: Adds sweetness and helps the pizzelles brown.
Unsalted Butter: Melted and cooled butter adds richness.
All-Purpose Flour: Creates the structure of the thin cookies.
Baking Powder: A small amount helps give the cookies a delicate texture.
Anise Extract: Provides the classic Italian-American flavor.
Anise Seeds: Optional, but wonderful if you enjoy the traditional flavor and little flecks throughout the cookies.
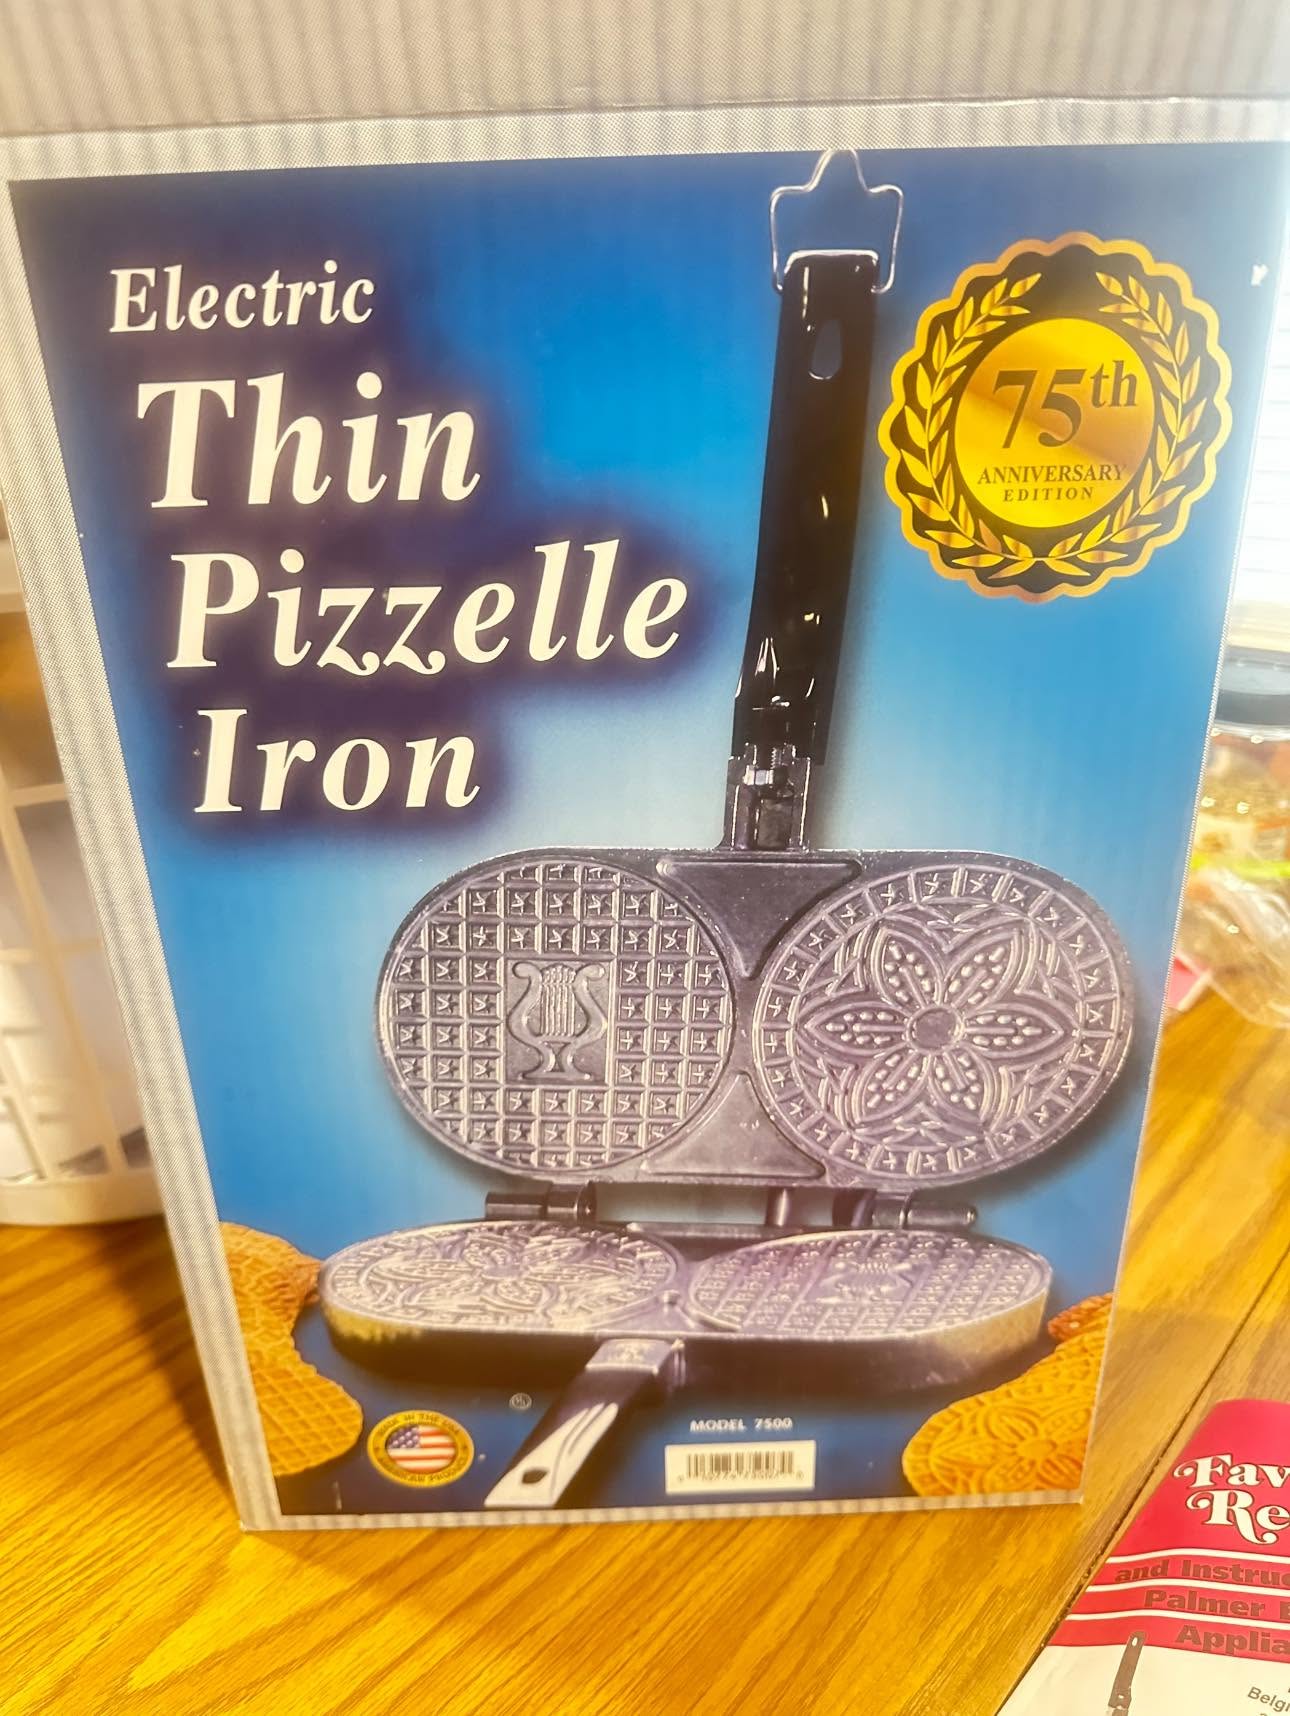
The Traditional Pizzelle Iron
One of the most memorable parts of making pizzelles is the iron itself.
Some families still use old stovetop irons, while others prefer electric pizzelle makers.
The electric thin pizzelle iron shown in the family photos has beautiful decorative plates that press traditional patterns into the cookies.
For the best results, allow your iron to preheat completely before adding the dough.
How to Make Crispy Anise Pizzelles
Step 1: Preheat the Iron
Preheat your electric pizzelle iron according to the manufacturer’s instructions.
Lightly grease the plates only if recommended for your model.
Step 2: Beat the Eggs and Sugar
In a medium mixing bowl, beat the eggs and granulated sugar until smooth and slightly thickened.
You can use a hand mixer, stand mixer, or whisk.
Step 3: Add Butter and Anise
Slowly mix in the melted, cooled butter.
Add the anise extract and optional anise seeds.
Stir until combined.
Step 4: Add the Dry Ingredients
In a separate bowl, whisk together the flour and baking powder.
Gradually add the dry ingredients to the egg mixture.
Mix just until a thick, smooth batter forms.
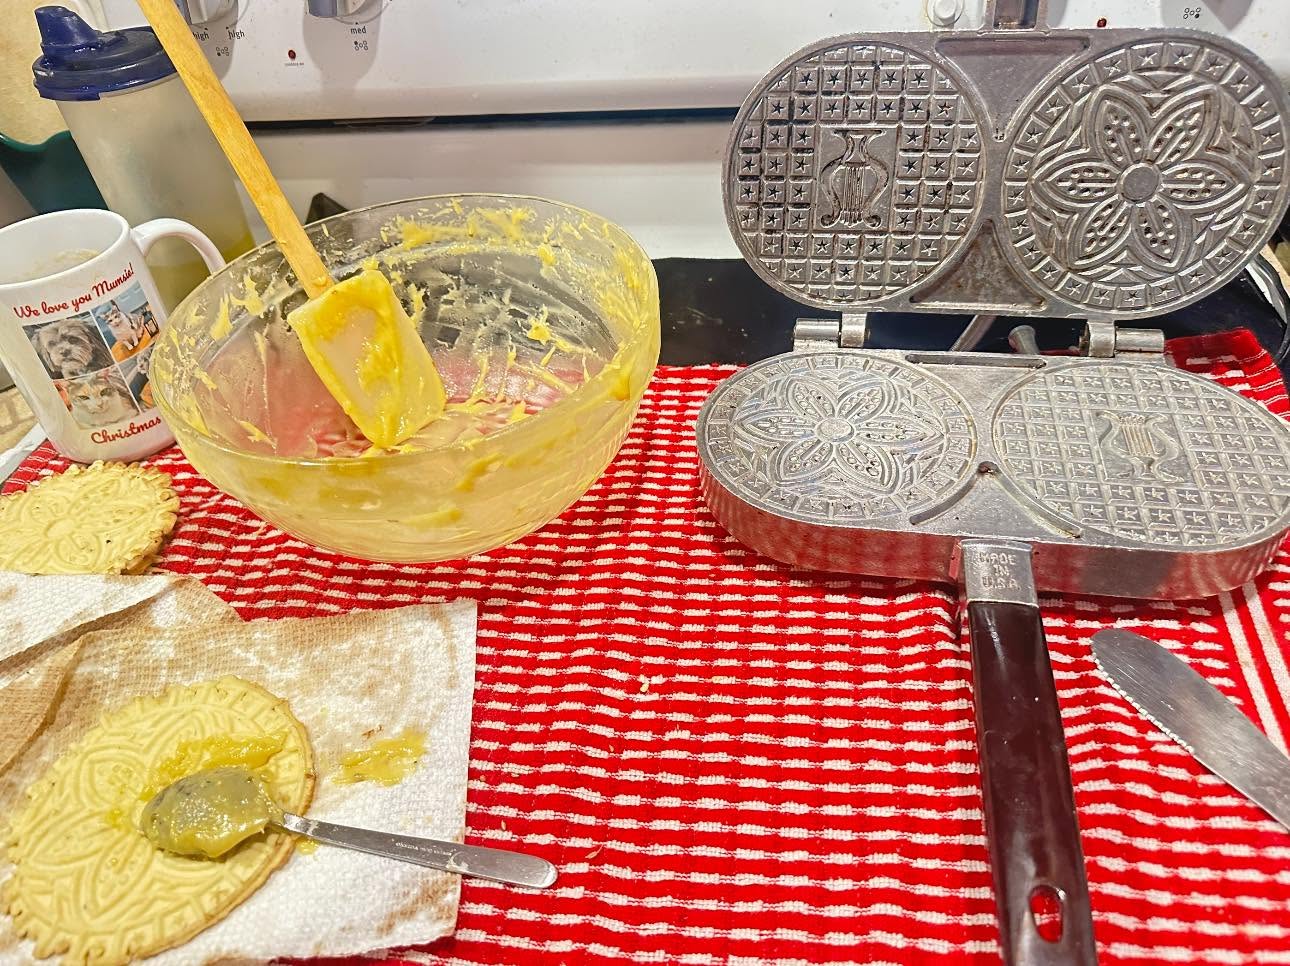
Step 5: Cook the Pizzelles
Place a small spoonful of batter in the center of each pizzelle pattern.
Close the iron gently and cook according to its instructions, usually around 30 seconds to 2 minutes, until the cookies are lightly golden.
Avoid using too much batter because it can overflow the plates.
Step 6: Cool Until Crispy
Carefully remove the hot pizzelles with a heat-resistant utensil.
Place them flat on a wire cooling rack in a single layer.
Do not stack them while warm.
They should become firmer and crispier as they cool.
Step 7: Serve
Once completely cooled, enjoy the pizzelles plain or lightly dusted with powdered sugar.
They’re wonderful with coffee, espresso, or hot tea.
Grandma-Style Tips for Crispy Pizzelles
Preheat the iron thoroughly. A properly heated iron helps the batter cook evenly.
Don’t use too much batter. A small amount spreads into a thin cookie.
Cook until lightly golden. Very pale pizzelles may retain too much moisture.
Use a wire rack. Cooling on a flat plate can trap steam underneath.
Never stack warm cookies. Allow them to cool completely first.
Watch the humidity. Moisture in the air can soften delicate cookies.
Follow the iron instructions. Use the locking mechanism only as recommended by the manufacturer.
Why Are My Pizzelles Soft Instead of Crispy?
This is one of the most common problems when making homemade pizzelles.
If your cookies are soft, they may need a little longer in the iron.
Using too much batter can also produce thicker cookies that don’t crisp as easily.
Another common mistake is stacking pizzelles before they’re completely cool.
If your finished cookies have softened, place them in a single layer on a baking sheet and warm them in a 300°F oven for approximately 3–5 minutes. Watch closely, then cool completely on a wire rack.
Easy Pizzelle Variations
Vanilla Pizzelles: Replace the anise extract with vanilla extract.
Lemon Pizzelles: Use lemon extract and a little finely grated lemon zest.
Orange Pizzelles: Add orange zest for a bright citrus flavor.
Chocolate Pizzelles: Replace 2 tablespoons of flour with unsweetened cocoa powder.
How to Store Pizzelles and Keep Them Crispy
Store completely cooled pizzelles in an airtight metal cookie tin or sealed container at room temperature.
Keep them in a cool, dry place for up to one week for the best texture.
Avoid refrigerating pizzelles because moisture can make them soft.
For longer storage, freeze completely cooled cookies in a freezer-safe container for up to one month.
Let frozen cookies reach room temperature while still wrapped before opening the container.
[Insert Photo 2 — Packaged Pizzelle Cookies Here]
Frequently Asked Questions
Should I use a hand mixer or stand mixer?
Either works. A hand mixer is perfectly suitable for a small batch.
Do I need to beat the eggs before adding them?
No. You can add whole eggs directly to the mixing bowl and beat them with the sugar.
Should I lock the pizzelle iron?
Follow the manufacturer’s instructions for your particular model. Don’t force the handle closed.
Can I make pizzelles without anise?
Yes. Vanilla and lemon are popular alternatives.
Can I make pizzelles ahead of Christmas?
Absolutely. Store them properly in an airtight container once completely cooled.
A Sweet Italian-American Christmas Memory
For many families, making pizzelles was never just about baking cookies.
It was about gathering around the kitchen, waiting for the iron to heat, and carefully stacking those beautiful little waffle cookies.
Some families made them with anise, while others preferred vanilla or lemon.
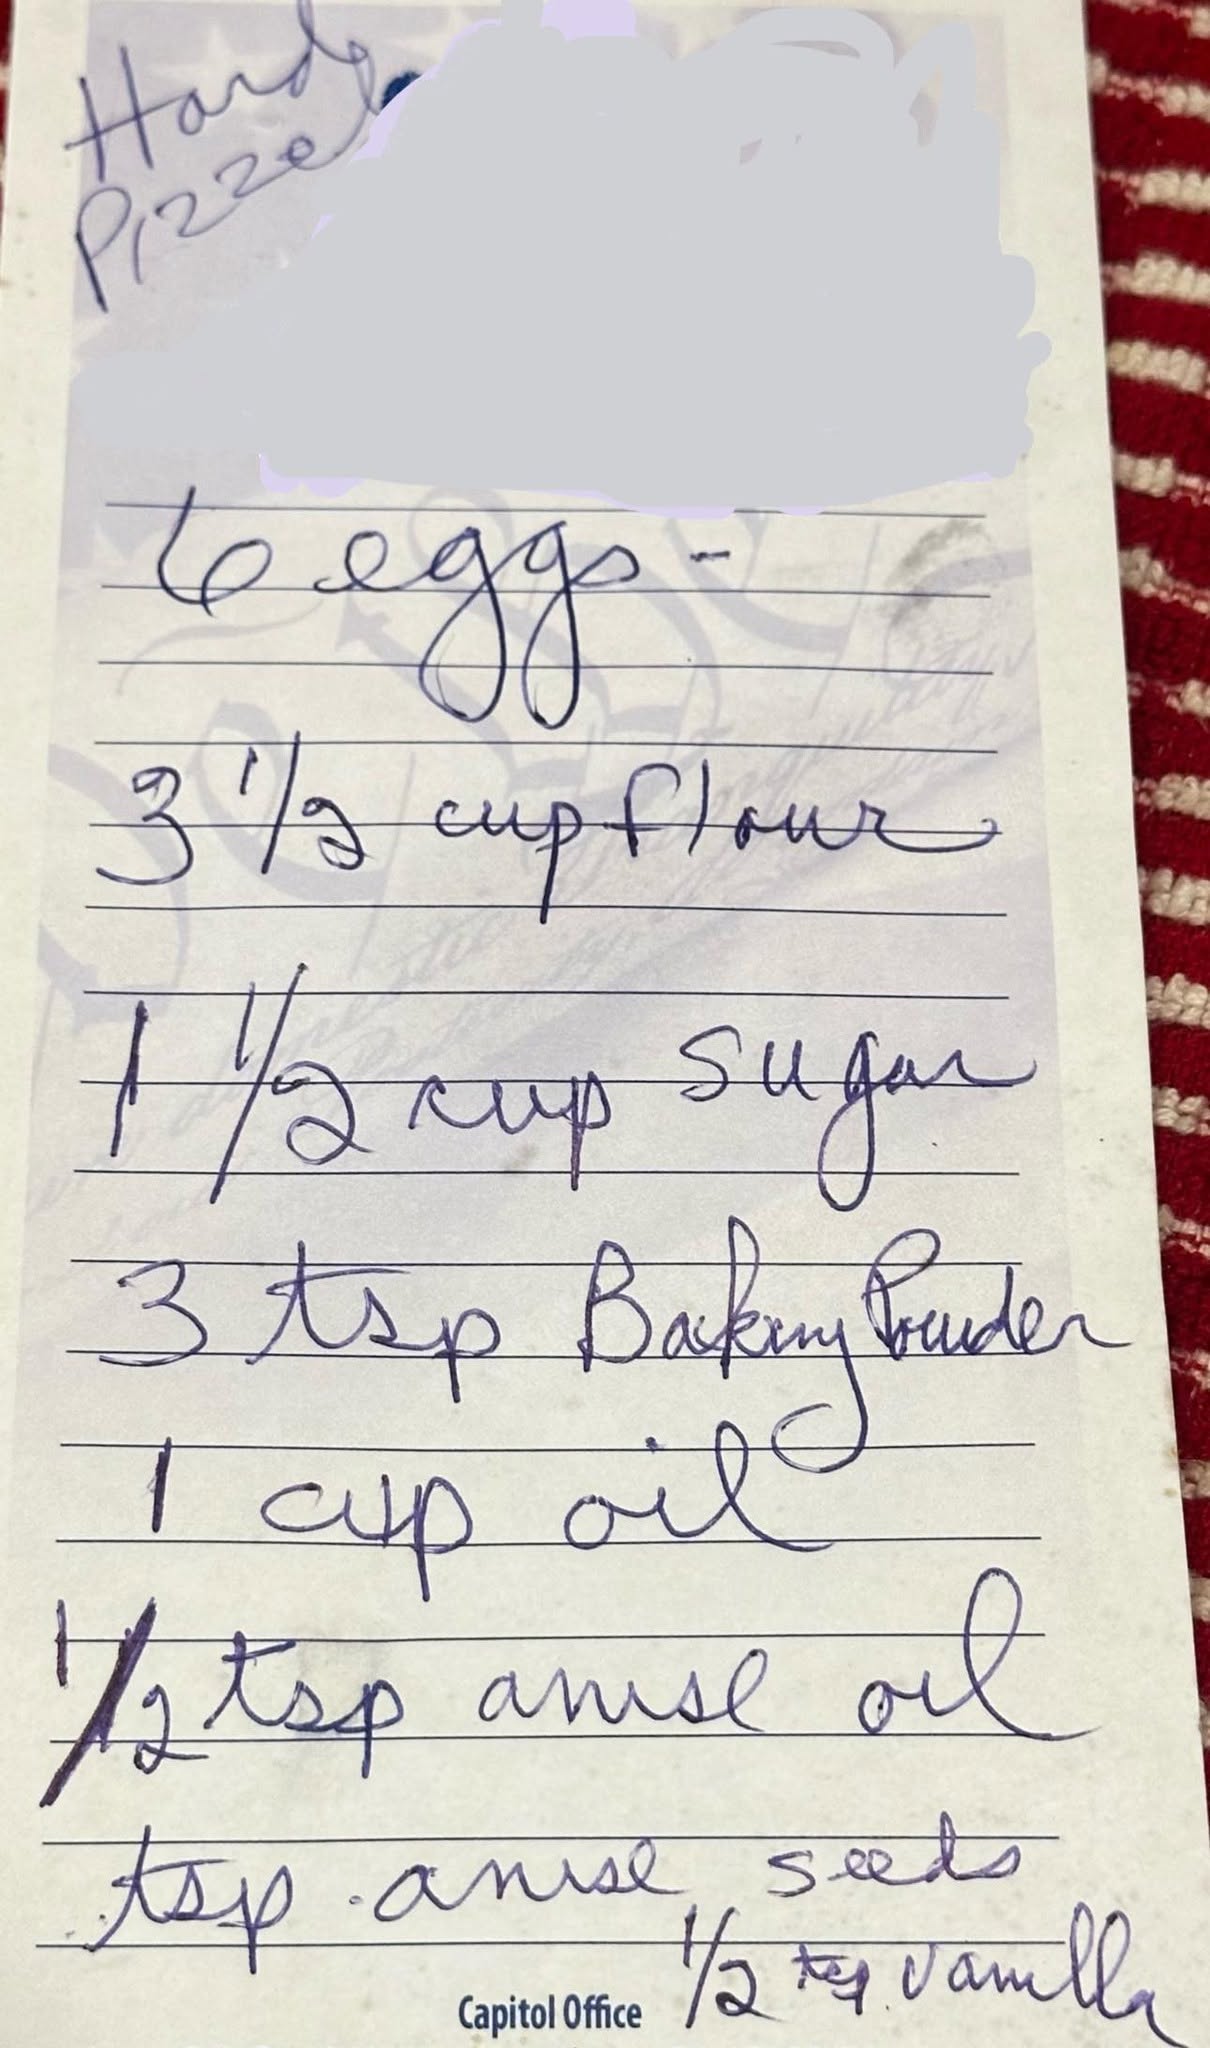
And sometimes, the most treasured part of the tradition was the old handwritten recipe that had been passed down for years.
These old-fashioned cookies are a wonderful reminder that the simplest Christmas traditions are often the ones we remember longest.
Did your Nonna or Grandma make pizzelles at Christmas? Did your family prefer anise, vanilla, or lemon?
WP Recipe Maker Card
Old-Fashioned Crispy Anise Pizzelle Cookies
Description: Thin, crisp Italian-American pizzelle cookies made with eggs, butter, flour, and traditional anise flavoring. Perfect for Christmas cookie tins and homemade holiday gifts.
Course: Dessert, Cookies
Cuisine: Italian-American
Method: Electric Pizzelle Iron
Prep Time: 10 minutes
Cook Time: Approximately 20–30 minutes for the full batch, depending on the iron
Total Time: Approximately 40 minutes
Yield: Approximately 18–24 pizzelles
Ingredients
- 2 large eggs
- ½ cup (100 g) granulated sugar
- ⅓ cup (76 g) unsalted butter, melted and cooled
- 1 cup (125 g) all-purpose flour
- 1 teaspoon baking powder
- ½ teaspoon anise extract
- ½ teaspoon anise seeds, optional
Instructions
- Preheat the pizzelle iron according to the manufacturer’s instructions.
- In a mixing bowl, beat the eggs and sugar until smooth and slightly thickened.
- Add the melted, cooled butter, anise extract, and optional anise seeds.
- In a separate bowl, whisk together the flour and baking powder.
- Gradually mix the dry ingredients into the wet ingredients until a thick batter forms.
- Place a small spoonful of batter in the center of each pizzelle pattern.
- Close the iron and cook according to its instructions until lightly golden, approximately 30 seconds to 2 minutes.
- Carefully remove the pizzelles and place them flat on a wire rack.
- Allow them to cool completely without stacking.
- Serve plain or with a light dusting of powdered sugar.
Recipe Notes
- This is a suggested small-batch alternative, not the exact handwritten recipe, and has not been kitchen-tested here.
- Use a fully preheated pizzelle iron.
- Avoid overfilling the plates.
- Let each cookie cool completely on a wire rack.
- Store in an airtight container for up to one week.
- If the cookies soften, briefly warm them in a 300°F oven for 3–5 minutes and cool again.