Old-Fashioned Fudge Icing Recipe (Authentic Boiled Frosting)
The Best Old-Fashioned Fudge Icing
How to Make Authentic Boiled Fudge Icing
There is a distinct difference between standard buttercream and a true, old-fashioned fudge icing. If you grew up enjoying cakes from a Southern grandmother’s kitchen, you likely remember that incredible chocolate topping that shatters slightly when you cut into it but instantly melts in your mouth. This traditional boiled icing is essentially homemade fudge transformed into a pourable, spreadable dream.
Mastering this recipe feels like a baking rite of passage. Because it relies on the science of candy making, it requires a bit of patience and attention to detail. Boiling sugar and cocoa to the exact right stage, followed by vigorous beating, is what creates that signature creamy texture that sets up with a beautiful, matte finish. Do not be discouraged if it takes a try or two to learn exactly what it looks like when the icing is ready to pour.
Once you get the hang of it, you will never want to top your brownies or yellow cakes with anything else. The flavor is intensely rich, deeply chocolatey, and perfectly sweet. Whether you are baking for a church potluck, a holiday gathering, or a simple Sunday dinner, this nostalgic frosting is guaranteed to steal the show. Grab your heavy-bottomed pot and a reliable timer, and let’s make some magic.
Why You’ll Love This Recipe
-
Incredible Texture: It forms a delightfully crisp outer shell while remaining soft and fudgy underneath.
-
Deep Chocolate Flavor: Boiling the cocoa powder blooms it, releasing an incredibly rich, intense chocolate taste.
-
No Powdered Sugar Needed: Unlike traditional frostings, this relies entirely on granulated sugar for a true candy-like finish.
-
Perfect for Warm Cakes: You pour it directly over your baked goods, locking in moisture and creating a seamless coating.
-
Highly Nostalgic: It brings back the authentic, comforting taste of vintage, scratch-made baking.
Ingredients
-
Granulated Sugar: 2 cups. This is the foundation of the icing, creating the candy-like structure.
-
Unsweetened Cocoa Powder: ½ cup. Standard cocoa works perfectly here to deliver that classic chocolate punch.
-
Salt: ¼ teaspoon to balance the sweetness and enhance the chocolate flavor.
-
Whole Milk: ½ cup. The fat and liquid help dissolve the sugar and create a smooth syrup.
-
Butter: ½ cup (1 stick). Use unsalted or salted, but ensure it is ready to drop into the pot to add richness and gloss.
-
Vanilla Extract: 1 teaspoon of pure vanilla extract, added at the very end to preserve its delicate flavor.
Step-by-Step Instructions
Step 1: Combine the Dry Ingredients
Start by selecting a medium-sized, heavy-bottomed pot. A heavy pot is crucial because it distributes heat evenly and prevents the sugar from scorching. Add the granulated sugar, cocoa powder, and salt. Use a wire whisk to blend them together thoroughly, ensuring there are no hidden lumps of cocoa powder remaining.
Step 2: Add the Milk and Butter
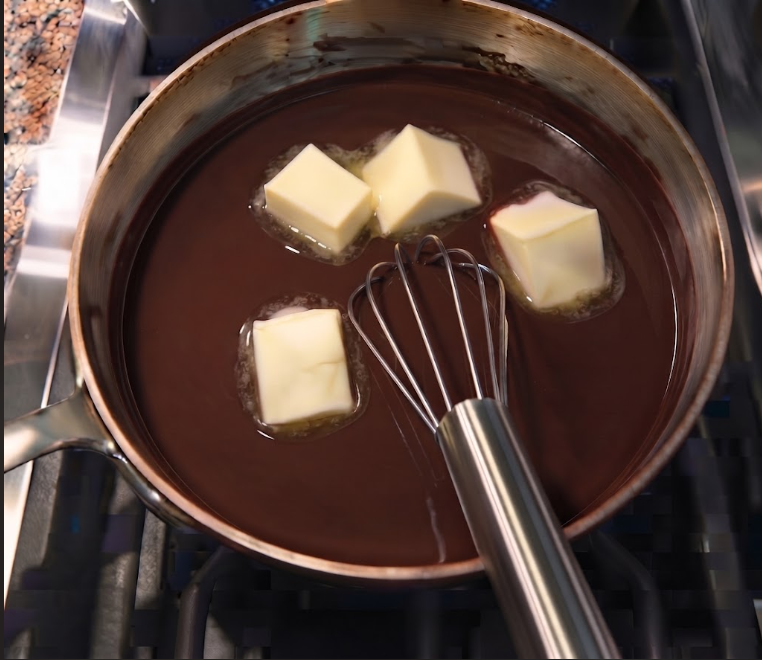
Switch from your whisk to a sturdy wooden spoon or heat-safe silicone spatula. Gradually pour the milk into the dry mixture, stirring until it forms a thick paste. Next, drop your stick of butter right into the pot.
Step 3: The Rapid Boil
Place the pot over medium-high heat. Stir the mixture constantly as the butter melts and the liquid heats up. Bring the mixture to a full, rolling boil. You will know it is ready when the bubbles are vigorous and cannot be stirred down. From the exact moment it hits this rapid boil, set a timer for exactly 3 minutes and 45 seconds. Continue to stir constantly so nothing burns on the bottom.
Step 4: Add Vanilla and Cool
As soon as your timer goes off, immediately remove the pot from the heat. Stir in the vanilla extract. We add the vanilla off the heat because boiling it will cause the flavor to evaporate. Allow the mixture to sit in the pot and cool undisturbed for no more than 5 minutes.
Step 5: Beat Until Creamy
After the brief resting period, it is time to build the fudge structure. Using a handheld electric mixer, or transferring the mixture to a stand mixer fitted with a whisk attachment, begin beating the icing. Start on a low speed to avoid splashing, then gradually increase to high. Beat for exactly 5 to 10 minutes.
Step 6: Watch for the Change
You must watch the texture closely. As you beat, the icing will transform from a dark, glossy liquid into a thicker, creamier frosting. You will know it is ready when it loses its shiny gloss and takes on a dull, matte appearance. You will also notice it starting to stiffen and pull away slightly along the edges of the bowl.
Step 7: Pour Immediately
The moment the icing turns dull and creamy, stop beating. You must work quickly at this stage! Immediately pour and spread the hot fudge icing over your prepared cake or brownies. It sets up very fast, so if you want to add chopped nuts, sprinkle them on top the second the icing is spread.
Expert Cooking Tips
-
Mind the Weather: Candy making is highly sensitive to humidity. If you are baking on a rainy or very humid day, it may take the icing a few extra minutes of beating to properly set up and lose its shine.
-
Have Everything Ready: This recipe moves fast once the boiling stops. Have your baked cake sitting nearby, and your vanilla and mixer out on the counter before you even turn on the stove.
-
Do Not Skimp on the Boil: The 3-minute and 45-second boil time is not a suggestion; it is the exact time needed for the sugar syrup to reach the soft-ball stage. Use a digital timer for accuracy.
-
Use a Heavy Pot: Thin metal pots will cause the sugar to heat unevenly and likely burn before the timer goes off. Cast iron or heavy-bottomed stainless steel are your best options.
-
Recognize the “Dull” Stage: If you pour the icing while it is still highly glossy, it will not set up and will remain a sticky syrup on your cake. Wait for that distinctive matte finish.
Variations to Try
-
Pecan Fudge Icing: As soon as you pour the icing onto your cake, immediately generously cover the top with toasted, chopped pecans for a classic Southern variation.
-
Espresso Fudge: Whisk one teaspoon of instant espresso powder into the dry ingredients before adding the milk. This deepens the chocolate flavor without making it taste overwhelmingly like coffee.
-
Dark Chocolate: Swap out standard cocoa powder for Dutch-processed dark cocoa powder to create an intensely dark, less sweet topping.
What to Serve With Old-Fashioned Fudge Icing
This icing is incredibly versatile for simple, single-layer bakes. It is the absolute perfect topping for a classic 9×13 yellow sheet cake, providing the ultimate flavor contrast. It is also phenomenal poured over warm, dense, homemade brownies. Because the icing is quite sweet and rich, serving your cake with an ice-cold glass of milk or a scoop of unsweetened vanilla bean ice cream is highly recommended.
Storage & Reheating
Refrigerator
Cakes topped with boiled fudge icing should ideally be kept at room temperature. Storing the cake in the refrigerator can introduce moisture, which causes the crisp, candy-like shell of the icing to sweat and become sticky. Cover your cake lightly with foil or a cake dome and store it on the counter for up to 3 days.
Freezer
While you can freeze a cake that has already been iced, you should not freeze the icing on its own. If freezing an iced cake, wrap it tightly in plastic wrap and foil. Allow it to thaw completely at room temperature before unwrapping to preserve the texture of the fudge.
Reheating
This icing cannot be reheated once it has been made and poured. It relies on a specific crystalline structure formed during the boiling and beating process. If it hardens in the pot before you can pour it, it unfortunately cannot be salvaged by simply melting it back down.
Frequently Asked Questions
Why did my icing turn out grainy?
Grainy icing is usually the result of the sugar not dissolving completely during the boiling stage, or from scraping the sides of the pot too aggressively while it cooks. Make sure to whisk the dry ingredients well and stir consistently, but gently, while boiling.
Why didn’t my icing set up and harden?
If your icing remained sticky and glossy, it either did not boil for the full 3 minutes and 45 seconds, or it was not beaten long enough afterward. The beating process is what forces the sugar to crystallize and set into that signature fudge texture.
Can I make this icing ahead of time?
No, boiled fudge icing must be made exactly when you are ready to use it. It sets up rapidly as it cools and is beaten. If you try to make it ahead of time, it will harden into a solid block in your mixing bowl.
Do I have to use a mixer?
While our grandmothers often beat this icing by hand with a wooden spoon, it takes immense arm strength and stamina to beat hot fudge for 10 minutes continuously. An electric hand mixer or stand mixer is highly recommended to save your arms and ensure the correct texture.
Can I use this icing for a layer cake?
This icing is best suited for sheet cakes, brownies, or bundt cakes where it can be poured over the top. Because it sets up quickly and firmly, trying to spread it between delicate cake layers or using it to frost the sides of a tall cake can be quite difficult and messy.
Final Thoughts
Making old-fashioned fudge icing is an art form that brings a true sense of accomplishment to any baker. Do not let the boiling and beating intimidate you! With a reliable timer and a close eye on the texture, you will quickly master the exact moment to pour this glorious, rich chocolate topping. Enjoy the process, and enjoy the incredible, melt-in-your-mouth results even more.
Old-Fashioned Chocolate Fudge Icing
A traditional, vintage boiled fudge icing that pours beautifully over warm cakes and sets up with a perfectly crisp, fudgy texture
Ingredients
Method
- n a medium, heavy-bottomed pot, whisk together the sugar, cocoa powder, and salt until well combined.
- Switch to a wooden spoon and gradually stir in the milk. Add the stick of butter to the pot.
- Place the pot over medium-high heat. Stir constantly as the butter melts and the mixture comes to a full, rapid boil that cannot be stirred down.
- Once it reaches a rolling boil, set a timer for exactly 3 minutes and 45 seconds. Boil continuously, stirring constantly.
- Immediately remove the pot from the heat. Stir in the vanilla extract.
- Allow the mixture to sit and cool for no more than 5 minutes.
- Using an electric mixer (start on low and increase to high), beat the icing for 5 to 10 minutes.
- Watch closely: The icing is done when it loses its shiny gloss, becomes dull and creamy, and begins to stiffen along the edges of the bowl.
- Immediately pour and quickly spread the icing over your baked cake or brownies. Top with chopped nuts right away, if using.
Notes
Humidity matters: On hot or rainy days, you may need to beat the icing a few minutes longer for it to lose its shine and set up properly.
Work fast: Once the icing reaches the dull stage, it sets up almost instantly. Have your cake ready!