Grandma’s Jam Thumbprint Cookies (Easy Buttery Recipe)
Grandma’s Jam Thumbprint Cookies (Easy Buttery Recipe)
Jam thumbprint cookies bring a cheerful splash of color to a cookie plate with very little decorating. Each buttery cookie has a small well of raspberry or strawberry jam in the middle, giving you a tender bite followed by a bright, fruity finish. Their simple shape makes them a lovely choice for Christmas baking, an afternoon treat, or a homemade gift.
This version uses egg yolks and vanilla in a straightforward butter dough. You cream the butter and sugar, mix in the remaining ingredients, shape little balls, and fill their centers before baking. There is no icing to pipe or chocolate to melt, so the jam gets to be the star.
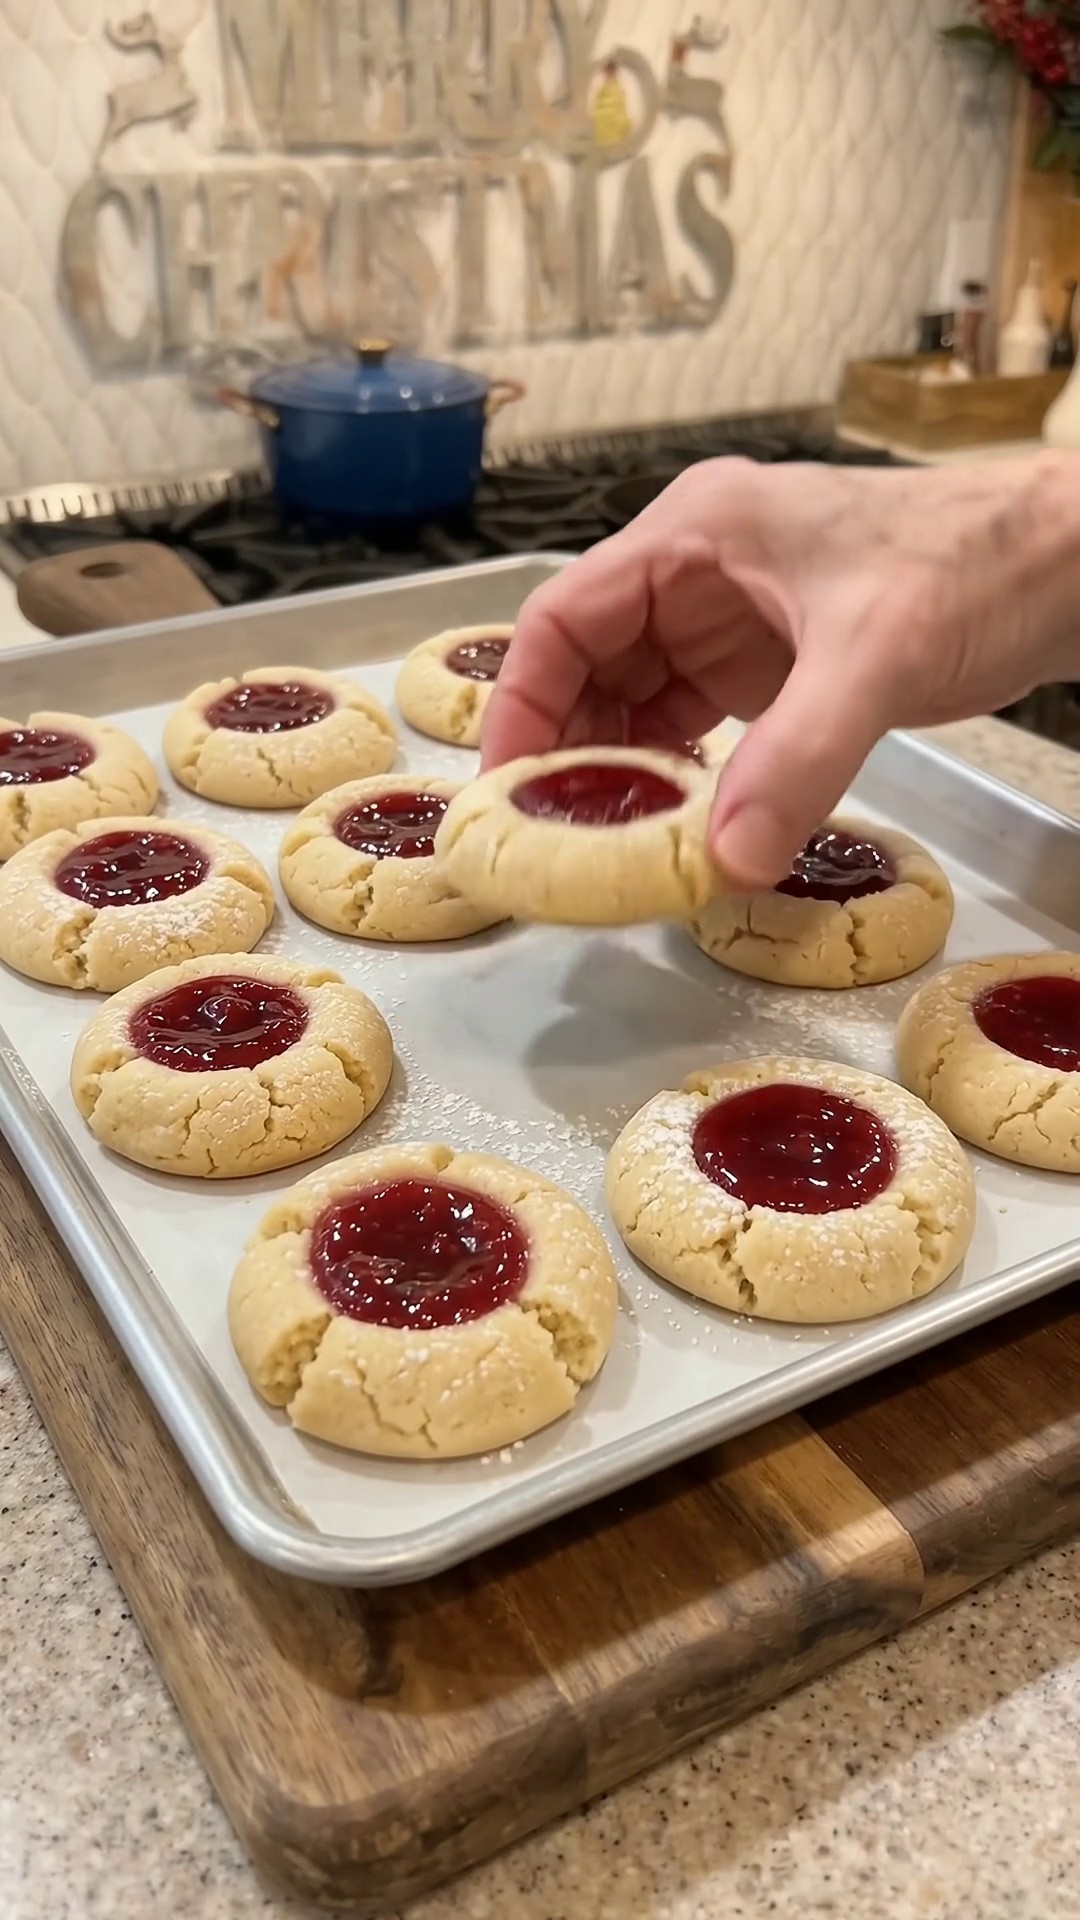
Oven: 350°F | Bake: 12–15 minutes per batch | Shape: 1-inch dough balls
Ingredients for Jam Thumbprint Cookies
- 1 cup unsalted butter, softened
- ⅔ cup granulated sugar
- 2 egg yolks
- 1 teaspoon vanilla extract
- 2 cups all-purpose flour
- ¼ teaspoon salt
- ½ cup raspberry or strawberry jam
Choose a jam you enjoy eating on toast. A thick, spoonable jam is easier to keep inside the little wells than a thin, runny preserve. Soften the butter until it yields to gentle pressure while still holding its shape; it should not be melted or oily.
How to Make Jam Thumbprint Cookies
1. Prepare the Oven and Baking Sheets
Heat the oven to 350°F. Line baking sheets with parchment paper and set out your ingredients. Keeping everything nearby makes it easier to work through the shaping stage without repeatedly handling the dough.
2. Cream the Butter and Sugar
Beat the softened butter and sugar in a mixing bowl until creamy and evenly combined. Scrape the sides and bottom of the bowl, then beat briefly again. Any unmixed streaks of butter can affect how individual cookies spread.
3. Add the Yolks and Vanilla
Beat in the egg yolks and vanilla. Mix until the dough base looks smooth. The yolks add richness without the extra liquid from whole eggs, helping create a tender cookie that supports its jam filling.
4. Mix in Flour and Salt
Add the flour and salt and mix just until the dough comes together. Stop when there are no dry pockets. If using an electric mixer, keep the speed low so flour stays in the bowl, then finish with a spatula if needed.
5. Shape and Fill
Roll the dough into 1-inch balls and arrange them on the prepared sheets with space between each one. Gently press a thumb or the rounded back of a small measuring spoon into each ball. Make a well without pressing through the bottom.
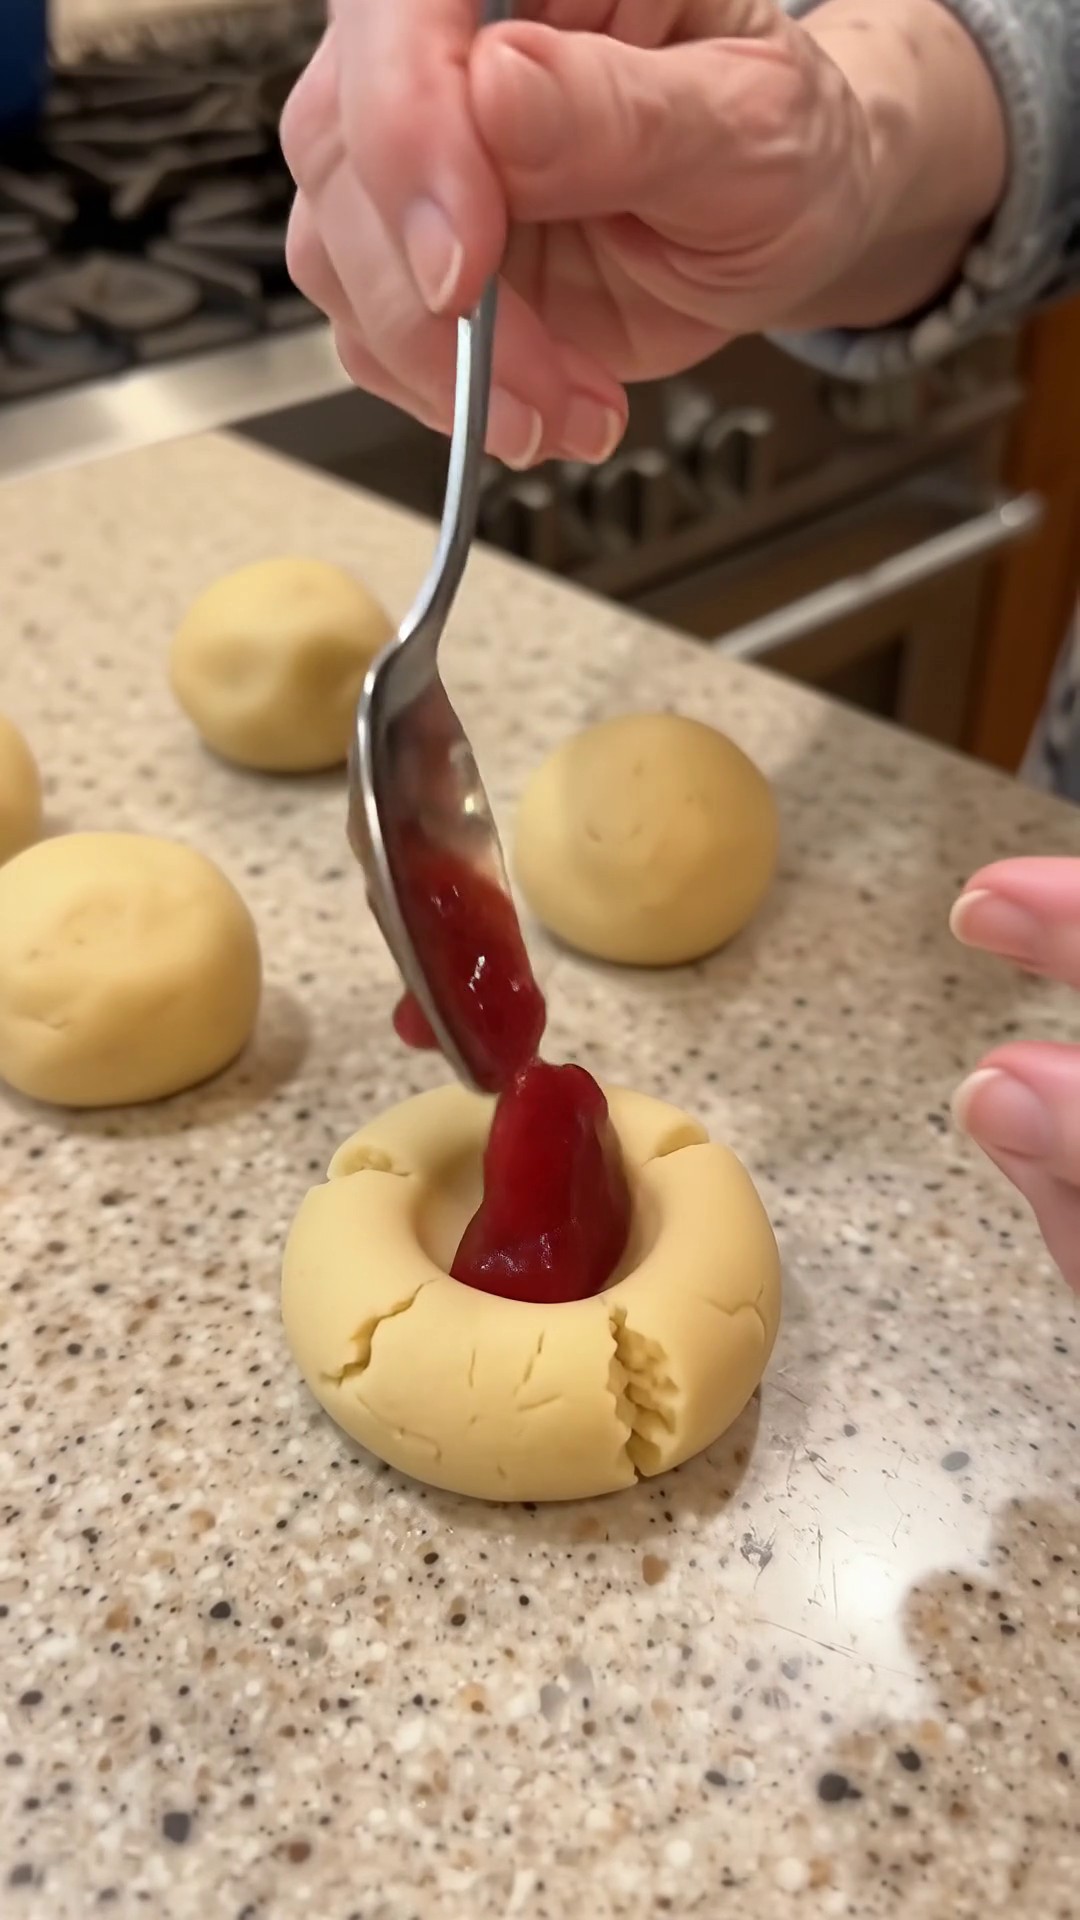
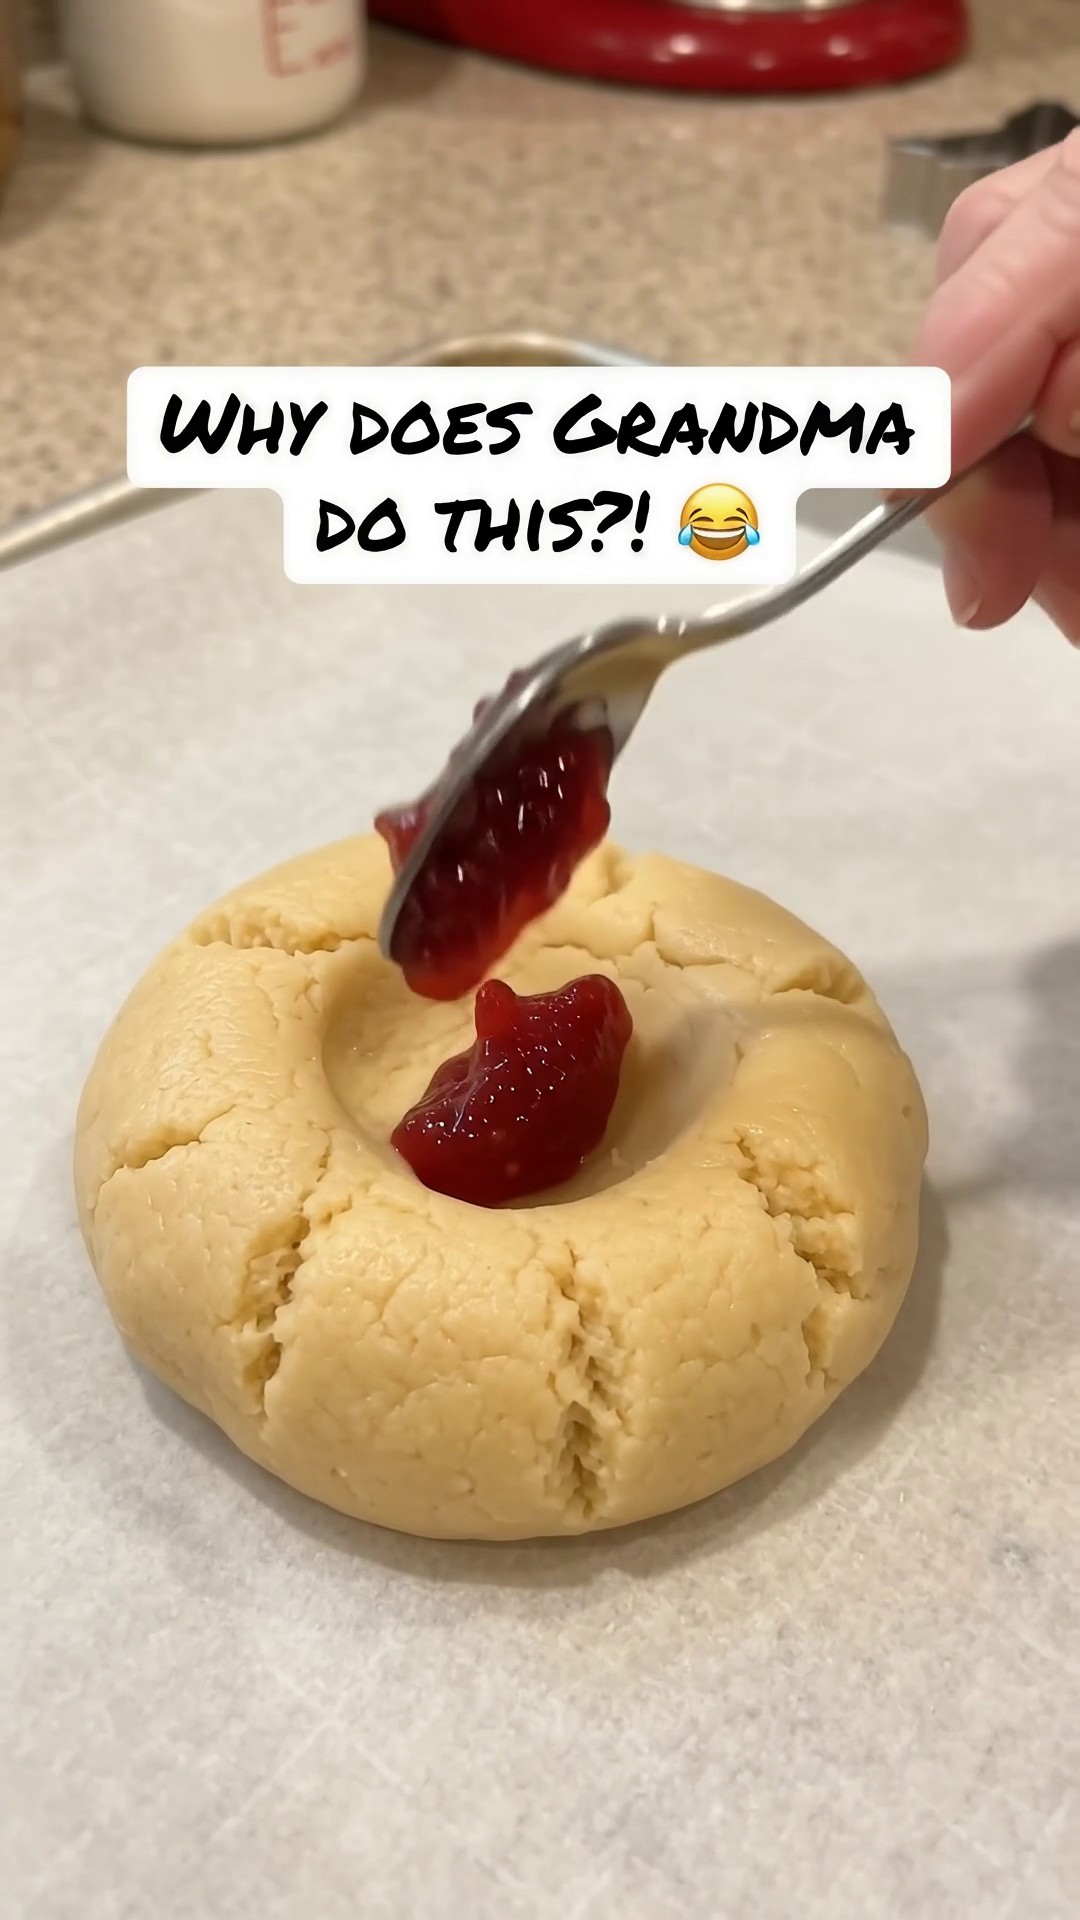
Spoon a little jam into each indentation, dividing the ½ cup among the cookies. Keep the jam below the rim so it has room to warm and bubble. If the dough cracks while you press, gently pinch the edges together before adding the jam.
6. Bake and Cool
Bake for 12–15 minutes, watching for set cookies with lightly golden edges. Cool on the tray until firm enough to move, then transfer carefully to a rack. Let the jam cool before tasting; the centers can remain hot after the dough feels comfortable to touch.
Helpful Baking Tips
Measure flour lightly. Spoon flour into the measuring cup and level it rather than packing it down. Too much flour can make the dough dry and prone to cracking.
Keep the wells even. Similar-size indentations hold similar amounts of jam and help the cookies finish together. Leave a sturdy border and a base beneath each filling.
Watch the dough temperature. If the dough becomes greasy or too soft to shape, a brief rest in the refrigerator can make handling easier. Do not keep adding flour to correct warm dough.
Use a cool tray. Let baking sheets cool between batches so newly shaped cookies do not begin melting before they reach the oven.
Serving and Storage
Arrange the cooled cookies in a single layer for a pretty serving tray, or pair them with coffee, tea, or cold milk. Their red jam centers make them especially welcome alongside plain butter cookies and chocolate treats.
Store completely cooled cookies in an airtight container for up to 3 days in a cool room, following any stricter storage directions on your jam. Separate stacked layers with parchment. For longer storage, freeze in a sealed container for up to 2 months and thaw while covered.
Frequently Asked Questions
Can I use a different jam?
Yes. Raspberry and strawberry are the suggested choices, but another thick jam can work. Avoid a very runny filling, which is more likely to spill over the edges.
Why does my dough crack?
Excess flour or dough that is too cold can cause cracking. Measure carefully, let firm dough soften slightly, and repair small cracks gently while shaping.
Do I fill the cookies before baking?
Yes. This method adds the jam before the cookies go into the oven. Use a modest amount and leave space below the rim of each indentation.
Can I make the dough ahead?
Yes. Cover and refrigerate the dough overnight. Let it soften enough to roll without cracking, then shape, fill, and bake as directed.
Recipe note: This is a suggested recipe based on the visible dish and actions in the supplied video package. Exact measurements were not supplied by the video, and this recipe has not been independently tested.