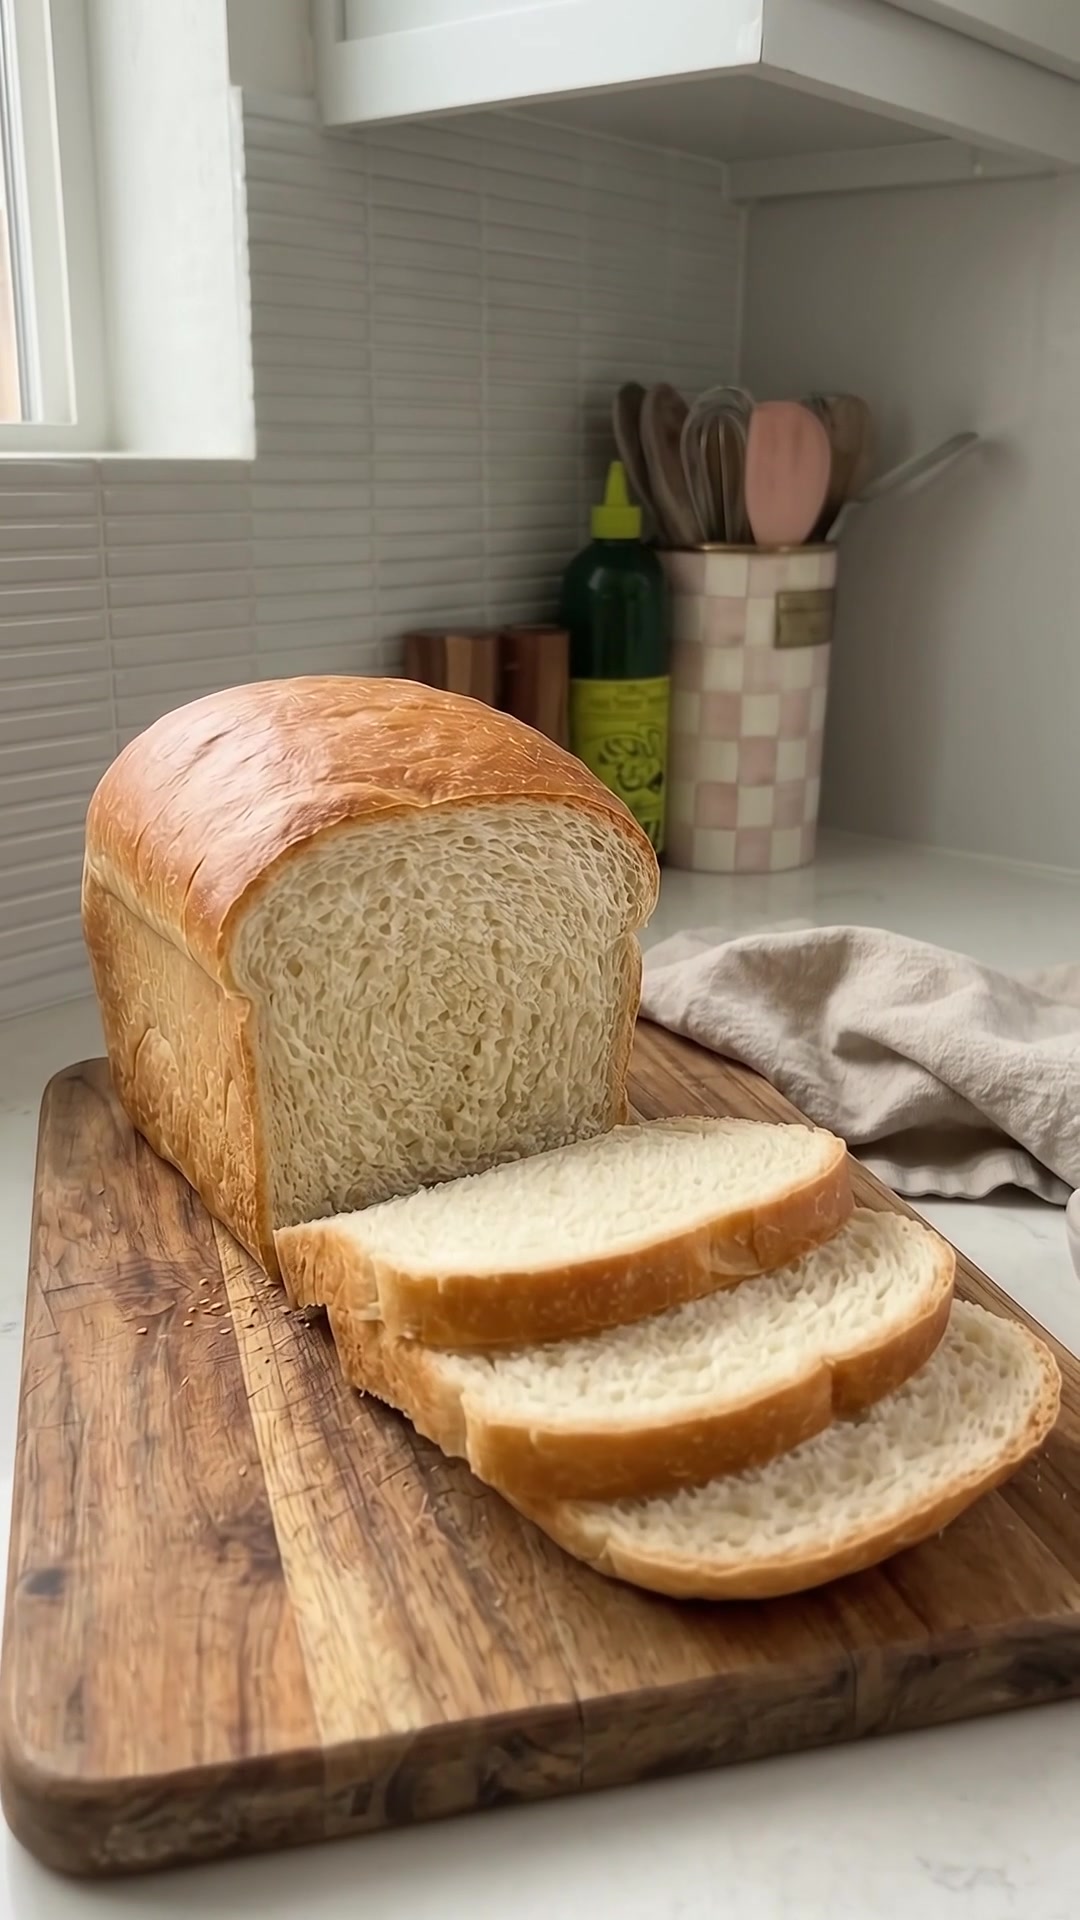
No-Knead Sandwich Bread (Soft Everyday Loaf)
A soft, simple sandwich loaf mixed with a spoon and baked in a regular bread pan.
No-knead sandwich bread is a useful everyday recipe when you want homemade toast without a mixer or a long kneading session. This version uses instant yeast, a sticky dough, and two rises. A little milk, oil, and sugar soften the crumb while the pan supports the wet dough. It is a separate recipe from naturally leavened sourdough and does not require a starter.
Why You’ll Love This Bread
- Mixes in one bowl with a sturdy spoon.
- A soft crumb for toast and simple sandwiches.
- No shaping expertise or Dutch oven needed.
- Easy to freeze in convenient individual slices.
No-Knead Sandwich Bread Recipe
Prep: 15 minutes
Rising: About 1½–2½ hours
Bake: 35–40 minutes
Cooling: At least 1 hour
Yield: One 9-by-5-inch loaf
Oven: 375°F
Ingredients
- 3¼ cups bread flour, spooned and leveled
- 2 teaspoons instant yeast
- 1 tablespoon granulated sugar
- 1¼ teaspoons fine salt
- 1 cup water, lukewarm, about 100–110°F
- ¼ cup whole milk, lukewarm
- 2 tablespoons neutral oil
- 1 tablespoon melted butter, optional, for the baked top
Baking Tip: This dough is deliberately sticky. Resist adding enough flour to make it feel like a firm kneaded dough; the extra moisture helps it develop with stirring and resting.
How to Make No-Knead Sandwich Bread
Step 1: Combine the Ingredients
Whisk the flour, instant yeast, sugar, and salt in a large bowl. Add the water, milk, and oil. Stir with a sturdy spoon until the flour is moistened, scraping the bottom and sides. Continue beating vigorously by hand for about 1 minute, lifting and folding the mixture as you stir.
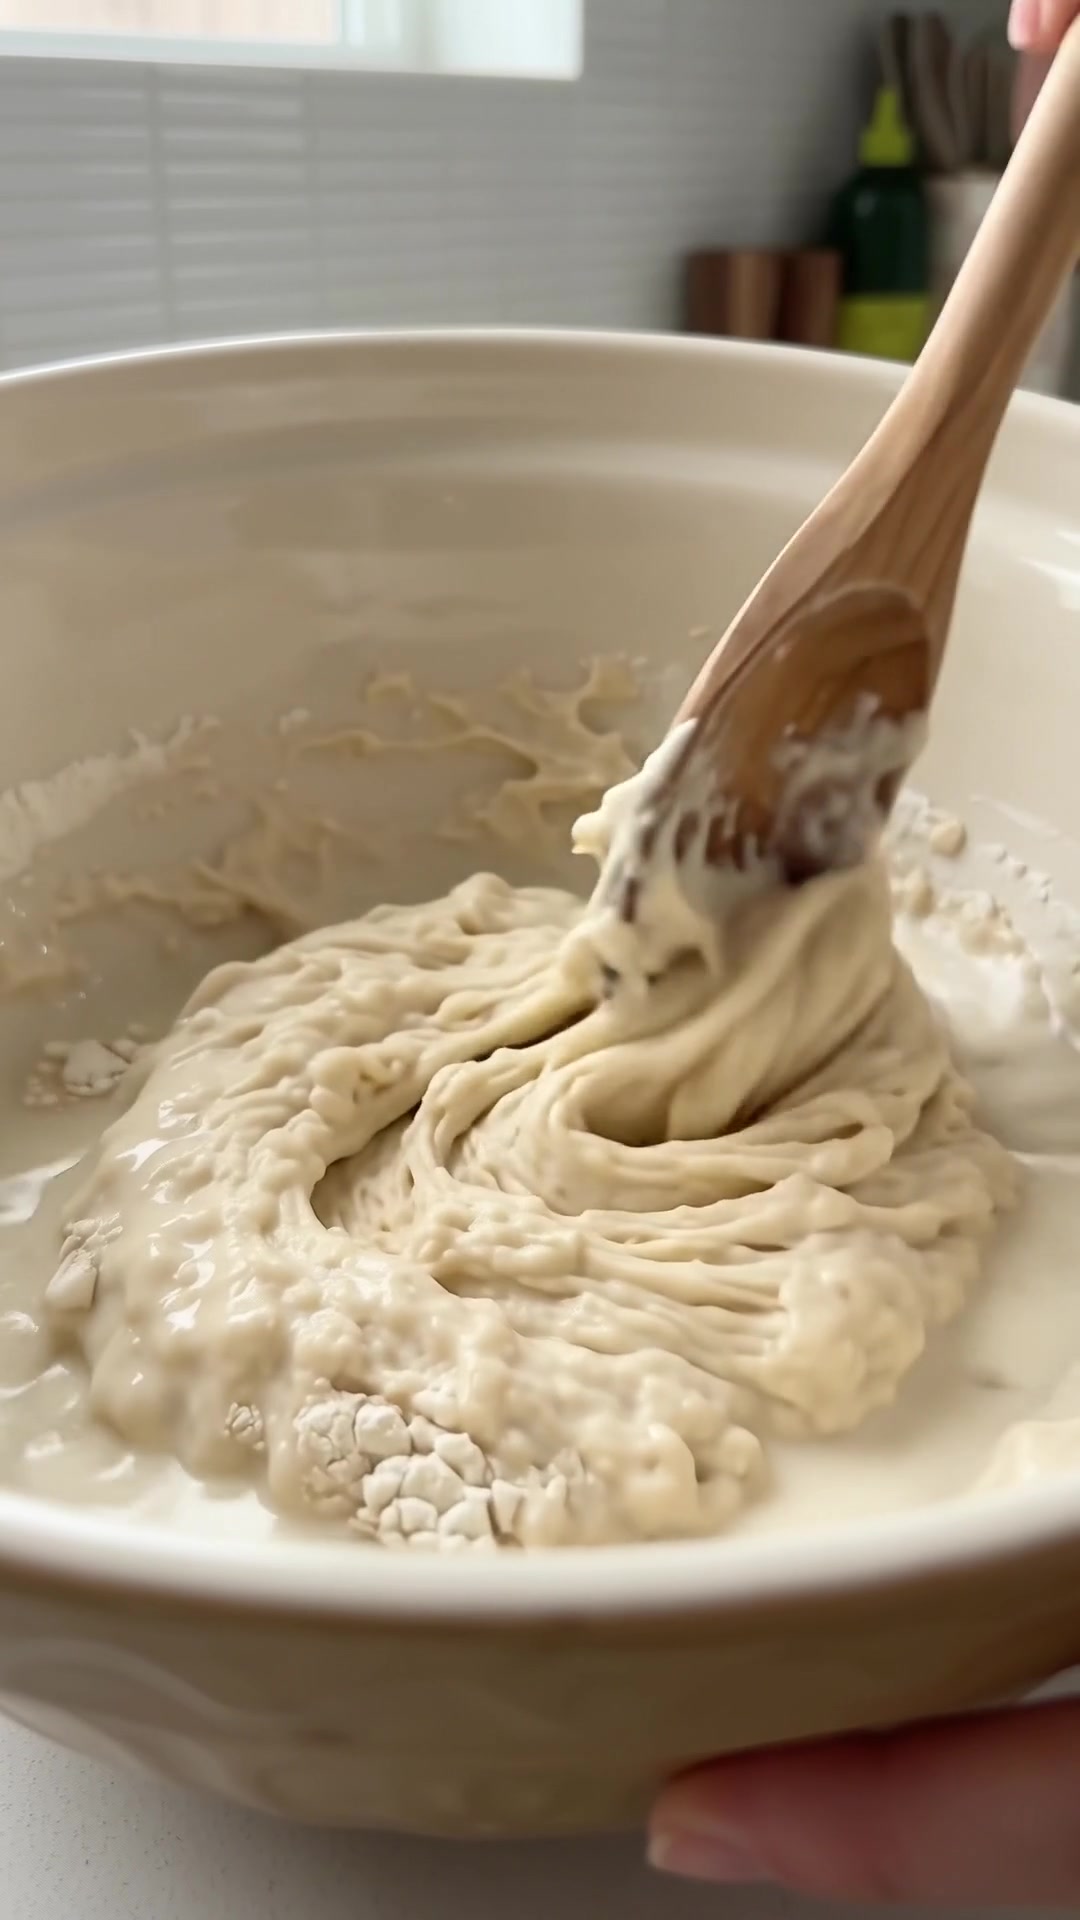
The dough should be thick, elastic, and sticky rather than pourable like cake batter. Flour absorption varies, so if dry flour cannot incorporate after resting briefly, add a teaspoon of water at a time. If it is genuinely soupy, work in flour 1 tablespoon at a time, rather than dumping in a large handful.
Step 2: Let the Dough Rise
Cover the bowl and leave in a draft-free spot around 75–80°F for 60–90 minutes, until roughly doubled and visibly bubbly. A cooler room takes longer. Use a bowl with plenty of headroom so the dough does not rise against the cover.
After about 30 minutes, use a wet spatula to lift and fold the dough from the edges toward the center several times. This optional fold strengthens the structure without traditional kneading. Replace the cover and continue the rise until the dough is well aerated.
Step 3: Fill the Bread Pan
Grease a 9-by-5-inch metal loaf pan. Stir the risen dough down gently with the spatula to release large pockets of air. Scrape into the pan, distributing it evenly from end to end. With wet or lightly oiled fingers, smooth the surface without pressing the dough into a dense mass.
The dough may not form a neat log, and that is fine. This method depends on the pan to give it shape. Clean any dough from the outside rim so it does not bake into a hard edge.
Step 4: Proof in the Pan
Cover loosely with lightly oiled plastic wrap or another nonstick cover. Let rise for 35–60 minutes, until the center is about 1 inch above the rim. Start heating the oven to 375°F while it rises. Remove the cover carefully before the dough sticks to it.
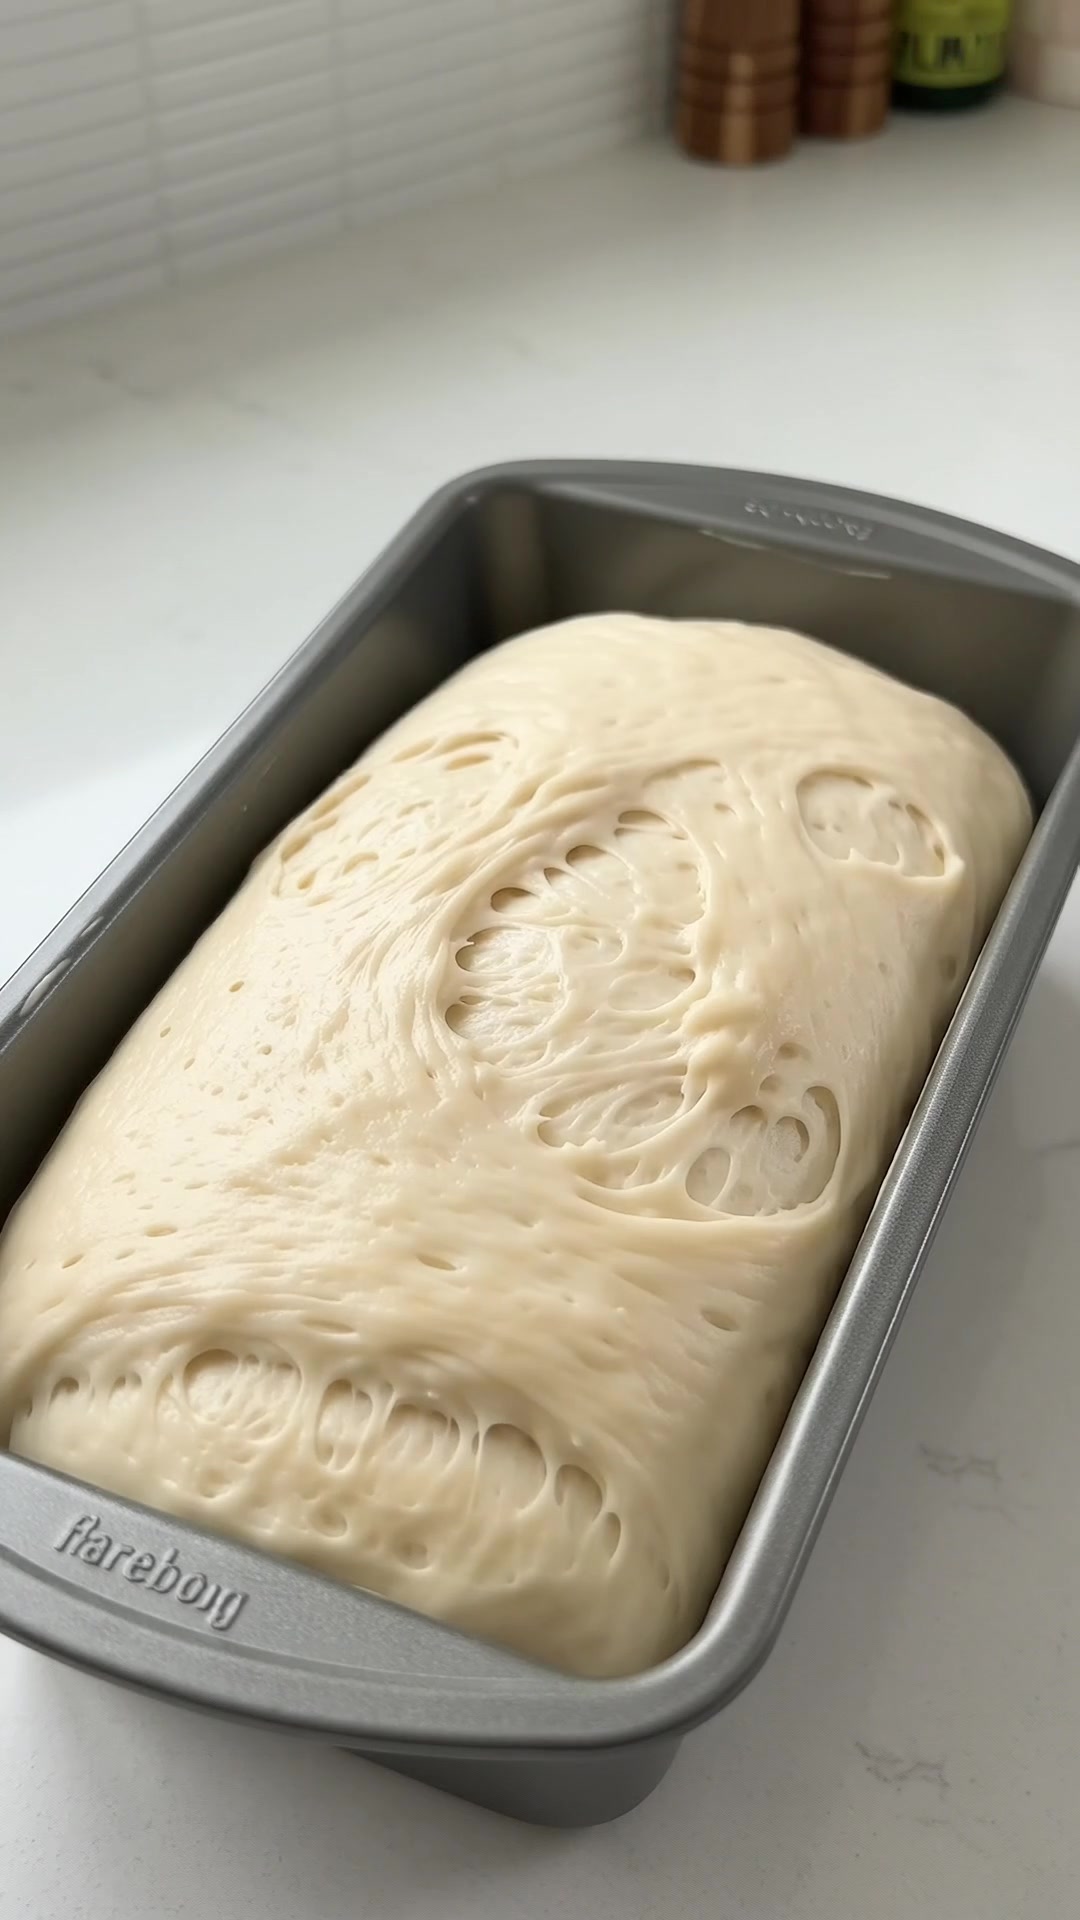
Test with a lightly floured fingertip: a shallow indentation should slowly ease back. If it springs back immediately, allow more time. If the surface deflates or looks extremely fragile, it may be overproofed, so bake promptly and shorten the final rise next time.
Step 5: Bake and Cool
Bake on the lower-middle rack for 35–40 minutes, until deeply golden and about 195–200°F in the center. Tent with foil if the top becomes dark before the middle is baked. Check temperature from the side if necessary to avoid repeatedly puncturing the top.
Rest in the pan for 5–10 minutes, then turn out onto a rack. Brush with melted butter if you prefer a soft crust. Cool for at least 1 hour before slicing, and longer if the loaf still feels warm inside. Warm bread can compress under the knife and appear gummy even when fully baked.
Tips for a Soft, Even Loaf
Use a metal pan for reliable browning. Measure flour lightly and choose bread flour when possible for a stronger dough. Keep the water warm rather than hot; excessive heat can damage yeast. If you prefer a more even top, spread the dough level before its final rise rather than trying to reshape it after proofing.
Delicious Variations
Add 1 tablespoon honey in place of the sugar for a mild honey note. For a seeded top, brush the unbaked loaf lightly with water and scatter on sesame seeds just before baking. Replace up to ½ cup of the bread flour with whole-wheat flour for a heartier loaf, adding a little water only if the dough needs it.
Storage Guidance
Store completely cooled bread in a closed bread bag at room temperature for up to 3 days. Freeze sliced portions for up to 2 months, separating them with parchment. Toast directly from frozen. Refrigeration tends to stale plain bread faster, so freezing is usually the better choice for longer storage.
Short FAQ
Can I use active dry yeast?
Yes. Dissolve the same amount in the warm water first and allow extra rising time if needed.
Why is the center heavy?
Underproofing, underbaking, or slicing too early can all make the crumb seem dense.
Can I double the recipe?
Yes. Divide between two pans and check each loaf for doneness independently.