Easy No-Bake Peanut Butter Pie (Creamy Oreo Crust)
Easy No-Bake Peanut Butter Pie (Creamy Oreo Crust Recipe)
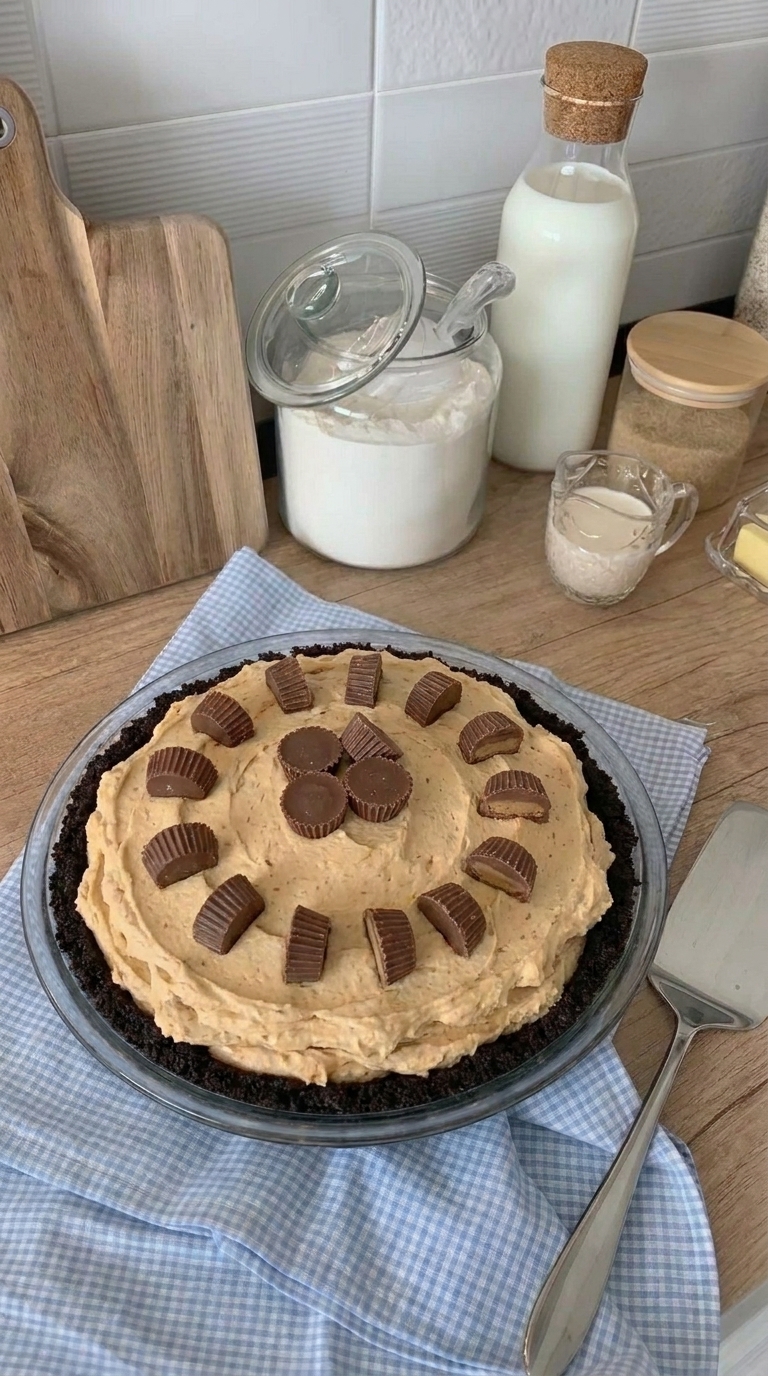
If there’s one dessert that can make everyone come running to the kitchen, it’s this No-Bake Peanut Butter Pie. With a rich chocolate Oreo crust, a thick layer of fluffy peanut butter filling, and little chocolate peanut butter cups on top, every bite is creamy, sweet, and absolutely delicious.
The best part? You don’t even need to turn on your oven.
This old-fashioned favorite comes together in about 15 minutes using simple ingredients like cream cheese, creamy peanut butter, powdered sugar, and whipped topping. After a few hours in the refrigerator, you’ll have a beautiful homemade pie ready to slice and share.
It’s perfect for family gatherings, summer cookouts, Thanksgiving dessert tables, or those evenings when you’re craving something sweet without spending hours baking.
Why You’ll Love This No-Bake Peanut Butter Pie
There’s a lot to love about this easy peanut butter dessert.
- No baking required: Perfect for warm days when you don’t want to heat the kitchen.
- Quick preparation: Just 15 minutes of hands-on work.
- Rich and creamy: Cream cheese and peanut butter create a smooth, fluffy filling.
- Chocolate and peanut butter: A classic combination that never disappoints.
- Make-ahead friendly: Prepare the pie the night before your gathering.
- Easy to decorate: Mini peanut butter cups make a beautiful finishing touch.
It’s the kind of dessert that looks impressive but requires surprisingly little effort.
What Is No-Bake Peanut Butter Pie?
No-bake peanut butter pie is a chilled American dessert made with a sweet peanut butter filling and a prepared cookie crust.
Unlike traditional baked pies, this recipe doesn’t require eggs, flour, or oven time.
Instead, softened cream cheese is beaten with peanut butter, powdered sugar, and vanilla until smooth.
Whipped topping is then folded into the mixture, creating a light, mousse-like texture.
The filling is spread into a chocolate cookie crust and refrigerated until firm enough to slice.
The result is a wonderfully creamy dessert with a rich peanut butter flavor and a delicious contrast between the fluffy filling and crunchy chocolate crust.
Ingredients for No-Bake Peanut Butter Pie
You only need a few simple ingredients to make this delicious homemade pie.
1 Prepared Oreo Pie Crust (9-Inch)
A chocolate cookie crust creates the perfect base for the creamy peanut butter filling.
You can use a store-bought crust to save time or make your own with crushed Oreo cookies and melted butter.
8 Ounces Cream Cheese
Use full-fat cream cheese softened to room temperature.
Cream cheese gives the pie its rich texture and helps the filling hold its shape.
1 Cup Creamy Peanut Butter
Regular creamy peanut butter works best for this recipe.
Avoid natural peanut butter that separates easily, as it can affect the consistency of the filling.
1 Cup Powdered Sugar
Powdered sugar sweetens the filling while helping create a smooth texture.
It’s easier to incorporate than granulated sugar.
1 Teaspoon Vanilla Extract
Vanilla adds warmth and enhances the peanut butter flavor.
8 Ounces Whipped Topping
Use one thawed 8-ounce container of Cool Whip.
The whipped topping makes the filling lighter and fluffier.
You can also use approximately 2 cups of freshly whipped heavy cream, although the texture and stability may differ slightly.
Optional Toppings
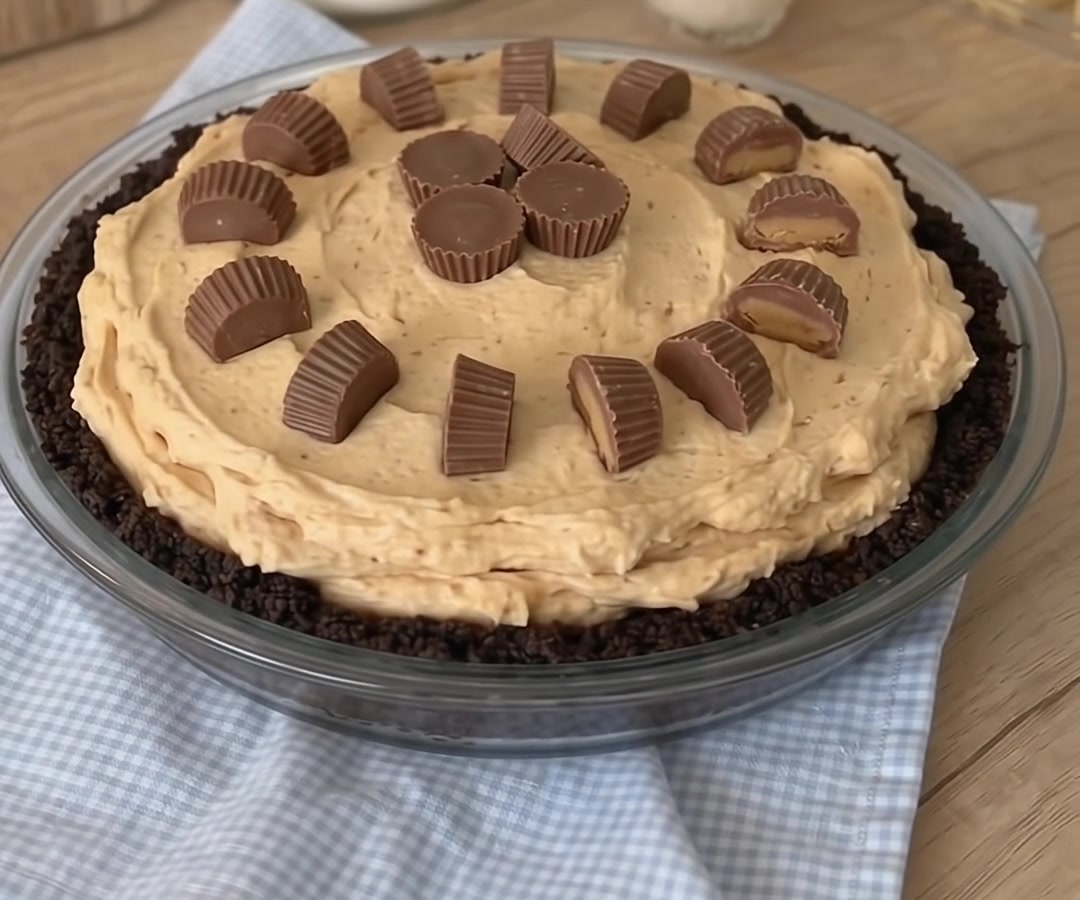
Decorate the pie with chopped mini peanut butter cups, chocolate syrup, or chocolate shavings.
How to Make No-Bake Peanut Butter Pie
This recipe couldn’t be easier. Follow these simple steps for a smooth, creamy peanut butter pie.
Step 1: Prepare the Chocolate Crust
Place your prepared 9-inch Oreo cookie crust on a flat surface.
If using a homemade crust, make sure it has been chilled until firm.
There’s no need to bake the crust.
Step 2: Beat Cream Cheese and Peanut Butter
In a large mixing bowl, combine the softened cream cheese and creamy peanut butter.
Using a hand mixer or stand mixer, beat on medium speed until the mixture is completely smooth.
Scrape down the sides of the bowl as needed.
Step 3: Add Powdered Sugar and Vanilla
Add the powdered sugar and vanilla extract.
Start mixing on low speed to prevent the sugar from flying out of the bowl.
Increase to medium speed and beat until the filling becomes thick, creamy, and fluffy.
Step 4: Fold in the Whipped Topping
Add the thawed Cool Whip to the peanut butter mixture.
Using a rubber spatula, gently fold everything together until no white streaks remain.
Avoid stirring too aggressively because you want to preserve the light, airy texture.
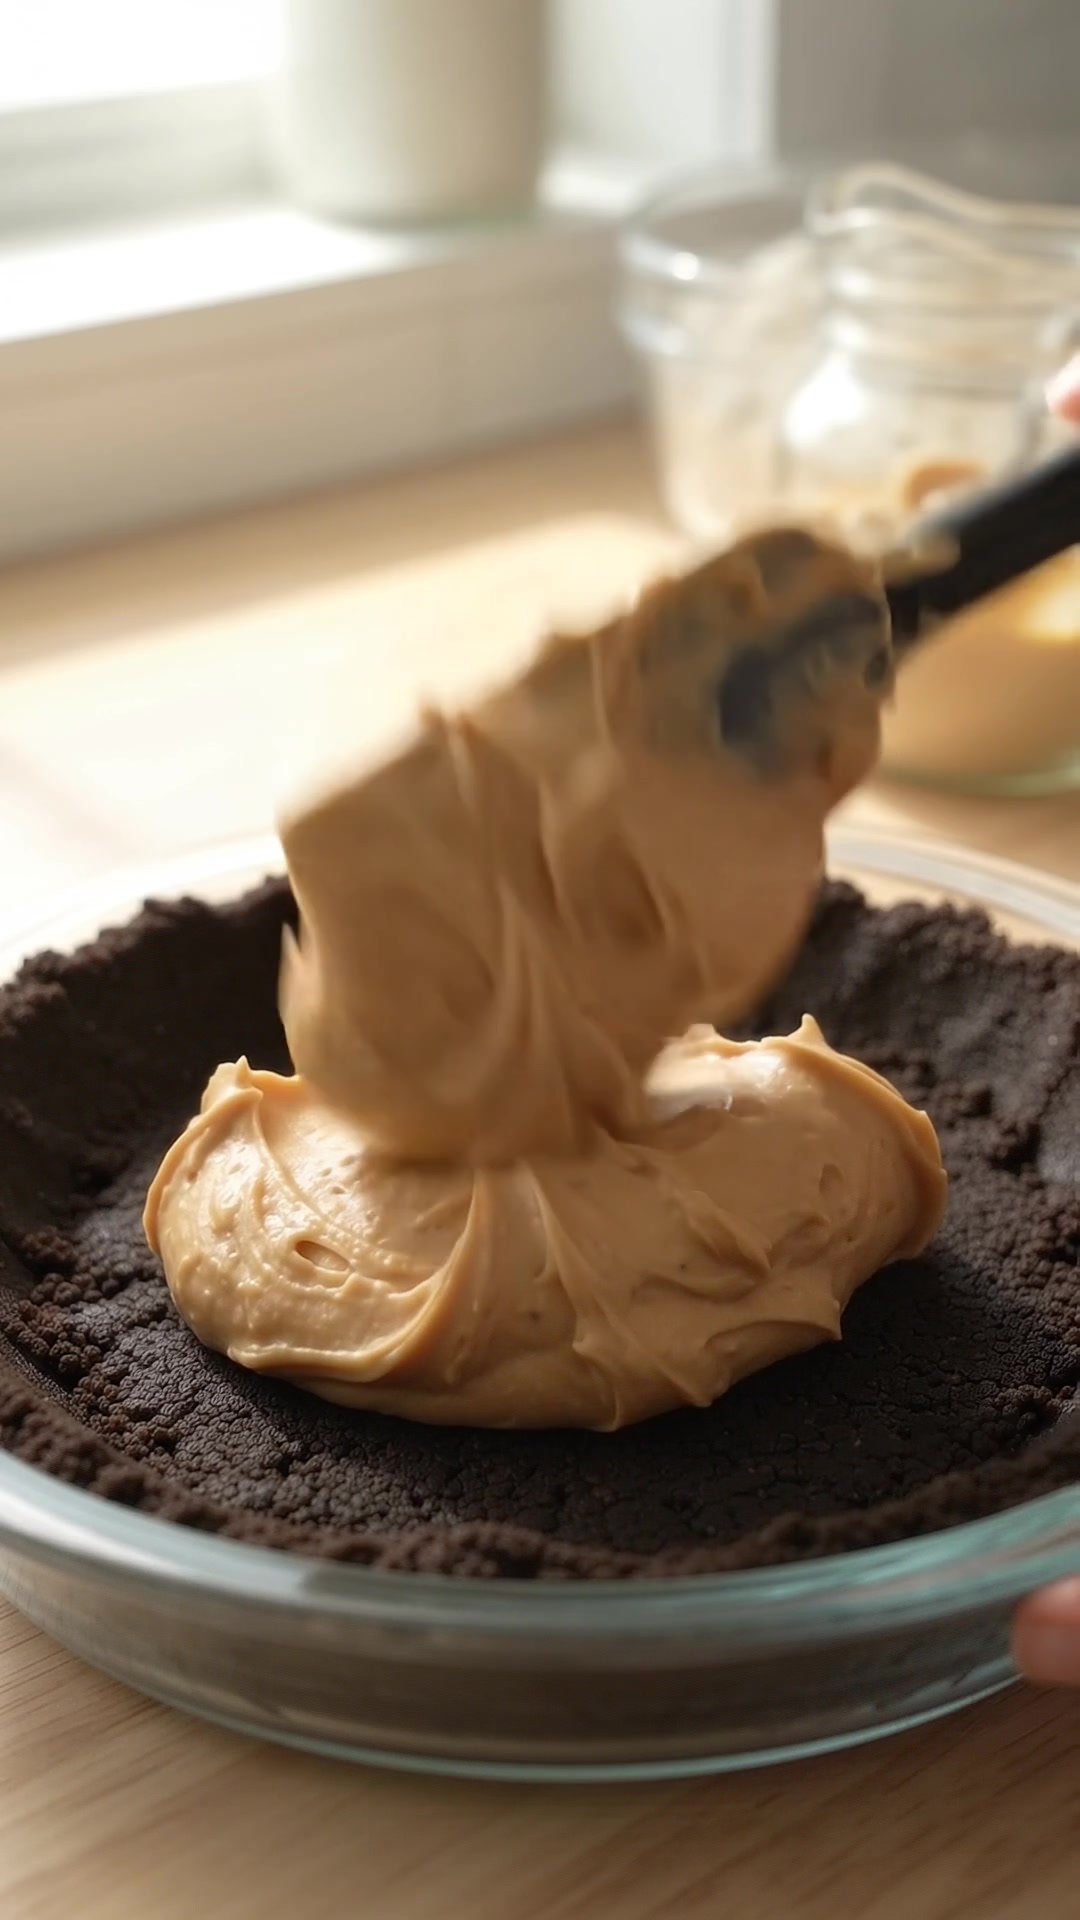
Step 5: Fill the Oreo Crust
Spoon the peanut butter filling into the prepared chocolate cookie crust.
Use an offset spatula or the back of a spoon to spread the filling evenly.
Create gentle swirls on top for a homemade appearance.
Step 6: Refrigerate Until Firm
Cover the pie loosely with plastic wrap.
Refrigerate for at least 4 hours, or preferably overnight.
This chilling time allows the filling to firm up and makes slicing much easier.
Step 7: Decorate and Serve
Before serving, top the pie with chopped mini peanut butter cups.
Add a drizzle of chocolate syrup if desired.
Slice with a sharp knife, wiping the blade clean between cuts for neat slices.
Tips for the Best Peanut Butter Pie
A few simple tricks will help your pie turn out perfectly.
Use softened cream cheese. Cold cream cheese can create lumps in the filling. Allow it to soften before mixing.
Choose regular creamy peanut butter. Stabilized peanut butter produces a smoother, more consistent filling.
Fold gently. Overmixing after adding the whipped topping can deflate the filling.
Don’t skip chilling. The pie needs several hours in the refrigerator to become firm enough to slice.
Use a sharp knife. For clean slices, wipe the knife between each cut.
Add toppings before serving. Peanut butter cups and chocolate drizzle look their best when added just before serving.
Delicious Peanut Butter Pie Variations
Once you’ve made the classic version, try experimenting with different flavors.
Chocolate Peanut Butter Pie: Add a layer of chocolate ganache over the chilled filling for an extra-rich dessert.
Peanut Butter Oreo Pie: Fold a handful of crushed Oreo cookies into the filling for extra chocolate crunch.
Peanut Butter Banana Pie: Arrange thin banana slices over the crust before adding the filling. Serve promptly for the freshest flavor.
Mini Peanut Butter Pies: Divide the filling among individual chocolate cookie crusts for party-sized desserts.
How to Store No-Bake Peanut Butter Pie
Because the filling contains cream cheese and whipped topping, this pie should always be refrigerated.
Refrigerator: Store covered in the refrigerator for up to 3–4 days.
Freezer: Wrap the pie tightly and freeze for up to 2 months for best quality.
Serving from frozen: Thaw in the refrigerator until the filling is soft enough to slice.
Avoid leaving the pie at room temperature for longer than 2 hours.
Frequently Asked Questions
Can I make peanut butter pie the night before?
Absolutely! In fact, making it the night before gives the filling plenty of time to firm up.
Can I use crunchy peanut butter?
Yes, although the filling will have a slightly different texture. Creamy peanut butter creates the smoothest results.
Why is my peanut butter pie too soft?
The pie may need more chilling time, or the whipped topping may have been overmixed. Refrigerate until firm before slicing.
Can I use homemade whipped cream instead of Cool Whip?
Yes. Use approximately 2 cups of whipped heavy cream. For the best stability, use stabilized whipped cream.
Can I make this pie without an Oreo crust?
Definitely. A graham cracker crust or chocolate graham cracker crust also works well.
Final Thoughts
Sometimes the easiest desserts turn out to be the ones everyone remembers.
This Easy No-Bake Peanut Butter Pie combines rich peanut butter flavor, fluffy cream cheese filling, and a crunchy chocolate crust into one irresistible dessert.
It’s simple enough for a weeknight treat but special enough for holidays, birthdays, and family celebrations.
Whether you’re a longtime peanut butter lover or making this dessert for the first time, this creamy pie is sure to earn a place in your favorite recipe collection.
Easy No-Bake Peanut Butter Pie
Ingredients
Method
- Place the prepared Oreo cookie crust on a flat surface.
- In a large mixing bowl, beat softened cream cheese and creamy peanut butter until smooth.
- Add powdered sugar and vanilla extract. Beat until thick and creamy.
- Gently fold in thawed Cool Whip until fully combined.
- Spoon the peanut butter filling into the prepared chocolate crust.
- Smooth the top using an offset spatula or spoon.
- Cover loosely and refrigerate for at least 4 hours or overnight.
- Decorate with chopped mini peanut butter cups and chocolate syrup before serving.
- Slice into 8 portions and serve chilled.
Notes
Regular creamy peanut butter works best.
Fold whipped topping gently to maintain a fluffy texture.
Refrigerate for at least 4 hours before slicing.
Store covered in the refrigerator for up to 3–4 days.
Freeze for up to 2 months.