Berry Cheesecake Lace Cups – Beautiful Crispy Dessert Cups
Berry Cheesecake Lace Cups – Beautiful Crispy Dessert Cups
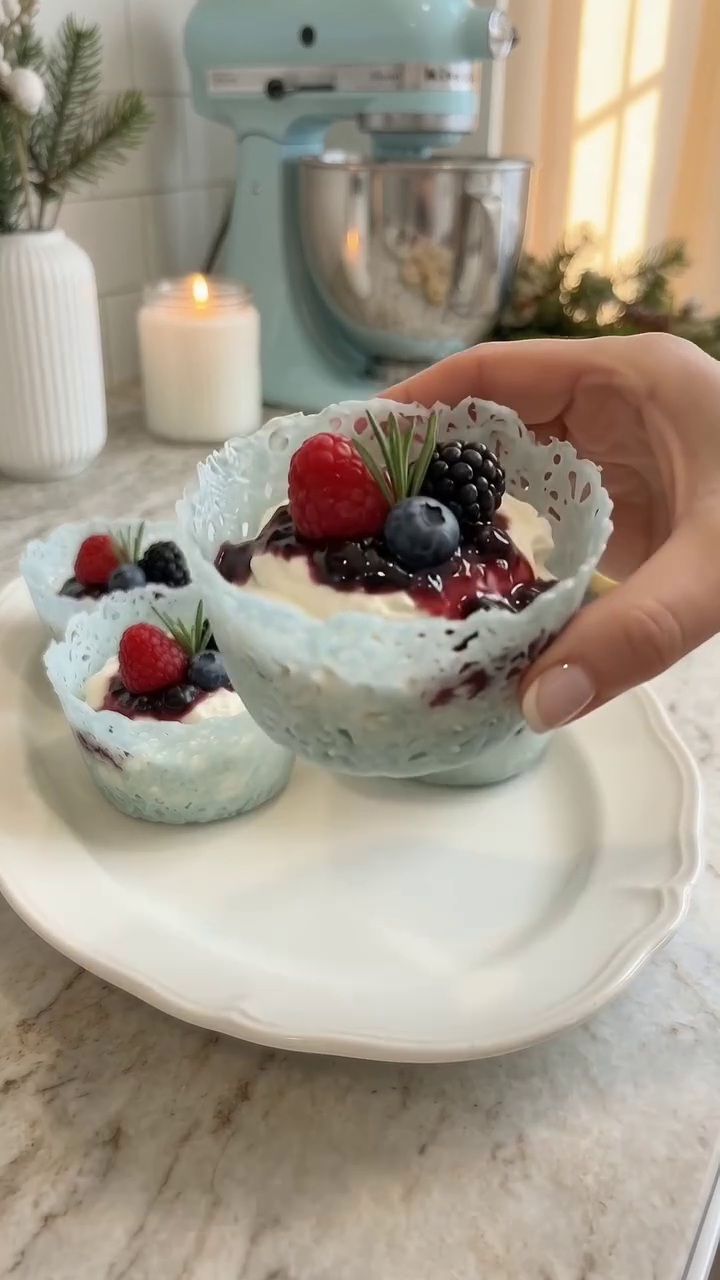
Berry Cheesecake Lace Cups combine delicate, crispy shells with fluffy cheesecake cream, glossy berry sauce, and fresh fruit. The lacy edges and colorful topping make each cup feel special, whether you’re serving them at Christmas, a bridal shower, or a dinner party. A little lemon juice brightens the filling and balances its creamy sweetness.
The components can be prepared separately, making assembly easier when guests arrive. The shells are fragile, so work gently and fill them just before serving to preserve their crunch.
Recipe note: The video demonstrates the technique without measurements. This is an adapted recipe using a lace-tuile-style batter intended to recreate the appearance shown; results may vary.
Recipe Information
- Prep: 25 minutes
- Cook: 10–15 minutes
- Chilling: 30 minutes
- Total: Approximately 1 hour 10 minutes
- Servings: 8 dessert cups
- Course: Dessert
- Cuisine: American-inspired
- Difficulty: Intermediate
Ingredients
For the Crispy Lace Cups
- ½ cup (120 ml) water
- ⅓ cup (40 g) all-purpose flour
- ⅓ cup (80 ml) neutral vegetable oil
- 1 tablespoon powdered sugar
- 1–2 drops blue food coloring, optional
For the Cheesecake Cream Filling
- 8 oz (225 g) cream cheese, softened
- ¾ cup (180 ml) cold heavy whipping cream
- ⅓ cup (40 g) powdered sugar
- 1 teaspoon vanilla extract
- 1 teaspoon fresh lemon juice
For the Berry Sauce
- 1 cup mixed berries, fresh or frozen
- 2 tablespoons granulated sugar
- 1 tablespoon lemon juice
- 1 teaspoon cornstarch mixed with 1 tablespoon water, optional
For Garnishing
- Fresh raspberries
- Fresh blueberries
- Fresh blackberries
- Fresh rosemary sprigs or mint leaves
- Powdered sugar, optional
How to Make Berry Cheesecake Lace Cups
Step 1: Whisk the Batter
Combine the water, flour, vegetable oil, and powdered sugar in a medium bowl. Whisk until smooth and free of lumps. Add 1–2 drops blue food coloring if desired. The batter should be very thin and pourable. Oil and water naturally separate, so whisk again before every portion goes into the skillet.
Step 2: Cook the Lace
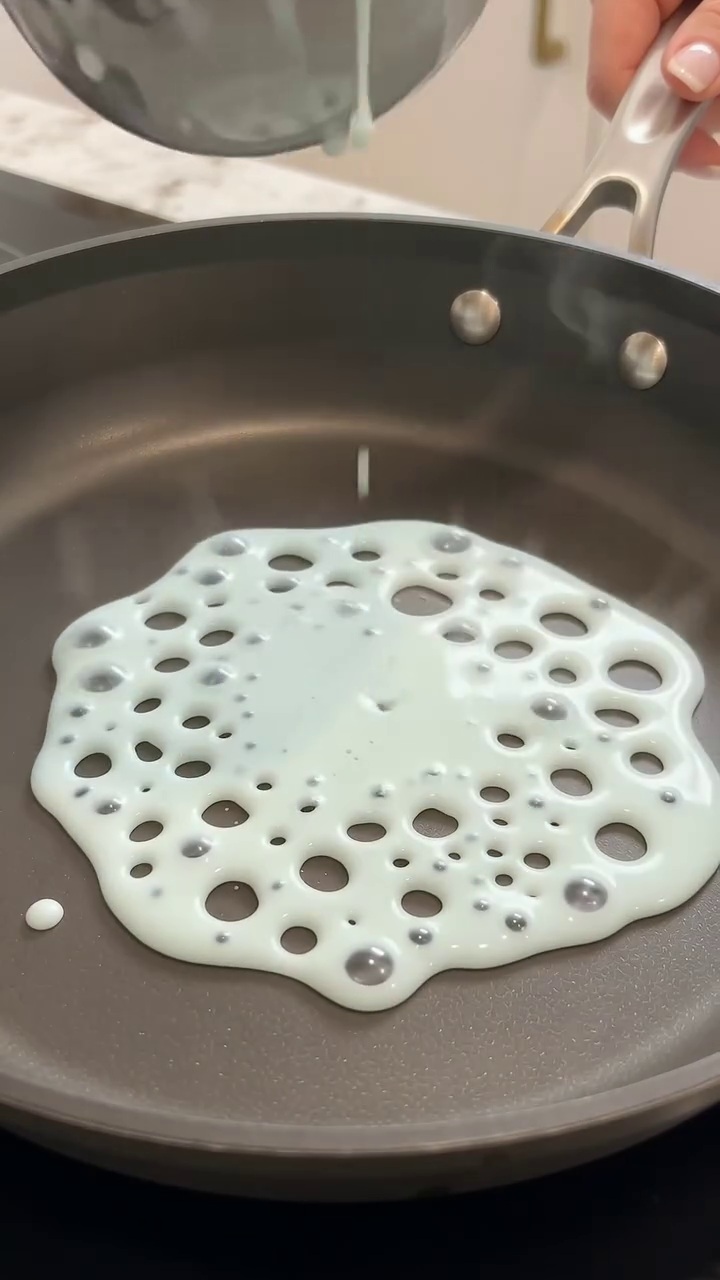
Heat a good-quality nonstick skillet over medium heat. Pour in approximately 2 tablespoons batter. It should bubble and form small holes as moisture evaporates. Cook until most bubbling stops and the lace is firm enough to lift with a thin spatula. If it seems greasy or too fragile, let it cook slightly longer. Adjust the heat if it browns before the sheet firms.
Step 3: Shape the Cups
While the lace is still warm and flexible, carefully drape it over an upside-down small heatproof bowl or cup. Gently guide the sides downward to form a bowl. Let it cool completely, then lift it off and place on a dry tray. Repeat with the remaining batter. Make extra pieces if your batter allows, since some may break during shaping.
Step 4: Prepare the Berry Sauce
Combine the mixed berries, granulated sugar, and lemon juice in a small saucepan. Cook over medium-low heat for 5–7 minutes, stirring occasionally and gently mashing some berries. For thicker sauce, stir in the optional cornstarch slurry and simmer briefly until thickened. Remove from the heat and cool completely before assembly.
Step 5: Make the Cheesecake Cream
Beat the softened cream cheese, powdered sugar, vanilla, and lemon juice until smooth. In another bowl, whip the cold heavy cream to stiff peaks. Fold the whipped cream gently into the cream cheese mixture until light and fluffy. Transfer to a piping bag fitted with a large star tip and refrigerate for 20–30 minutes.
Step 6: Fill and Decorate
Set the cooled lace cups on a serving tray. Pipe a generous swirl of chilled cheesecake cream into each, starting in the center and working outward. Spoon a small amount of cooled berry sauce over the filling, allowing it to settle between the swirls. Avoid excess liquid, which softens the shells.
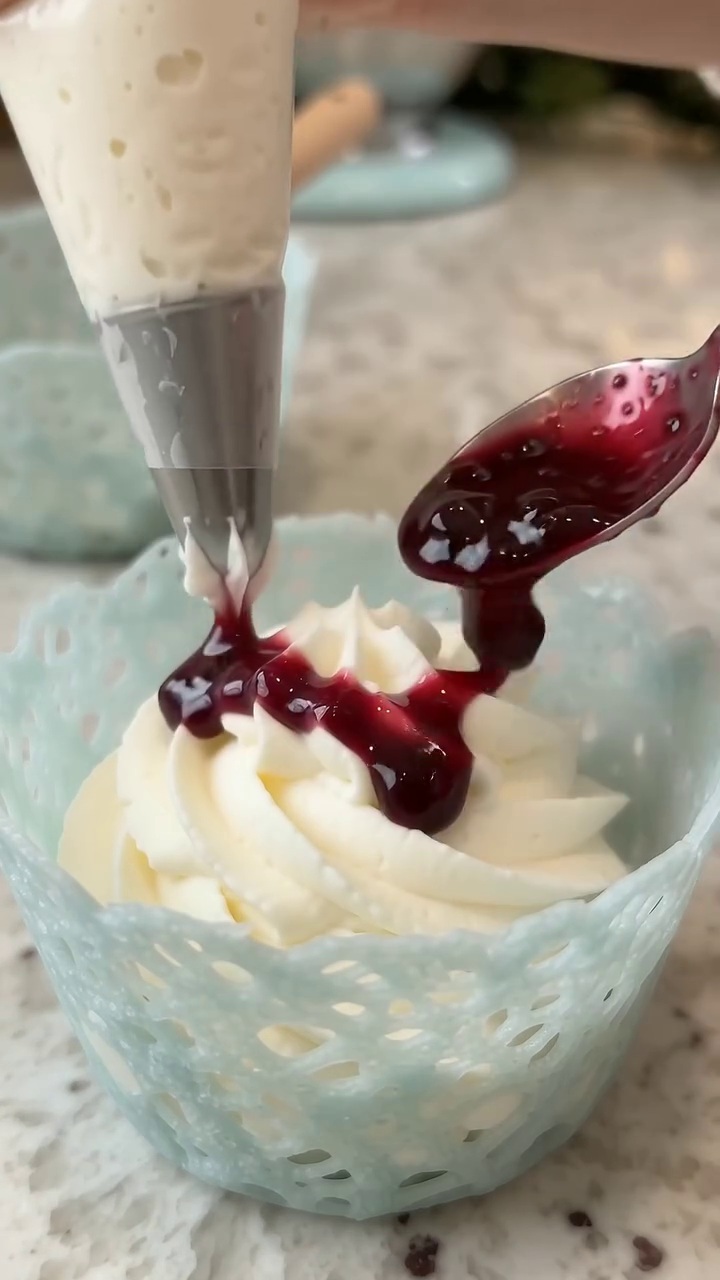
Top with fresh raspberries, blueberries, and blackberries. Finish with a small rosemary sprig or mint leaf and optional powdered sugar. Serve immediately for the crispiest texture.
Tips for Delicate Lace Cups
- Use a reliable nonstick pan: Easy release helps prevent tearing when lifting the lace.
- Whisk every time: Redistribute the oil before each pour so the batter stays consistent.
- Watch the heat: Medium heat is a starting point; adjust according to how the lace cooks.
- Shape promptly: Cooled lace becomes brittle and may crack when bent.
- Keep everything cool and dry: Warm filling or sauce can soften the shell and cream.
Storage and Make-Ahead Advice
Store unfilled lace cups in a dry, airtight container at room temperature for up to 1 day, provided they remain crisp. Refrigerate the cheesecake filling separately for up to 3 days and the berry sauce for up to 4 days.
For parties, prepare the components ahead and assemble shortly before serving. Assembled cups are best enjoyed immediately; refrigeration gradually softens the delicate shells. Keep any filled leftovers refrigerated. Freezing the assembled dessert isn’t recommended.
Frequently Asked Questions
What are lace dessert cups made of?
This adapted version uses a thin water, flour, and oil batter with powdered sugar. Cooking it in a skillet creates the decorative holes.
Why does the batter separate?
Oil and water naturally separate. Whisk thoroughly before every pour to distribute the ingredients again.
Can I prepare the cups ahead?
Yes. Keep unfilled cups dry and airtight for up to 1 day, then fill just before serving to protect their crispness.
Can I use frozen berries?
Yes. Frozen berries work for the sauce. Cook until softened, thicken if needed, and cool completely before spooning over the cream.