Medovik Honey Cake (Russian Layer Cake Recipe)
Medovik Honey Cake (Russian Honey Layer Cake)
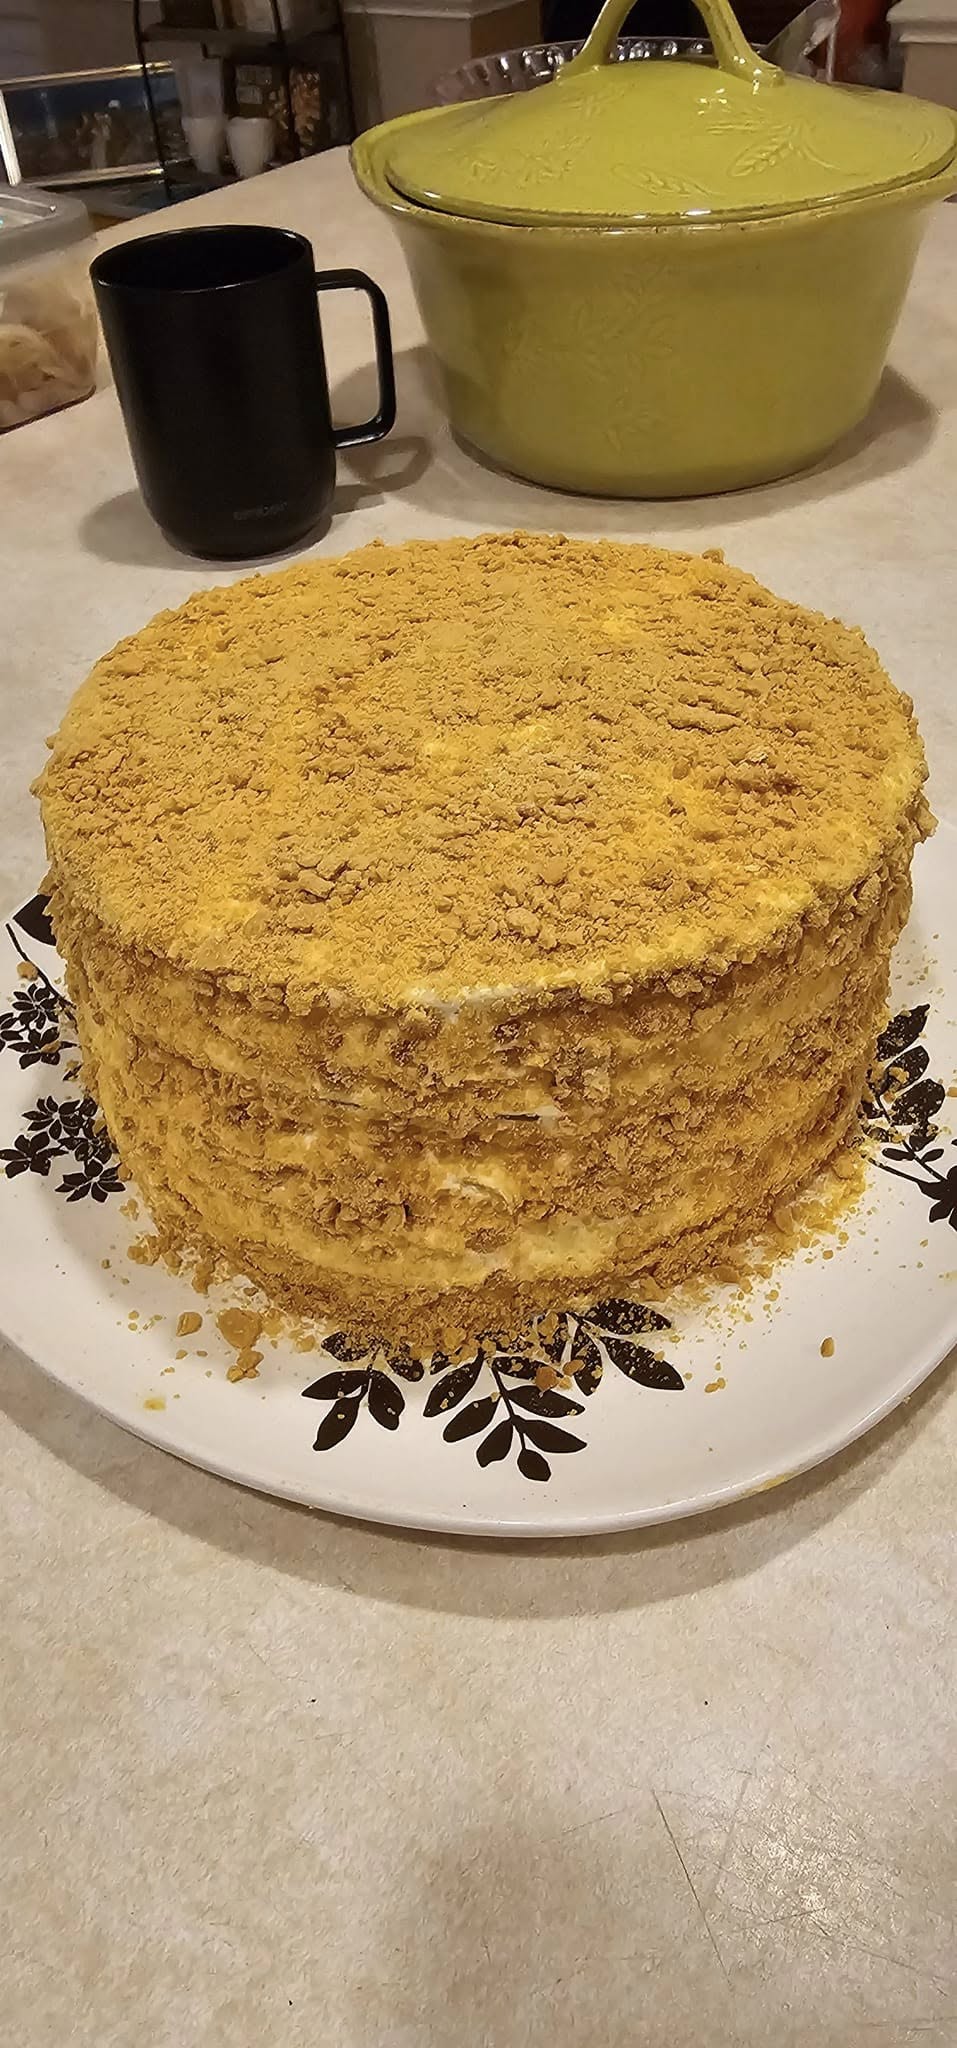
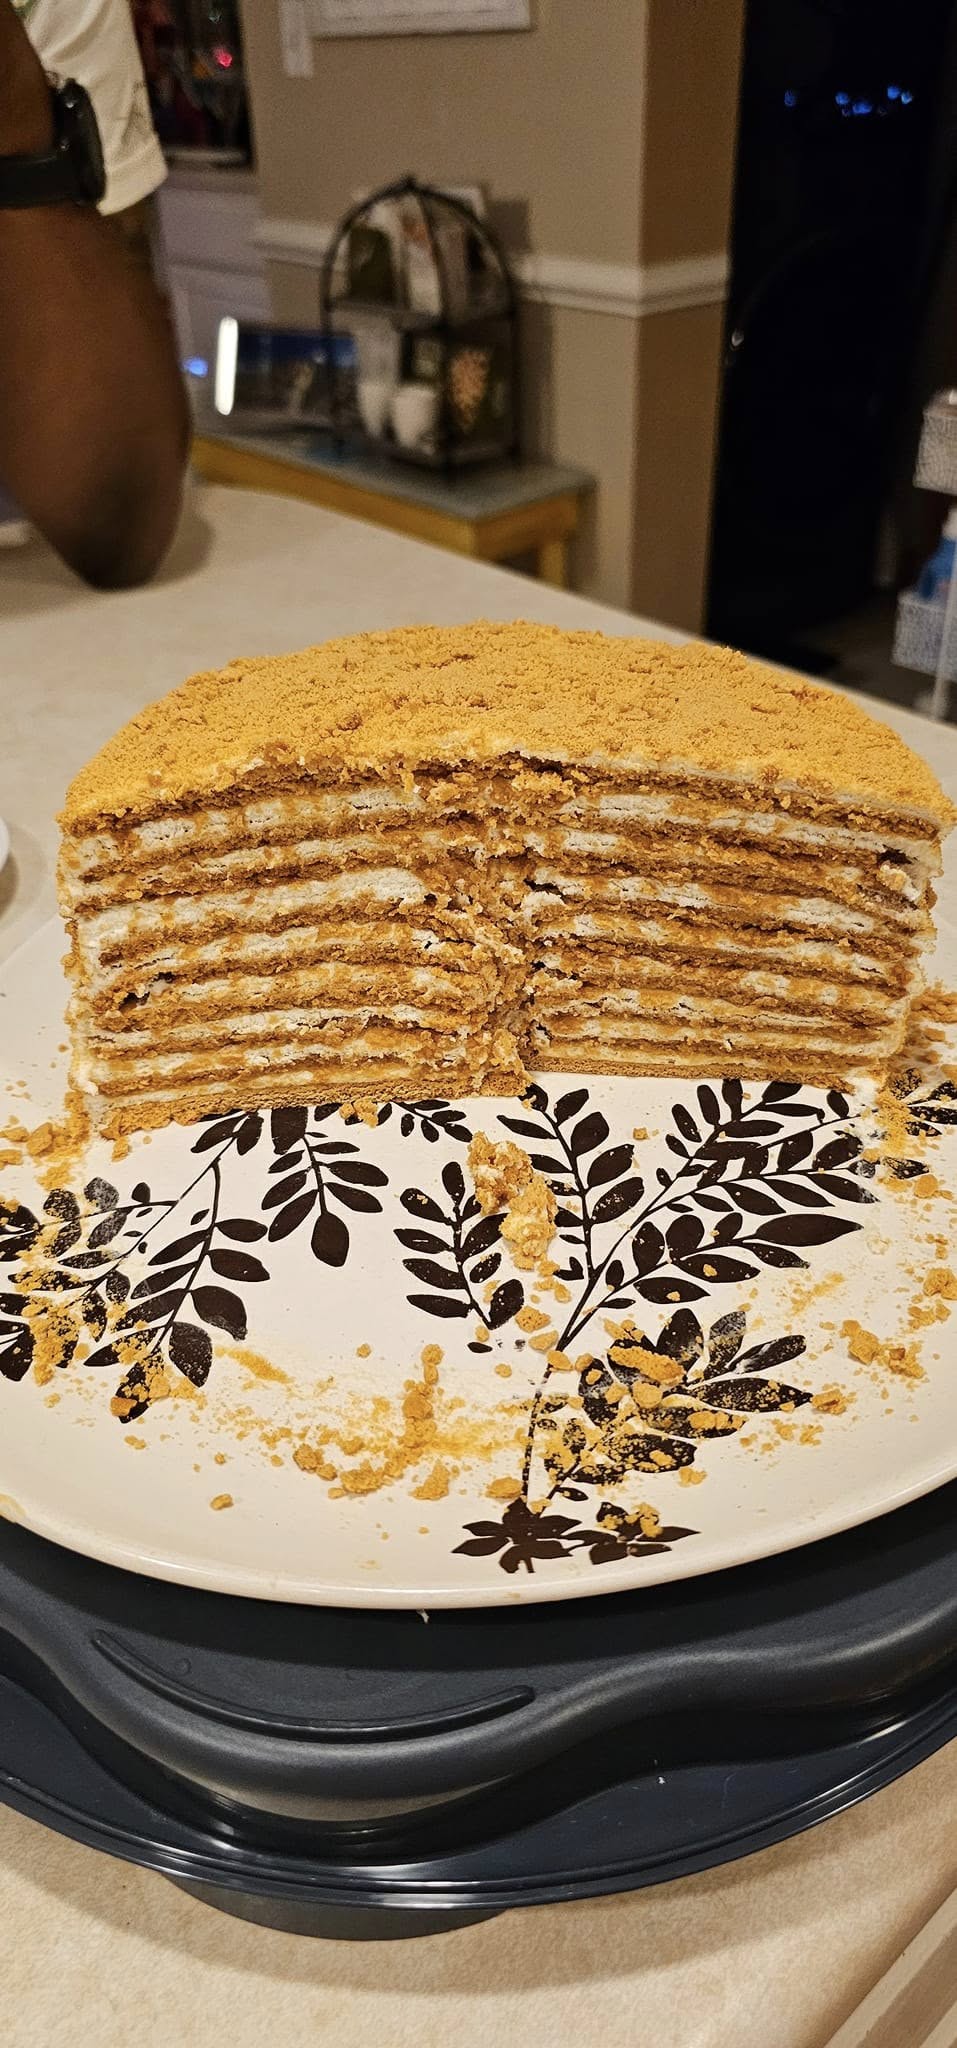
There’s something truly special about Medovik honey cake. At first glance, it looks like a bakery masterpiece with its delicate layers and golden crumb coating. Slice into it, though, and you’ll discover what makes this dessert unforgettable—thin honey-infused cake layers separated by a light, creamy filling that becomes softer and more flavorful as it rests.
Unlike many layer cakes, Medovik actually tastes better the next day. As the cake chills, the cream gently soaks into each layer, creating the signature melt-in-your-mouth texture this classic Eastern European dessert is known for. It’s the perfect cake for birthdays, holidays, family gatherings, or anytime you want to impress without using fancy decorating techniques.
Even though it has several layers, don’t let that intimidate you. Each step is simple, and with a little patience, you’ll create a cake that looks as incredible as it tastes.
Why You’ll Love This Recipe
- Beautiful bakery-style layered cake.
- Rich honey flavor without being overly sweet.
- Light and creamy sour cream frosting.
- Perfect make-ahead dessert.
- Uses simple pantry ingredients.
- Great for birthdays, holidays, or special occasions.
- Even better after chilling overnight.
Ingredients
For the Honey Cake
- 2 large eggs, room temperature
- 120 g unsalted butter
- 80 g granulated sugar
- 140 g honey
- 10 g baking soda
- 420 g all-purpose flour
- ½ teaspoon salt
For the Cream Filling
- 600 g full-fat sour cream, cold
- 160 ml cold heavy whipping cream
- 100 g powdered sugar
Helpful Tip: Cold ingredients are the secret to a thick, stable filling. Chill your mixing bowl and whisk for the best results.
How to Make Medovik Honey Cake
Step 1 – Prepare the Dough
Beat the eggs for about one minute until they become pale and slightly fluffy. Set them aside.
In a saucepan, melt the butter with the honey and sugar over medium heat. Once everything has melted and starts to simmer, reduce the heat and whisk in the baking soda. The mixture will foam dramatically before settling down and turning a beautiful light amber color. This step gives the cake its rich honey flavor.
Slowly pour the warm honey mixture into the beaten eggs while whisking continuously. Add the flour and salt, then stir until a soft, sticky dough forms. Resist the urge to add extra flour—this sticky texture is exactly what you want.
Wrap the dough tightly and refrigerate for one hour.
Step 2 – Roll the Layers
Preheat your oven to 355°F (180°C).
Divide the chilled dough into 10 equal pieces. Roll each one very thin, about 1–2 mm thick, between parchment paper and plastic wrap. Cut each into a 7-inch circle and leave the scraps beside each round, as they’ll be baked too and turned into crumbs for decorating the cake.
Bake each layer for about 4 minutes, or until lightly golden. Let each layer cool on a wire rack before stacking.
Step 3 – Make the Cream
In a chilled mixing bowl, whip the heavy cream with the powdered sugar until thick. Once soft peaks form, gently mix in the cold sour cream until smooth.
If your cream seems thin, chill it for 15–20 minutes before assembling the cake. Starting with very cold ingredients makes a big difference.
Step 4 – Assemble the Cake
Place one cake layer on your serving plate and spread a thin, even layer of cream over the top. Continue layering cake and cream until all the layers have been used.
Cover the top and sides with the remaining cream.
Crush the baked scraps into fine crumbs and gently press them over the entire cake until fully coated.
For the best flavor and texture, refrigerate the cake overnight before serving. This resting time allows the layers to soften and absorb the cream, creating the classic Medovik texture.
Expert Tips
- Use room-temperature eggs so they blend smoothly with the warm honey mixture.
- Don’t skip chilling the dough. It makes rolling the thin layers much easier.
- Roll each layer evenly. Thin, even layers bake quickly and create the classic Medovik texture.
- Keep the cream ingredients cold. Cold heavy cream, sour cream, and even a chilled mixing bowl help create a thick, stable filling.
- Let the cake rest overnight. This is the most important step. Freshly assembled Medovik can seem firm, but after 12–24 hours in the refrigerator, the layers soften beautifully and absorb the cream.
Variations
- Add a teaspoon of vanilla extract to the cream for extra flavor.
- Sprinkle chopped toasted walnuts between a few of the layers for added crunch.
- Garnish the top with fresh berries before serving for a colorful finish.
- Drizzle a little honey over each slice just before serving if you love an extra honey flavor.
Storage
Medovik stores beautifully, making it one of the best make-ahead desserts.
Refrigerator: Cover the cake and refrigerate for up to 5 days. The flavor actually improves after the first day.
Freezer: Wrap individual slices or the whole cake tightly and freeze for up to 2 months. Thaw overnight in the refrigerator before serving.
What to Serve With Medovik
This cake pairs wonderfully with:
- Hot coffee
- Black tea
- Earl Grey tea
- Chamomile tea
- Fresh berries
- Vanilla ice cream
- Whipped cream
Frequently Asked Questions
Why is my dough sticky?
That’s completely normal. Medovik dough is supposed to be soft and sticky. Chilling it makes it much easier to work with.
Can I make Medovik ahead of time?
Yes! In fact, it’s recommended. The cake tastes even better after resting overnight.
Can I use a different frosting?
Traditional Medovik uses a sour cream filling, but mascarpone or cream cheese frosting can also work if you prefer a richer dessert.
Why didn’t my cream thicken?
Make sure the heavy cream, sour cream, mixing bowl, and whisk are all very cold. Whipping the heavy cream first, then folding in the sour cream, usually gives the best results.
How do I know when the cake layers are done?
The edges should be lightly golden, and the layers should still be soft. Since they’re very thin, they bake quickly—usually in about 4 minutes.
Final Thoughts
Medovik is one of those desserts that looks impressive but is surprisingly achievable at home. The delicate honey layers, creamy filling, and golden crumb coating come together to create a cake that’s rich in flavor yet wonderfully light in texture.
If you’re willing to give the cake time to rest overnight, you’ll be rewarded with soft, tender layers that practically melt in your mouth. Whether you’re baking it for a holiday, a birthday, or simply because you’re craving something special, this Medovik honey cake is sure to become a favorite you’ll make again and again.
Medovik Honey Cake
Ingredients
Method
- Beat the eggs until pale.
- Heat the butter, honey, and sugar until melted. Stir in the baking soda and cook until the mixture turns light amber.
- Slowly whisk the honey mixture into the eggs.
- Add the flour and salt to form a sticky dough. Chill for 1 hour.
- Divide the dough into 10 portions and roll each into a thin 7-inch circle.
- Bake each layer at 355°F (180°C) for about 4 minutes until lightly golden.
- Whip the heavy cream and powdered sugar until thick, then fold in the cold sour cream.
- Layer the cakes with the cream filling.
- Frost the top and sides, then coat with crushed baked crumbs.
- Refrigerate overnight before serving.
Notes
Always use cold ingredients for the cream.
Overnight chilling creates the best texture.
Estimated Nutrition (Per Serving)