Rosemary Baby Potato Pie: A Heavenly Comfort Food Classic
Rosemary Baby Potato Pie: A Comforting Veggie-Packed Twist on a Classic
Rosemary Baby Potato Pie: A Heavenly Comfort Food Classic
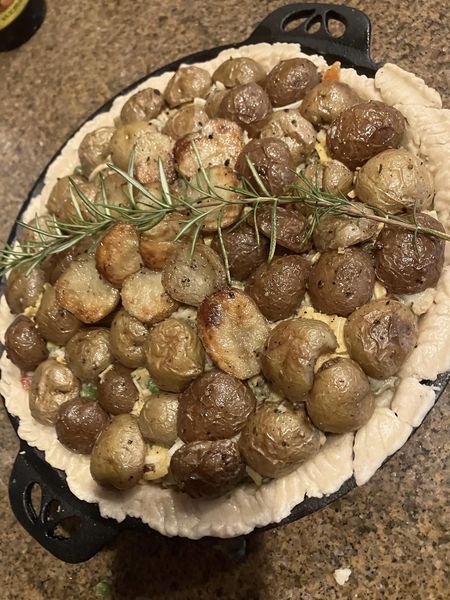
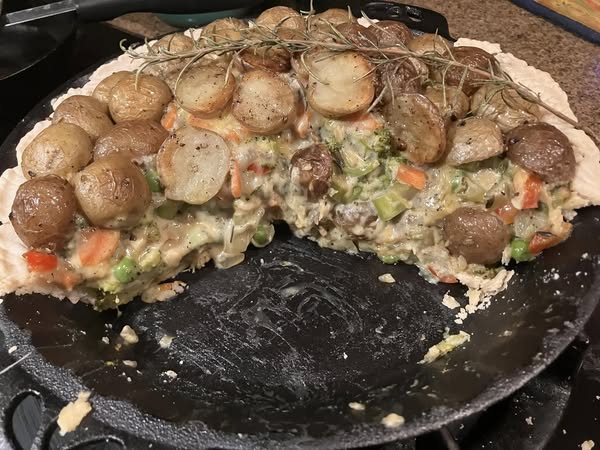
There is nothing quite like cutting into a piping hot Rosemary Baby Potato Pie to reveal a creamy, velvet-smooth thyme roux enveloping tender shredded chick’n, bright broccoli, sweet carrots, and peas. The real star of the show is the jaw-dropping topping of golden-brown, crispy baby potato halves infused with fragrant rosemary that crown the flaky pie crust.
For me, it’s the ultimate treat that has become a family staple in my home whenever we crave something deeply rustic, hearty, and comforting on a chilly evening.
It is the perfect center-stage dish for cozy Sunday dinners, autumn potlucks, or holiday gatherings where you want to impress everyone at the table.
Why You’ll Love This Rosemary Baby Potato Pie
-
Spectacular Crispy Topping: Swapping a traditional top pastry sheet for roasted, rosemary-infused baby potato halves creates an incredible crunch and stunning rustic look.
-
Rich and Creamy Herb Roux: The savory combination of fresh thyme, half-and-half, and rich broth builds a deeply satisfying, velvety filling.
-
Packed with Wholesome Veggies: With broccoli, carrots, celery, peas, and peppers, this dish easily sneaks a beautiful rainbow of nutrition onto your dinner plate.
Ingredients
For the Pot Pie Filling:
-
2 cups shredded Chick’n
-
1 cup broccoli, chopped
-
2 small carrots, diced
-
2 sticks celery, sliced
-
1/2 red pepper, diced
-
1/2 onion, chopped
-
1/2 cup peas
-
1 tablespoon fresh thyme
For the Creamy Roux:
-
2 tablespoons butter
-
2 tablespoons all-purpose flour
-
1 cup half-and-half
-
1.5 cups vegetable or chicken broth
-
1 tablespoon fresh thyme
-
1 deep-dish pie shell
-
Shredded cheese (optional, for topping)
For the Rosemary Baby Potatoes:
-
Approx. 1 lb baby potatoes, halved
-
Extra virgin olive oil (EVOO), for coating
-
Salt and pepper, to taste
-
3-4 stems of fresh rosemary
Instructions
Step 1: Roast the Potatoes
-
Preheat your oven to 400°F and coat a 1-inch lipped cookie sheet with oil.
-
Toss the halved baby potatoes with EVOO, salt, and pepper, then spread them flat-side down on the sheet and place rosemary stems across them.
-
Cover tightly with foil, bake for 20 minutes, then remove the foil and switch the oven to a low broil.
-
Broil for 2 minutes, loosen the potatoes with a spatula, shake the pan, and broil for 3 more minutes before moving them to a bowl to cool.
Step 2: Sauté the Filling
-
In a large skillet over medium heat, combine the shredded chick’n, broccoli, carrots, celery, red pepper, onion, peas, and 1 tablespoon of fresh thyme.
-
Sauté the mixture together until the vegetables are perfectly al dente, then remove from heat.
Step 3: Whisk the Thick Roux
-
Melt 2 tablespoons of butter in a saucepan over medium heat, then stir in 2 tablespoons of flour until it becomes toasty and fragrant.
-
Slowly pour in the half-and-half and broth, add the remaining tablespoon of thyme, and stir continuously until the gravy is thick and luscious.
Step 4: Assemble the Pie
-
Pour the thick herb roux directly into your sautéed filling and mix well until everything is coated beautifully.
-
Transfer the mixture into your prepared pie shell and sprinkle with an optional layer of cheese if you like.
-
Arrange the cooled roasted baby potatoes across the top in a gorgeous, decorative pattern, pressing them slightly into the filling with their golden, crispy bits facing up.
Step 5: Bake to Perfection
-
Lower the oven temperature to 375°F.
-
Cover the entire pie securely with aluminum foil so the beautifully roasted potato topping doesn’t dry out during the bake.
-
Bake covered with foil at 375°F for exactly 1 hour until the center is piping hot and the crust is cooked through.
Tips for the Best Rosemary Baby Potato Pie
-
Keep the Potato Skins On: Leaving the skins on your baby potatoes gives the dish a rustic texture and locks in those delicious crispy bits when broiling.
-
Don’t Skip the Foil: Covering the pie with foil during the final 1-hour bake is absolutely crucial to keep your pre-roasted potatoes perfectly tender without drying them out.
-
Let the Potatoes Cool: Make sure your potatoes are cool enough to handle before arranging them so you can easily place them flat-side up to showcase their beautiful color.
Why This Pot Pie Is So Special
This comforting dish speaks to the cozy heart of home cooking, turning simple garden vegetables and wholesome ingredients into a spectacular centerpiece. There is a deep, nostalgic warmth in the aroma of fresh rosemary and simmering thyme wafting from a hot cast iron pan. It reminds me of long family conversations around a crowded kitchen table, sharing a rustic meal that feels both incredibly comforting and wonderfully celebratory.
Serving and Storing
-
Serve Warm: Let the pie rest for 10-15 minutes after baking so the rich gravy can set up, then slice and serve warm garnished with a fresh sprig of rosemary.
-
Store Leftovers: Place any remaining pie slices in an airtight container in the refrigerator for up to 3 days, and reheat them in a 350°F oven covered with foil to keep the potatoes tender.
Conclusion: A Dreamy Veggie Masterpiece
I just know this Rosemary Baby Potato Pie is going to become a highly requested favorite in your home, just like it has in mine! The incredible combination of a velvety thyme gravy, wholesome vegetables, and that spectacular crispy potato topping makes this recipe completely irresistible. If you are looking to elevate your next dinner with an unforgettable slice of comfort, don’t wait another minute to try it. Grab your baking dish, start roasting those potatoes, and let me know in the comments how your pie turns out!